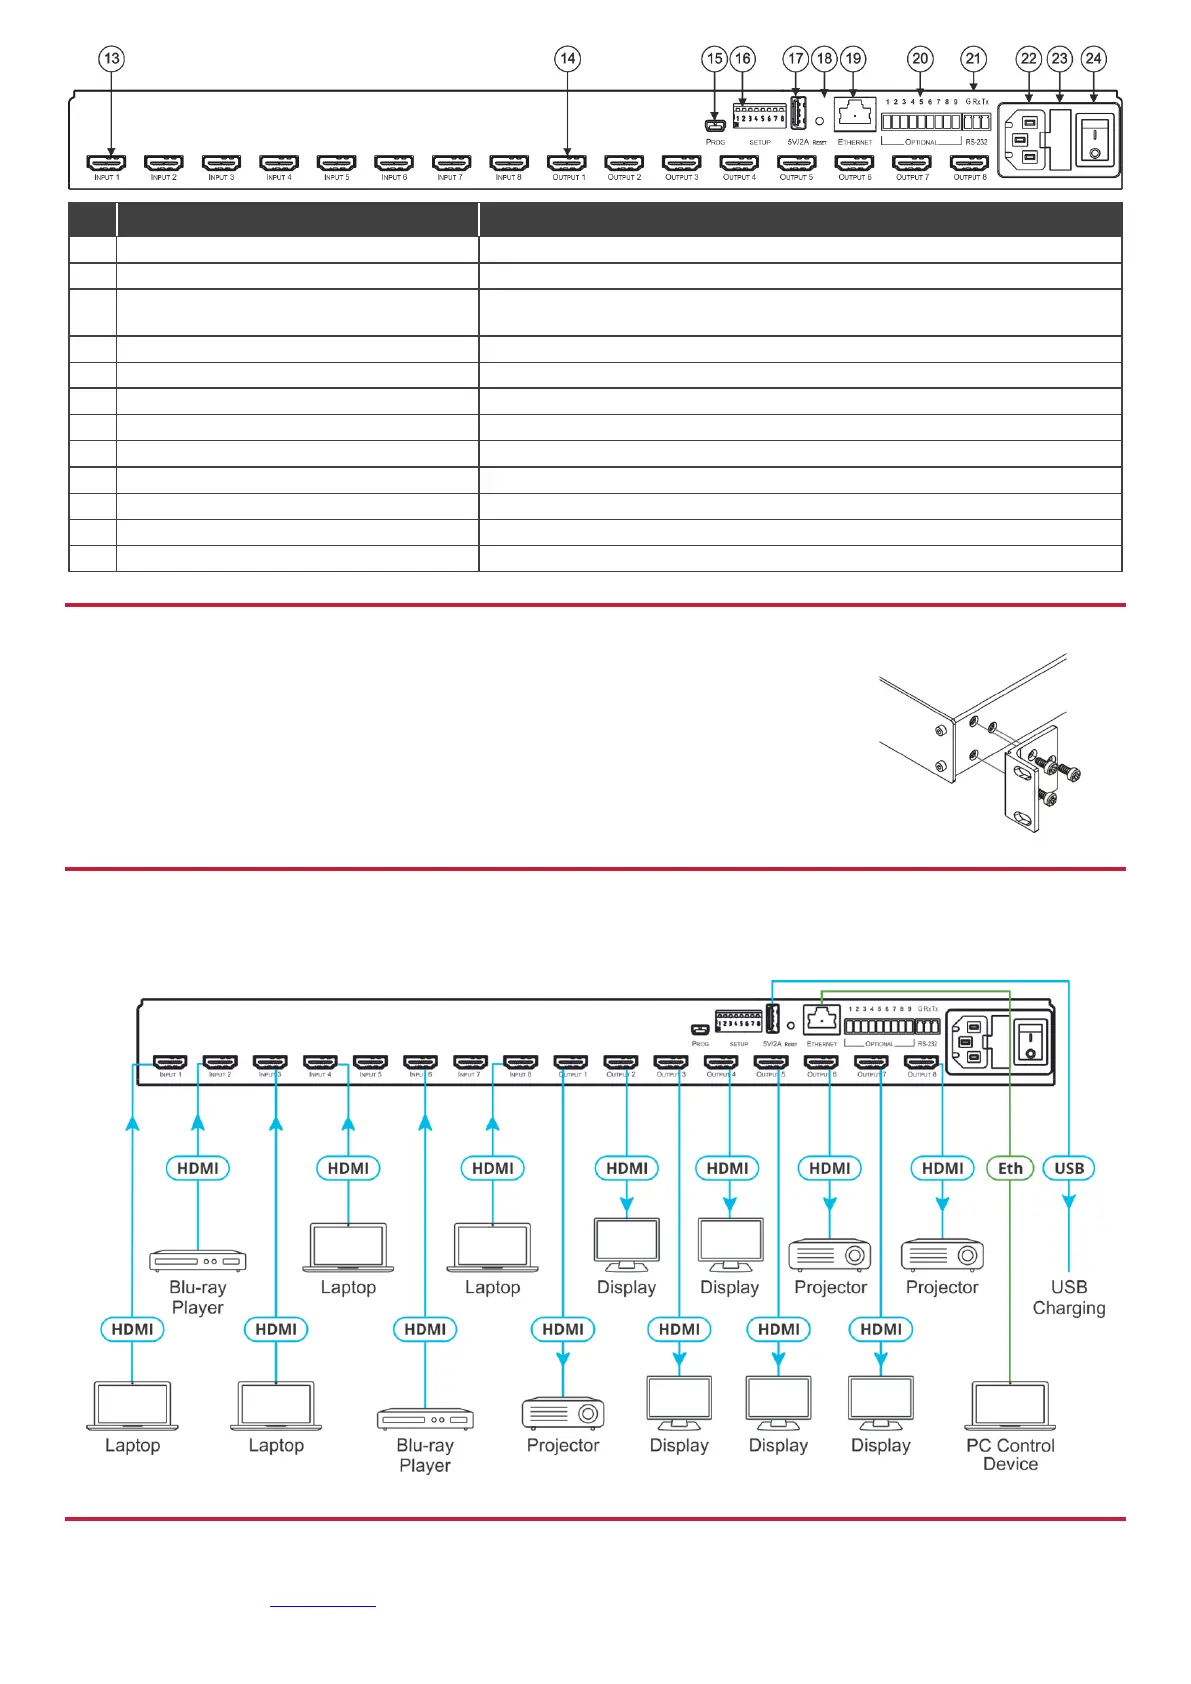
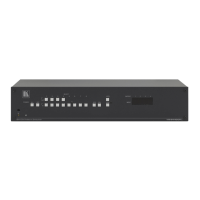
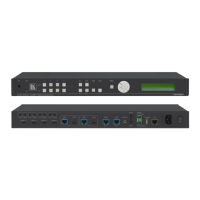
Connect to HDMI sources (from 1 to 8).
Connect to HDMI acceptors (from 1 to 8).
Use for firmware upgrade or communication (connecting to a PC or a serial
controller).
Can be used to charge an external device.
Press and hold to reset settings to factory default values.
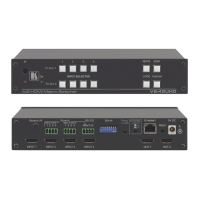
OPTIONAL Terminal Block Connectors
RS-232 3-pin Terminal Block Connectors
Connect to a PC or a serial controller.
Connect to the mains power.
Fuse for protecting the device.
Switch for turning the device on or off.
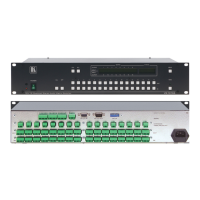
Step 3: Install the VS-88H2
To rack mount the machine, attach both ear brackets (by removing the screws from each side of
the machine and replacing those screws through the `ear brackets) or attach the rubber feet and
place the machine on a table.
Step 4: Connect the inputs and outputs
Always switch OFF the power on each device before connecting it to your VS-88H2. For best results, we recommend that you
always use Kramer high-performance cables to connect AV equipment to the VS-88H2.
Step 5: Connect the power
Connect the power cord to VS-88H2 and plug it into the mains electricity.
Safety Instructions (See www.kramerav.com for updated safety information)