VW-4 Quick Start Guide
This guide helps you install and use your VW-4 for the first time.
Go to www.kramerav.com/downloads/VW-4 to download the latest user manual and check if firmware
upgrades are available.
Step 1: Check what’s in the box
VW-4 4 Output Video-Wall Driver
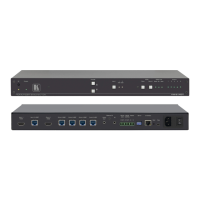
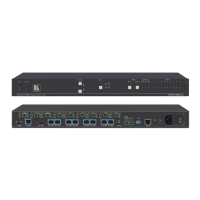
Step 2: Get to know your VW-4
Lights green when the device is powered.
Lights green when a valid input signal is detected on the input.
Light green when an acceptor is detected on that output.
Connect to an HDMI source.
Connect to an additional VW-4 device for configuring a large video wall or to a
local monitor.
Use to perform firmware upgrade.
OUT HDMI Connectors (1 to 4)
Connect to up to 4 HDMI acceptors that make up the video wall configuration.
The appropriate segments of the zoomed picture are output on these connectors
for connection to the displays in the video-wall.
The output on these connectors is at 1080P resolution.
For fast, basic configuration of the device without needing to be connected to a
PC, see Step 6: Configure VW-4.
RS-232 3-pin terminal block connector
Use to setup and monitor the VW-4 via the Windows software and to upgrade the
firmware.
Connect to a PC via a LAN to setup and monitor the VW-4 via the configuration
app.
Connect to the supplied power adapter.
Install VW-4 using one of the following methods:
• Attach the rubber feet and place the unit on a flat surface.
• Fasten a bracket (included) on each side of the unit and attach it to a flat surface
(see www.kramerav.com/downloads/VW-4).
• Mount the unit in a rack using the recommended rack adapter
(see www.kramerav.com/product/VW-4).
• Ensure that the environment (e.g., maximum ambient temperature &
air flow) is compatible for the device.
• Avoid uneven mechanical loading.
• Appropriate consideration of equipment nameplate ratings should be
used for avoiding overloading of the circuits.
• Reliable earthing of rack-mounted equipment should be maintained.
• Maximum mounting height for the device is 2 meters.