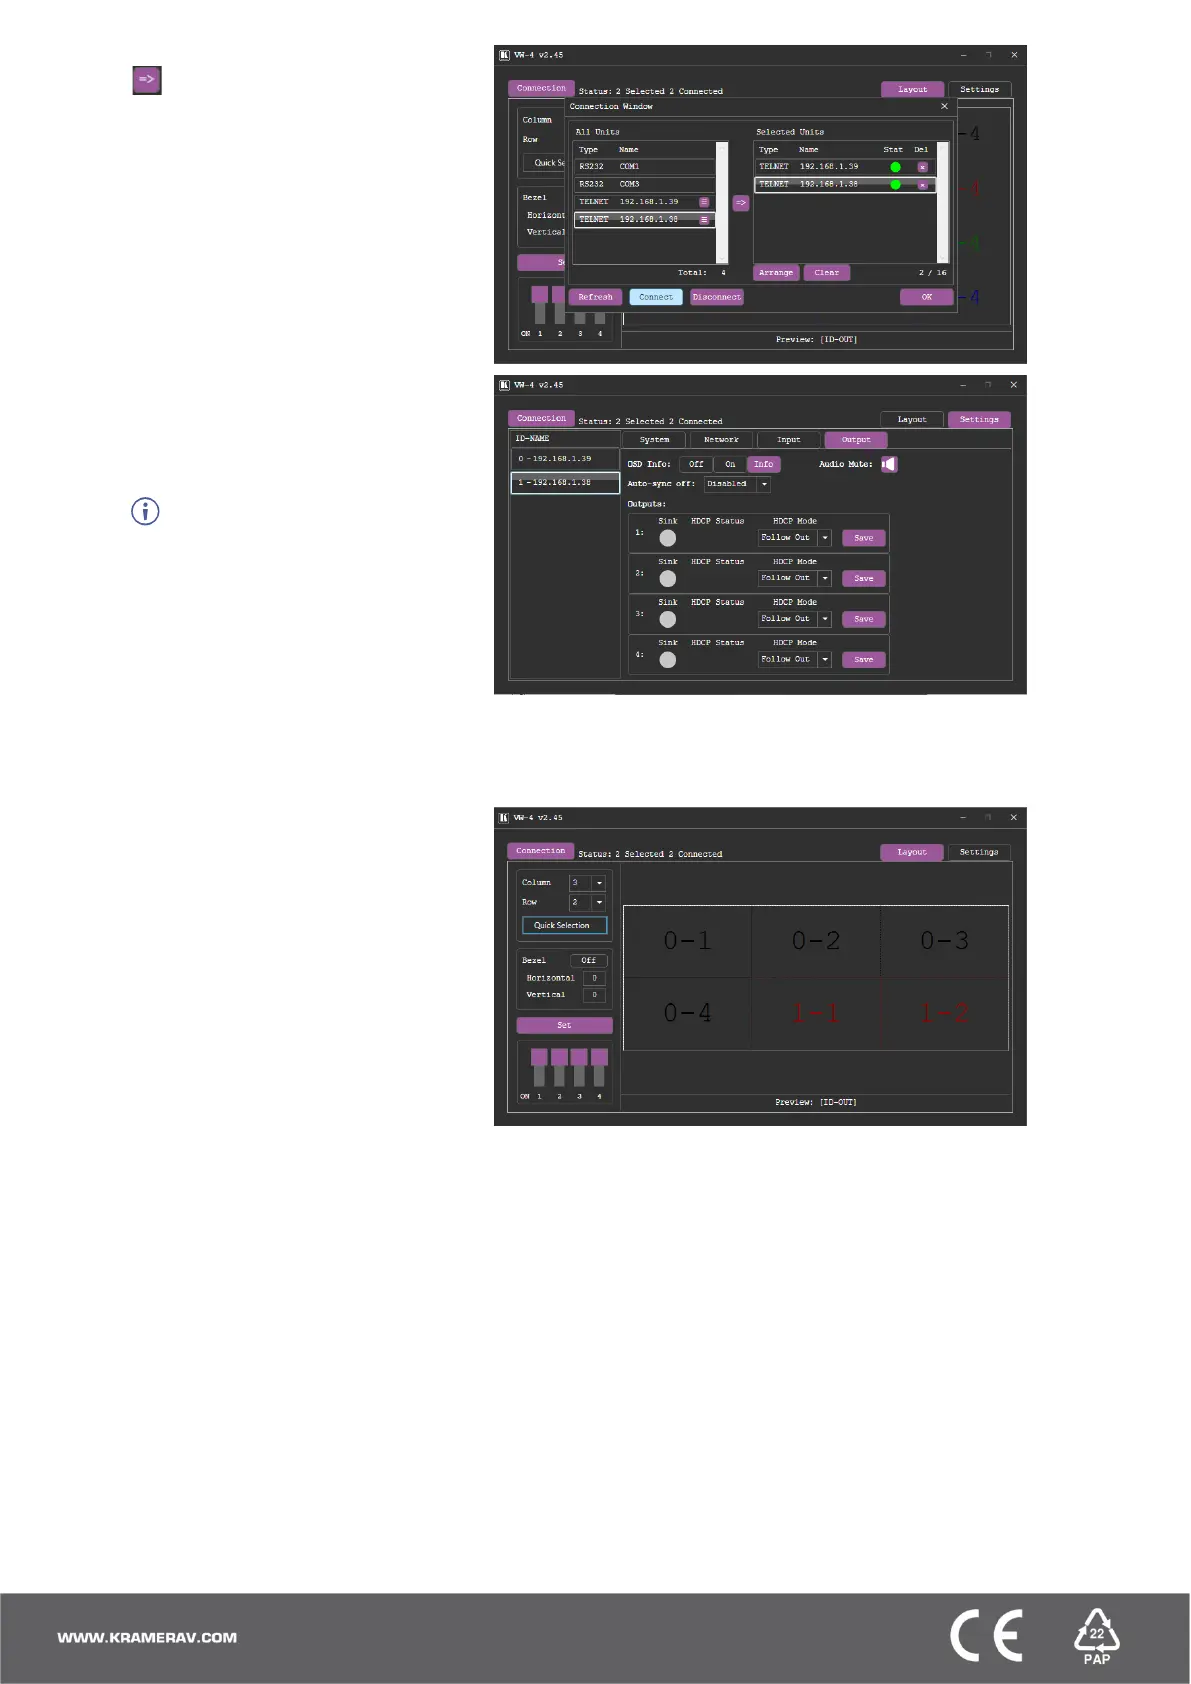
4. Select a device under All Units and click
.
The selected device moves to the
Selected Units area.
5. Add the other connected devices.
6. Click OK.
7. Select the Settings tab and then select the
Output tab.
8. If you need to change the device ID, enter
the new ID under ID-NAME and press
Enter on your keyboard.
You can set the ID number
individually only when the device is directly
connected to your PC.
The ID number is set to each device, and
according to that number each device is
assigned its physical position in the video
wall setup.
9. View the sink status of each device output
and:
▪ Set OSD Info.
▪ Define Auto-Sync Off status.
▪ Set the HDCP per output and
click Save.
10. Select the Layout tab.
11. Set the video wall size by either:
▪ Selecting Column and Row
numbers (for example, 3 x 2).
OR
▪ Clicking Quick Selection for
common video wall
configurations.
12. Select horizontal and vertical bezel
corrections (in pixels).
For each connected device, VW-4 App also enables performing factory reset, upgrading the firmware, viewing network
settings and copying the EDID to the input from a selected EDID source.

 Loading...