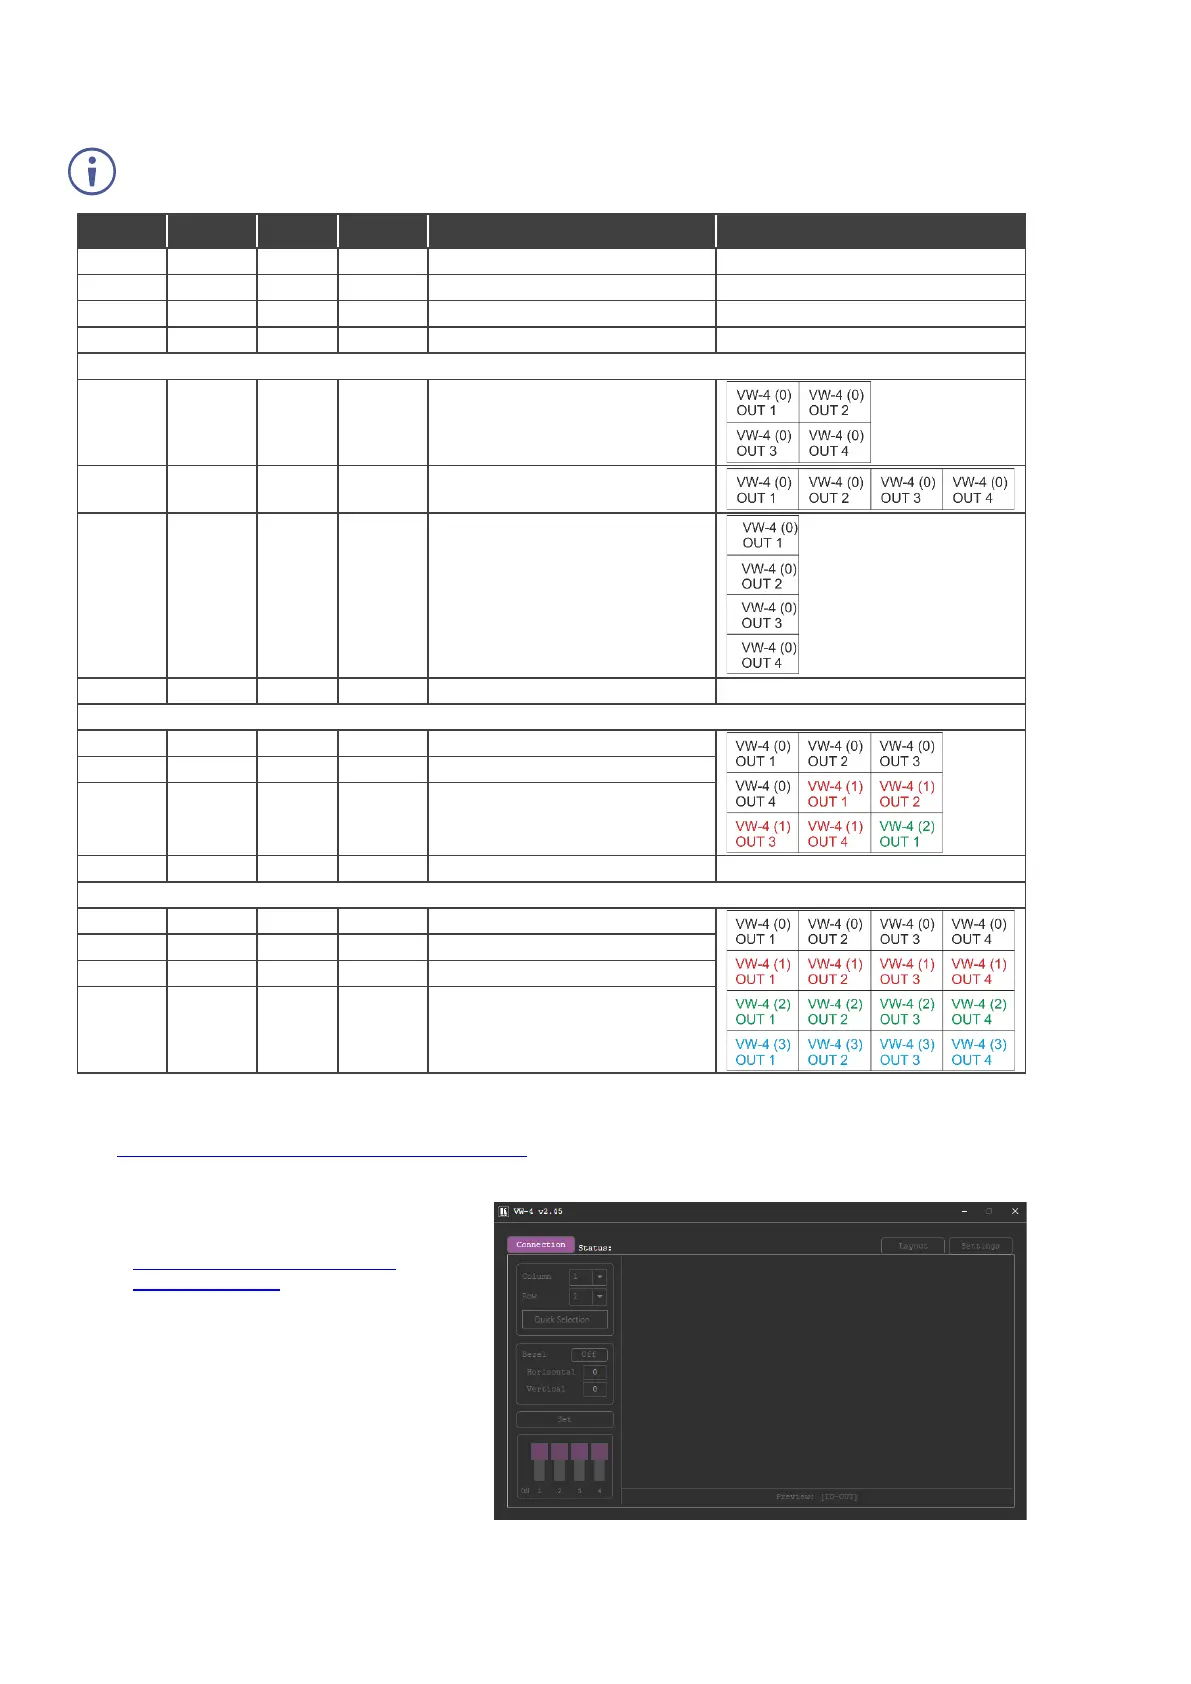
Video Wall Configuration via DIP-switch Settings
You can use the DIP-switch settings to quickly configure a basic video wall (without bezel correction) of up to 4x4, consisting
of 1 or more VW-4 devices.
When the video wall size is configured using the DIP-switches, it is not possible to set it up via the configuration
app. (To use the app, make sure that the DIP-switches are all OFF).
Basic setup is not used (default)
Full size picture (“1x1” wall)
Image appears on all displays.
3x3 wall, second unit (1)
4x4 wall, second unit (1)
4x4 wall, fourth unit (3)
Video Wall Configuration via the configuration app
Use the VW-4 Windows® Control Software app to configure a video wall of up to 8x8, consisting of 1 or more VW-4 devices
(see www.kramerav.com/product/VW-4#Tab_Resources).
To configure the video wall (for example, a 3x2 video wall, using 2 devices):
1. Download the latest VW-4 Control
Software app from
www.kramerav.com/product/VW-
4#Tab_Resources.
2. Open the app.
3. Click Connection.
The Connection window opens, showing a
list of all the connected VW-4 devices and
the available RS-232 ports on your PC.
The Connection window opens.

 Loading...