Do you have a question about the Kraus KEU12 and is the answer not in the manual?
Choose and cut the template for desired sink reveal type: Negative, Positive, or Flushed.
Align the cut-out template on the countertop, ensuring clearance for backsplash and faucet.
Trace the template onto the countertop surface using a pencil.
Carefully cut the countertop opening following the traced line, using appropriate saw.
Align the sink with the countertop and mark mounting holes 1/2" from the sink edge.
Drill 3/8" diameter x 1/2" deep holes in the countertop for mounting brackets.
Insert anchors into the drilled holes and tap flush with a hammer.
Apply silicone sealant around the sink rim and place it firmly into the cutout.
Secure the bowl using mounting hardware and allow sealant to cure for 30-60 minutes.
Connect drain, trap, and water supply to the faucet, then test for leaks.
Details Kraus's limited lifetime warranty for personal household use, covering structure and finish.
Outlines exclusions for misuse, improper installation, abrasive cleaners, and professional installation requirement.
This document is an installation manual for Kraus Porcelain Enameled Steel Undermount Kitchen Sinks, specifically models KEU12, KEU14, and KE1US21. It provides comprehensive instructions for the proper installation of these sinks, ensuring a successful and secure fit within a kitchen countertop. The manual emphasizes the importance of careful preparation, precise measurements, and adherence to recommended procedures to achieve optimal results and maintain the product's warranty.
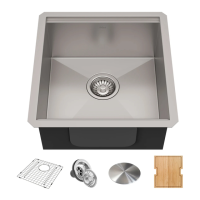
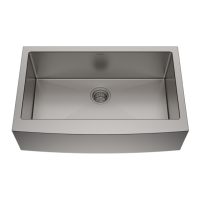
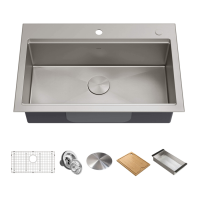
The primary function of these Kraus kitchen sinks is to provide a durable and aesthetically pleasing basin for various kitchen tasks, such as washing dishes, preparing food, and general cleaning. Made from porcelain enameled steel, these sinks are designed for resilience and ease of maintenance, offering a long-lasting solution for modern kitchens. The undermount installation style creates a seamless look with the countertop, contributing to a sleek and contemporary kitchen design.
Before beginning the installation, the manual advises several crucial steps. Users should first verify that all necessary parts are present by checking the provided parts list. If any components are missing or damaged, Kraus Customer Service should be contacted immediately for replacements. A thorough inspection of the sink itself is also recommended to ensure it has not sustained any damage during shipping. This proactive approach helps prevent issues during installation and ensures the integrity of the final product.
A key usage feature highlighted in the manual is the provision of a cut-out template. This template is essential for accurately marking and cutting the opening in the countertop. The manual explicitly states that the cut-out template provided by Kraus should be used, emphasizing the importance of precision for a proper fit. Users are instructed to determine their desired reveal type—Negative, Positive, or Flushed Reveal—and cut the template accordingly. This customization option allows users to achieve their preferred aesthetic with the countertop edge relative to the sink.
The installation process begins with positioning the template on the countertop. Users are advised to check the template against the actual sink to confirm the correct size and to place it in the desired location on the countertop. A critical note here is to ensure sufficient clearance for the backsplash, faucet, and plumbing connections, which is vital for the sink's functionality and accessibility. Once positioned, the template is traced onto the countertop with a pencil, providing a clear guide for the subsequent cutting step.
Cutting the countertop opening is a precise task that requires the appropriate tools. The manual instructs users to carefully follow the traced line and use a saw best suited for their specific countertop material. While the manual does not specify particular saw types, the accompanying illustrations show various saws like jigsaws and circular saws, implying that the choice depends on the material. It's important to note that the manual states that installation with laminate countertops is not recommended, suggesting that these sinks are better suited for solid surface materials like wood, marble, or granite. For these specialized materials, the manual mentions that specialized tools may be necessary, further emphasizing the need for professional expertise in some cases.
Once the countertop is cut, the next step involves setting up the mounting brackets. The countertop is turned over, and the sink is aligned with it to determine the optimal locations for the mounting brackets. The manual specifies that mounting holes should be drilled 1/2" from the edge of the sink. These holes, 3/8" in diameter and 1/2" deep, are then used to install anchors. The anchors are lightly tapped into the drilled holes with a hammer until they are flush with the countertop surface, providing a secure base for the mounting hardware.
Securing the sink to the countertop is a crucial step that involves applying a sealant. A bead of silicone or another preferred adhesive is applied around the rim of the sink. Users are instructed to check the alignment of the sink with the cutout in the countertop before placing the sink over the hole and pressing it firmly into place. Following this, the mounting hardware is attached to secure the bowl. Any excess sealant from the inside lip of the sink should be removed, and the sealant is then allowed to set for 30 to 60 minutes. For cleaning excess sealant, the manual recommends using acetone or rubbing alcohol, which are effective for removing silicone residues without damaging the sink's finish.
The final stage of installation involves connecting the plumbing fixtures. This includes connecting the drain to the sink, the trap to the drain, and the water supply connections to the faucet. Users are advised to follow the faucet manufacturer's instructions for these connections. After all plumbing is connected, water is run into the sink to check for any leaks, ensuring that the installation is watertight and fully functional.
The manual also includes important information regarding the product's warranty and customer support. Kraus provides a lifetime warranty for the structure and finish of the kitchen sink under normal usage for the original purchaser in its original location. This warranty covers defects in material and workmanship. However, it explicitly excludes damages resulting from negligence, misuse, abuse, improper installation, or the use of abrasive cleaners. The manual strongly recommends hiring a fully insured and licensed trade professional for installation to ensure compliance with all applicable codes and regulations, which is a condition for the warranty to apply.
For technical assistance or replacement parts, Kraus Customer Service can be reached via a toll-free number or email. The manual also provides contact information for plumbing contractors, trade professionals, and authorized partners, ensuring that all types of users can access appropriate support. Homeowners are encouraged to register their Kraus product online to activate their warranty, access premium customer support, and receive product information. A care and maintenance guide is also available online, providing further details on how to properly maintain the sink to ensure its longevity and appearance.
In summary, this installation manual for Kraus Porcelain Enameled Steel Undermount Kitchen Sinks is a comprehensive guide designed to facilitate a smooth and correct installation. It covers everything from pre-installation checks and template usage to cutting the countertop, securing the sink, and connecting plumbing. The emphasis on precision, proper tools, and adherence to instructions, along with detailed warranty information and customer support contacts, makes it an invaluable resource for anyone installing these Kraus kitchen sinks.
| Product Type | Kitchen Sink |
|---|---|
| Sink Type | Undermount |
| Material | Stainless Steel |
| Gauge | 16 |
| Bowl Configuration | Single Bowl |
| Number of Bowls | 1 |
| Installation Type | Undermount |
| Number of Holes | 0 |
| ADA Compliant | Yes |
| Warranty | Limited Lifetime Warranty |
| Minimum Cabinet Size | 36 inches |
| Drain Size | 3.5 inches |
| Drain Opening | 3.5 inches |