Do you have a question about the Kraus Kore KWT311-15 and is the answer not in the manual?
Align cut-out template on countertop for proper sink fitment.
Outline the template onto the countertop using a pencil.
Carefully cut the countertop opening following the traced line.
Secure mounting clips to the sink rim for countertop attachment.
Apply sealant around the sink edge for a watertight seal.
Insert sink, align, and tighten mounting screws to secure.
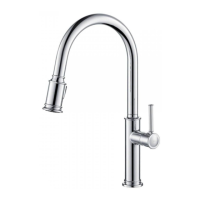
Connect drain, trap, and water supply for faucet functionality.
Choose the desired reveal (Negative, Positive, Flush) for the sink installation.
Place the cut-out template on the countertop for correct sink placement.
Mark the countertop outline from the template with a pencil.
Cut the countertop opening precisely along the traced line.
Position and mark holes for mounting brackets on the countertop.
Drill pilot holes of specified diameter and depth in the countertop.
Insert anchors into drilled holes and tap them flush.
Apply sealant to sink rim and place into countertop cutout.
Fasten mounting hardware to secure the sink bowl to the countertop.
Connect plumbing components and check for leaks after installation.
Warranty terms for commercial applications, valid for one year.
Guidelines for sink maintenance to prevent finish damage and voiding warranty.
Lists exclusions from warranty, including misuse and damage.
Contact points for consumers, trade professionals, and partners.
Details on implied warranty duration and exclusion of consequential damages.
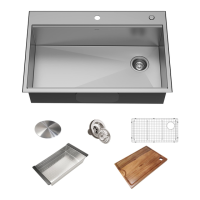
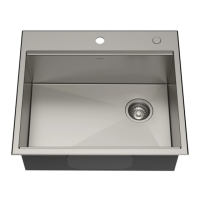
This document is an installation manual for Kraus Kore™ Workstation Stainless Steel Dual Mount Kitchen Sinks, covering various models including KWT311-15, KWT321-15, KWT301-25, KWT311-25, KWT311-25-5.5, KWT300-28, KWT310-28, KWT300-30, KWT302-30, KWT300-33, KWT302-33, and KWT310-33/PGM. The manual provides comprehensive instructions for both top mount and undermount installations, along with essential safety warnings, a parts list, dimensions, and cleaning and maintenance guidelines.
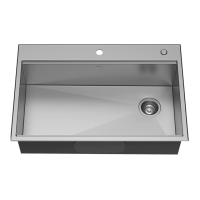
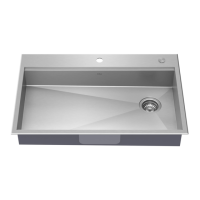
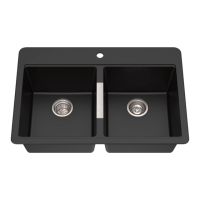
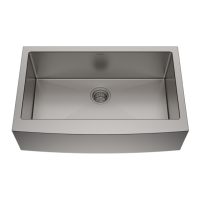
The Kraus Kore™ Workstation Stainless Steel Dual Mount Kitchen Sinks are designed for versatility, offering both top mount and undermount installation options to suit different kitchen countertop styles and preferences. These sinks are crafted from stainless steel, ensuring durability and a modern aesthetic that complements various kitchen decors. The "Workstation" designation implies integrated features that enhance functionality, such as ledges for accessories like cutting boards and rolling mats, which are included with many models. This design aims to streamline kitchen tasks by providing a dedicated space within the sink for food preparation and other activities.
For top mount installation, the process begins with positioning and tracing a provided cut-out template onto the countertop. It's crucial to verify the template against the actual sink size and ensure adequate clearance for the backsplash, faucet, and plumbing. After tracing, the countertop is carefully cut along the marked line. Safety is emphasized during this step, requiring the use of eye protection and cut-resistant gloves. The manual suggests using an appropriate saw for the specific countertop material. Following the cut, mounting hardware is attached to the sink's underside, ensuring the hooked side of the clip faces away from the sink. A silicone-based sealant or plumber's putty is then applied around the sink's edge before it is inserted into the countertop opening. The sink is secured by tightening screws on the mounting clips, and any excess sealant is removed. The sealant is then allowed to cure for 30-60 minutes before plumbing fixtures are installed and checked for leaks.
Undermount installation follows a similar initial sequence but introduces additional steps for securing the sink beneath the countertop. First, the desired reveal type (Negative, Positive, or Flush Reveal) is determined using the paper template. The template is then positioned and traced onto the countertop, again ensuring proper clearance. The countertop is cut, with the same safety precautions for eye protection and cut-resistant gloves. Next, the countertop is turned over, and the sink is aligned underneath. Mounting bracket locations are determined, with mounting holes drilled 1/2 inch from the sink's edge. Anchors are inserted into these drilled holes and lightly tapped until flush. A bead of silicone or preferred adhesive is applied around the sink's rim before it is pressed firmly into place against the countertop. Mounting hardware is then attached to secure the bowl, and excess sealant is removed using acetone or rubbing alcohol. Finally, plumbing fixtures are installed and checked for leaks.
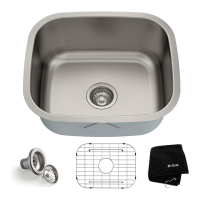
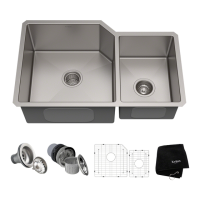
The usage features of these sinks are enhanced by the inclusion of various accessories, depending on the specific model. Many models come with a bottom grid, which protects the sink's surface from scratches and allows water to drain freely. A strainer and drain cap are standard, facilitating waste disposal and preventing clogs. Several models also include a cutting board (available in different materials like KCB-WS13BB, KCB-WS14BB, KCB-WS102SA, KCB-WS102BB, KCB-WS103SA, KCB-WS103BB, KCB-WS103BC, KCB-WS103AC), which can slide along the integrated ledges, transforming the sink into a versatile workstation. A rolling mat (KRM-11BL or KRM-11LG) is another common accessory, providing a convenient space for drying dishes or produce. Some models also include a soap dispenser hole cap, indicating the possibility of integrating a soap dispenser. These accessories are designed to fit seamlessly within the sink, maximizing counter space and improving efficiency in the kitchen.
Maintenance of the Kraus Kore™ sinks is straightforward, focusing on regular cleaning with warm soapy water. After using cleaning products, it is important to rinse the sink thoroughly and wipe its surface with a soft cloth to remove any liquid residue. To preserve the sink's performance and warranty, users are advised against cutting food directly on the sink's surface or leaving sharp objects on it for extended periods. Crucially, abrasive cleaning products, sanding tools, steel wool, or bleaching products should be avoided, as their use can damage the product's finish and potentially void the warranty.
The product is covered by a Lifetime Limited Warranty for personal household use, ensuring the structure and finish are free from defects under normal usage for as long as the original purchaser resides in the installed residence. A separate one-year commercial warranty applies to products used in industrial, commercial, and business applications. The warranty explicitly excludes damage resulting from neglect, misuse, accidents, hard water or mineral deposits, exposure to corrosive materials, improper maintenance, alterations, or failure to follow care and installation instructions. Kraus recommends professional installation by a licensed and insured trade professional to ensure proper setup and maintain warranty validity. The manual also provides contact information for customer service and technical assistance, emphasizing the importance of retaining proof of purchase for warranty claims.
| Product Type | Kitchen Sink |
|---|---|
| Material | Stainless Steel |
| Installation Type | Undermount |
| Bowl Configuration | Single Bowl |
| Gauge | 16 |
| Corner Style | Tight Radius |
| Sound Dampening | Yes |
| Drain Size | 3.5 inches |
| Minimum Cabinet Size | 18 inches |