Positioning the Mini Kreg Jig
®
to center a screw in various material thicknesses is
accomplished by setting the base of the jig a given distance from the edge of the
workpiece. (Be sure to clamp the jig to the workpiece before drilling)
Using the Mini Kreg Jig®
3-5/16”
3-1/2”
4-1/4”
1/2
3/4
1.5
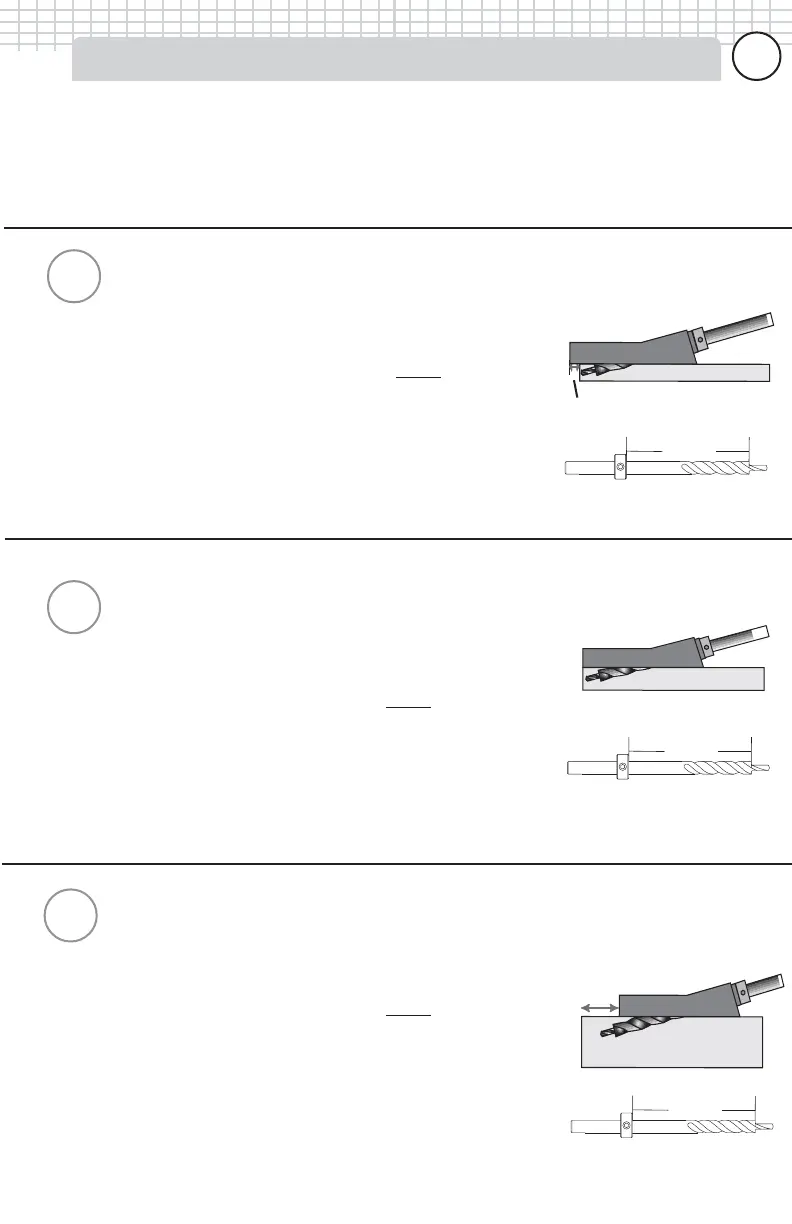
To join 1/2” thick material.
1. Clamp the workpiece to be drilled to a stationary object
such as a workbench.
2. Set depth collar to 3-5/16” from the
STEP
of the drill bit.
3. Position the base of the jig 3/8” over the edge of the
workpiece as shown at right. Clamp jig to material with
Face Clamp
TM
.
4. Drill pocket hole. Use 1” screw to join 1/2” to another
1/2” thick workpiece.
To join 3/4” thick material.
1. Clamp the workpiece to be drilled to a stationary object
such as a workbench.
2. Set depth collar to 3-1/2” from the
STEP
of the drill bit.
3. Position the base of the jig flush with the edge of the
workpiece as shown at right. Clamp jig to material with
Face Clamp
TM
.
4. Drill pocket hole. Use 1-1/4” screw to join 3/4” to
another 3/4” thick workpiece.
To join 1-1/2” thick material.
1. Clamp the workpiece to be drilled to a stationary object
such as a workbench.
2. Set depth collar to 4-1/4” from the
STEP
of the drill bit.
3. Measure and set the base of the jig back 1-1/4” from
the edge of the workpiece as shown at right. Clamp jig
to material with Face Clamp
TM
.
4. Drill pocket hole. Use 2-1/2” screw to join 1-1/2” to
another 1-1/2” thick workpiece.
Figure
(19)
Figure
(20)
Figure
(21)
1414
1414
14
4-1/4”
1-1/4”
3/8”