1.5 Detergent dispenser installation
Electrical connection:
Consult the electric diagram enclosed with the dishwasher.
Water connection:
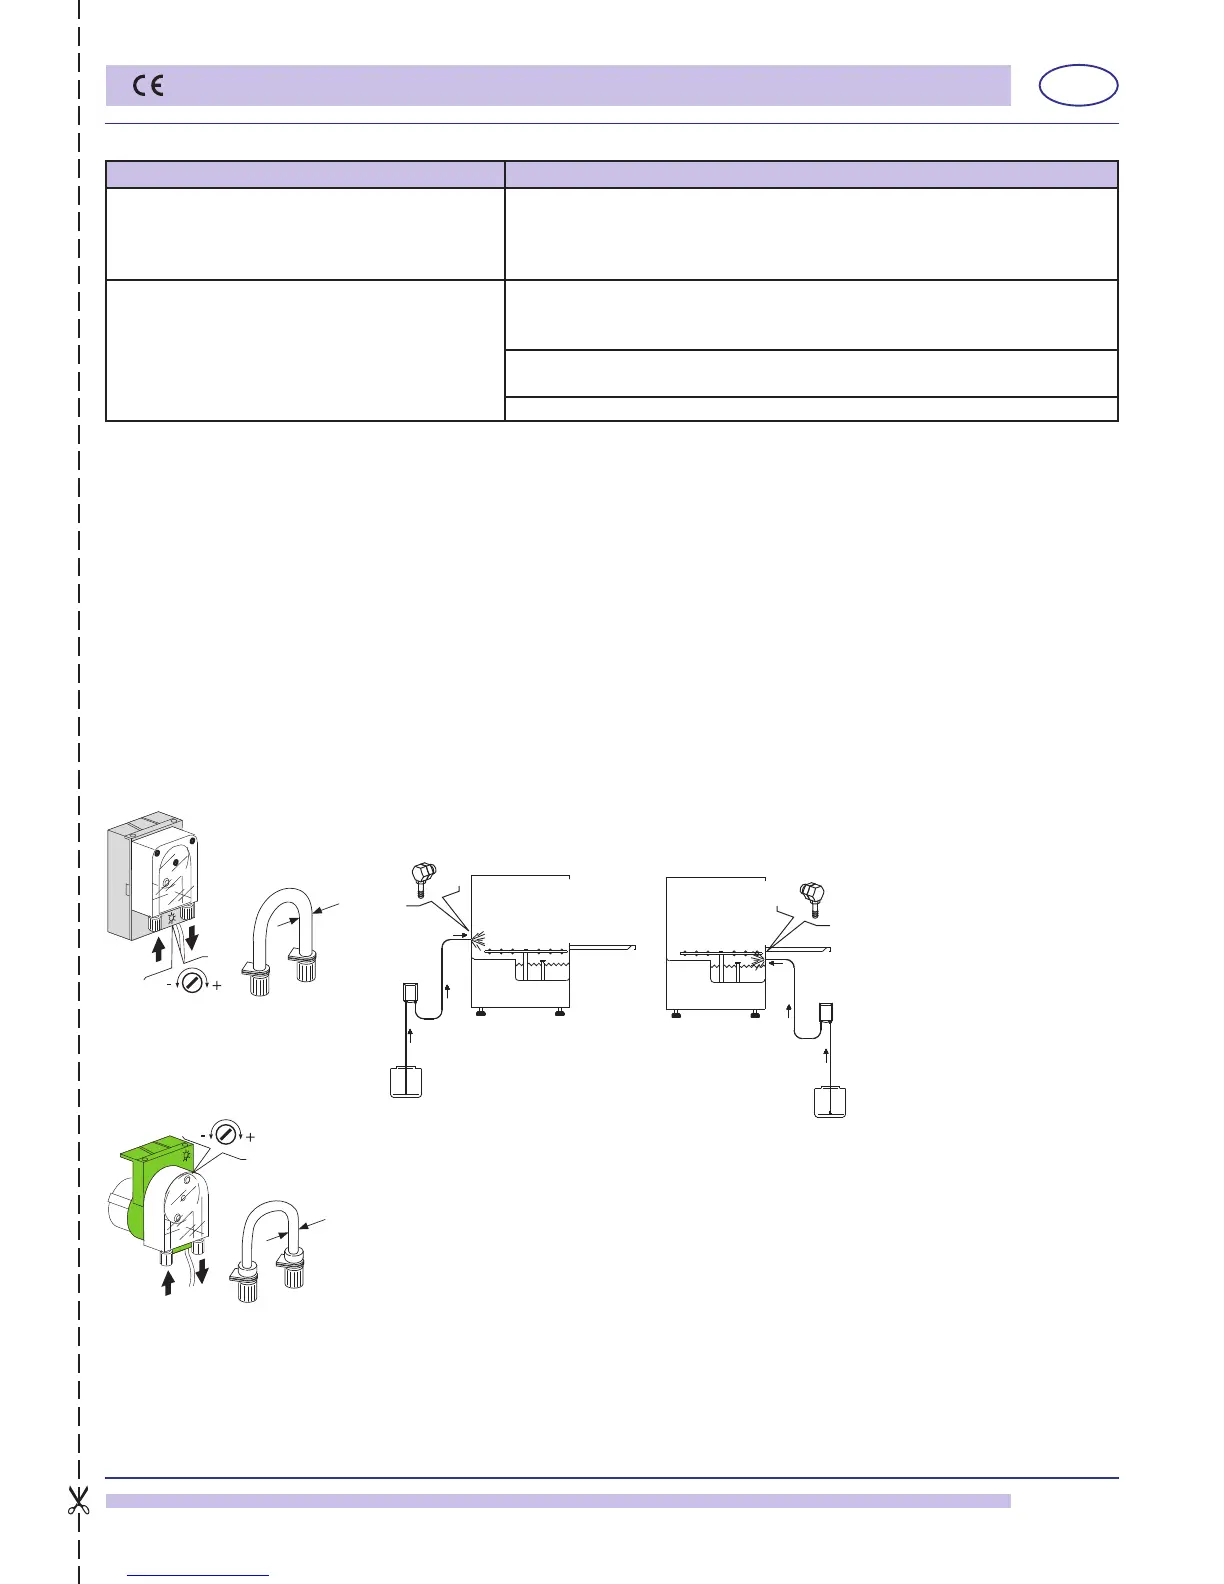
a) Properly assemble the injector (C), using the appropriate washers.
b) Connect the suction straw to the dispenser suction attachment (see g 5 point A).
c) Connect the ow straw to the other dispenser attachment and the ow connector (see
g. 5 point B).
d) insert the straw with lter into the detergent canister.
e) Prime the detergent and proceed with the dosage phase
Dosage:
The detergent dosage ow can be regulated with a screwdriver as indicated in g. 6. Every
2 cm of product sucked into the tube corresponds to 0,25 cm3 equal to 0,3 g (with 1,2 g/
cm3 density). See also par. 7.3.
N.B.: A dispenser with a conductivity probe in the tank is recommended.
pict. 5
PROBLEM CAUSES AND REMEDY
Water leaks from rins aid suction tube The suction valves 10705/D and ow do not seal due to foreign bodies is
the clamping seats. Clean valves 10705/D, check if the rinse aid suction
lter is present. Make sure there are no crystals or solid pieces inside the
canister which could be due to old, dried-out product.
The dispenser does not suck up rinse aid a) The ow valve 10705/D does not seal due to foreign bodies in the
clamping seats. Clean the valve 10705/D, check if the rinse aid suction
lter is in place.
b) The piston washer does not seal because it is ruined. Replace the
washer with an original.
c) Check that membrane 10705/O is intact.