54
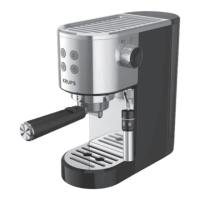
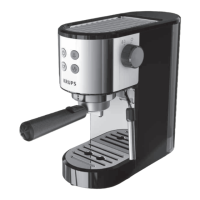
ENGLISH
IMPORTANT! Warning! To prevent the milk from splashing, do not lift the nozzle out
of the milk when using “steam” mode.
IMPORTANT! Warning! The steam nozzle is still hot! Take care not to burn yourself!
IMPORTANT! After switching off the steam function, clean the nozzle immediately
and carefully, as set out in the section: CLEANING AND MAINTENANCE .
GOOD TO KNOW – PRACTICE AFTER USING STEAM
• If you want to make an espresso after using the steam function, you need to cool down your
coffee machine to avoid burnt coffee.
• Press button
to return to the coffee brewing mode, if buttons orange light ash, it
means the temperature in thermoblock is too high, please do not make coffee right now. You need
to lower temperature.
• Immerse the steam nozzle in a container lled with 60 ml of water.
• Turn the knob from preheat (M1) back to steam position (M2) (28) to make hot water.
The machine stops producing hot water automatically once the system has cooled down. Turn the
knob (M) back to (M1). The buttons
will remain lit white. The machine is in coffee brewing
mode
Hot water preparation
1. The machine is in coffee brewing mode.
2. Place a container under the steam nozzle.
3. Turn the knob to the position (M2) (28).
buttons white lights turn off, button white light
ash. Machine starts making hot water and it will stop when turn the knob back to the position
pre-heating (M1) (30).
4.
buttons white lights stay on, button white light off.
CLEANING AND MAINTENANCE
Unplug (K) before each clean let the appliance cool down rst.
Machine: Clean the outside of the appliance with a damp sponge when you think it necessary. Do
not use solvents or abrasive detergents to clean the coffee machine.
Water tank: Rinse the inside of the tank regularly. When a ne white layer appears in the tank,
descale the appliance (refer to the section on descaling).
Drip tray: Clean the drip tray (J) and its grid (I) using water and a little mild detergent (33-34). Rinse
and dry. Only the drip tray grill is dishwasher safe.
Filter holder, lters: Using a damp cloth, clean the lter holder mount regularly in order to remove
possible coffee residues stuck to the surface. In order to prolong the useful life of the watertight seal
on the brewing head, do not put the lter holder back in place if the coffee machine is not to be used
for extended periods. To remove any deposits that could block the ow of your 1 or 2 cup lter, you
may use the needle. Filters are dishwasher safe.
Steam nozzle: To prevent milk from drying inside the nozzle, please clean it after each use. To do
this, follow the steps for foaming the milk, replacing 100 ml of milk with 60 ml of water. After turning
off the steam, quickly and carefully clean the steam nozzle using a damp sponge (in order to remove
any residue). Pull the tube of the steam nozzle downwards. Carefully clean the steam nozzle with
lukewarm water (31-32). Fit the tube back onto the steam nozzle. Only the steam nozzle tube is
dishwasher safe.
4. Set the steam nozzle to the foaming function (H1) by turning the ring (27)
5. Place the steam nozzle (H) into a container lled with milk.
6. Turn the knob (M) from preheat (M1) to steam position (M2) (28),
button white light ashes,
the machine starts to make steam.
Note: For best results, foam the milk near the bottom of the container for approximately 10 seconds,
taking care not to touch the bottom. Then slowly tilt the container and move the nozzle upwards until
it is almost at the surface of the milk. Make sure that the nozzle does not leave the milk. To get a great
foam, move the container in circular motions (29).
7. Once you have achieved the best foam turn the knob back to preheat position (30).
Note: To prevent overheating the milk, do not use the steamer for more than 45 seconds (for 100 ml
of milk).
8. Spread the milk foam over the cup(s) of espresso.
Note:
• If you wish to make more than one cappuccino, rst make all the espressos, then make the milk
foam.
• After turning off the steam, quickly and carefully clean the steam nozzle using a damp sponge (to
ensure that residues do not remain stuck).
Hot milk preparation
Follow the steps described in the section “Making Cappuccino”, taking care to modify the steam
function in step 4, which will produce hot milk instead of foamed milk:
4. Set the steam nozzle to the hot milk function (H2) by turning the ring (27)
DESCALING
IMPORTANT! Warning! Do not clean any parts of this appliance in a dishwasher.
(Dishwashing safe only for drip tray grill, steam nozzle tube, lter cups.)
The machine can be descaled at any time, even if the descaling light is not on. However, the coffee
machine auto counts the use cycles and gives the alert when the machine must be descaled: when
the button
white light and orange light ash in turn and the button white light is lit, the machine
needs to be descaled.
1. Prepare the descaler in accordance with the manufacturer’s instructions, add to the water tank
and ll with approx. 750 ml drinking water (2). Place the tank in the machine (3).
2. Place a receptacle with a capacity of at least 1 litre underneath the spouts.
3. Insert the lter holder without lter.
4. Press the buttons
and at the same time for 3 seconds to go to auto descaling program.
and ash in turn. Release the buttons, machine will go to descaling status automatically.
The water pump will work for 10 seconds and then stop for 120 seconds. This cycle will repeat
until the water tank is empty.
5. Once descaling nishes, buttons
white light will stay lit.
IMPORTANT! After descaling, rinse 2-3 times using clean water (no coffee), as
described in the “FIRST USE” paragraph. Do not forget to rinse the nozzle. The
appliance is now descaled and ready for use again.
 Loading...