32
ENGLISH
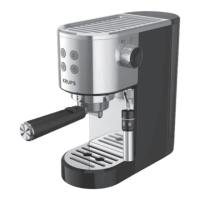
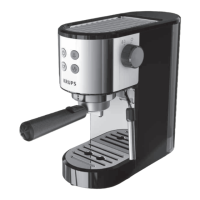
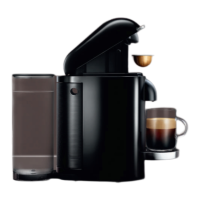
MAKING ESPRESSO
IMPORTANT!
If the espresso function is used for the rst time, the appliance must be cleaned as
described in the “FIRST USE” paragraph.
IMPORTANT! To prevent splashes of hot water, check that the lter holder has been
tightened until it stops before preparing the coffee. Do not remove the lter holder
while the water is owing, as the appliance is still under pressure.
With ground coffee
To prepare your coffee, please refer to the rst 4 steps in the FIRST USE section and then follow the
instructions below:
The machine is in coffee brewing mode.
5. Add the ground coffee to the 1 cup or 2 cups lter (F1, F2) using the measuring spoon (L, 1 spoon
= 1 measure = +/- 7g of ground coffee = 1 espresso) (15, 16), then pack it down (rmly but not
too solid) using the tamper (17). Do not overll the lter. Clean off any excess coffee from around
the lter holder (18).
6. Slot the lter holder into place then turn it to the right until it stops (20).
7. Place a cup or two cups under the lter holder.
8. Press button
or button (21) or (9), according to the number of cups you want to make (15).
The selected button will ash and the appliance will start (22). When the machine has nished, the
buttons
will stay lit.
9. Unlock the lter holder by turning it to the left (23) and remove it from the appliance.
10. Use the lter holding hook to empty the lter. (24) Remove the lter from the lter holder.
11. Wash the lter and lter holder under running water to remove the rest of the coffee (25).
With Pods (E.S.E.)
You can use E.S.E. pods to make your espresso. They can be recognised by the logo
opposite.
1 E.S.E. pod = 1 cup of espresso (19)
1. Insert the lter for coffee pods (F3) into the lter holder.
2. Place the pod as centrally as possible in the lter holder. Follow the instructions on the packaging
of the coffee pods for correct placement of the pod in the lter holder. Pods (E.S.E.) are designed
to make one cup of coffee. Using two pods on top of each other is not recommended.
3. Repeat the steps in the “With ground coffee” section, ignoring step 5.
4. Press button (C) (5) on control panel (D). button light switches on, and buttons
lights ash white (6). The machine is pre-heating.
5. Place a lter (F2) (7) without coffee into the lter holder. Slot the lter holder into place and turn it
to the right until it stops (8).
6. Place two cups under the lter holder.
7. When the temperature reaches pre-set value,
buttons white light will stay on. The machine
is in coffee brewing mode. Press
button (9), button ashes white. The machine starts to pour
the water (10). When it is nished, buttons
white light stay on.
8. Press button
(11). Buttons white light off, button orange light stay on, the machine
is pre-heating.
9. Place the steam nozzle (H) into a container lled with water (12).
10. Turn the knob (M) from preheat (M1) to steam position (M2) (13), button white light ashes,
the machine starts to make steam. Let the water heat for 20 seconds, then turn the knob back to
preheat position (M1) (14).
Note: If you want to brew a coffee now, please refer to the GOOD TO KNOW – PRACTICE AFTER
USING STEAM section to know how to proceed.
You can personalize the coffee volume as you wish from 15 to 65 ml for 1 cup, and from 30 to 130 ml
for 2 cups.
Note : Default volume is 30 ml - 1 cup / 60 ml - 2 cups
1. The machine is in coffee brewing mode.
2. Press
or for 3 seconds. Selected espresso button orange light ashes.
3. Release the button and start set coffee volume.
4. Press the button as soon as the desired volume is reached.
5. Both
buttons orange lights ash 3 times to conrm the new setting.
6. The machine goes back to coffee brewing mode.
1. The machine is in steam pre-heat status:
button orange light stay on
2. Press
for 3 seconds. The buttons orange light ashes once.
3. Water pump works once.
4. Default coffee volumes are now recovered.
5. The machine goes back to steam pre-heat status.
You can change the automatic shutdown time of the machine to 5, 15 or 30 minutes. The default setting
is 30 minutes. To change it, please follow these instructions:
1. The machine is in coffee brewing mode
2. Press and hold the
and buttons simultaneously for 3 seconds
3. The
and button lights will ash orange:
• 1 time for a time set at 5 min
• 2 times for a time set at 15 min
• 3 times for a time set at 30 min
4. To change the current setting, press the
button when the and buttons are not ashing.
Repeat the operation until the number of orange ashes corresponds to the desired duration.
5. Wait until the
and buttons turn white again. Your new setting is saved.
PERSONALIZATION OF THE COFFEE VOLUME
RECOVER DEFAULT COFFEE VOLUME
PERSONALIZATION OF AUTOMATIC SHUT DOWN TIME
Making Cappuccino
1. Make espresso as described above using big enough cups. You can remove the drip tray and
place the tall cup on the stand if required.
2. Press button
(26). Buttons white light off, button orange light stay on, the machine
is in steam pre-heating mode.
3. Fill a container with approximately 60 to 100 ml of cold milk.
Note :
• When choosing the size of the milk container, keep in mind that the milk volume will increase by
two to three times.
• In order to obtain good quality milk foam, we recommend that you use fresh, cold milk. Pasteurised
or UHT milk usually gives the best results.
Note: For a better result, turn on the steam nozzle a few seconds in a container before using it in the
milk. It will remove the water it may contain.
STEAM FUNCTION
 Loading...