2 SETUP 5
K00377-10
–
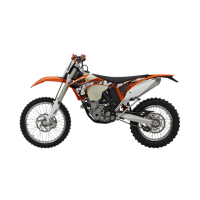
Remove screws
. Take off the handlebar clamps. Remove the handlebar and lay
it to one side.
Info
Cover the components to protect them against damage.
Do not kink the cables and lines.
–
Remove screws
. Remove handlebar support
.
–
Position rubber bushings
and push through nuts
from below.
– Position the handlebar.
Info
Make sure the cables and wiring are positioned correctly.
–
Position the handlebar clamps. Mount screws
. Screw the handlebar clamps so
that both parts touch at the front and tighten all of the screws.
Guideline
Screw, handlebar clamp M8 20 Nm
(14.8 lbf ft)
M01067-01
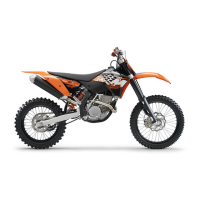
– Position the controls on the right half of the handlebar.
Info
The routing of the cables can be seen in the figure.
M01068-01
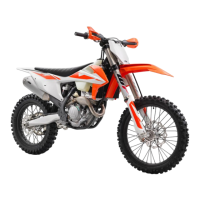
– Position the controls on the left half of the handlebar.
Info
The figure shows how to route the clutch line and wiring harness.
– Install the front fender. ( p. 7)
– Install the front wheel. ( p. 6)
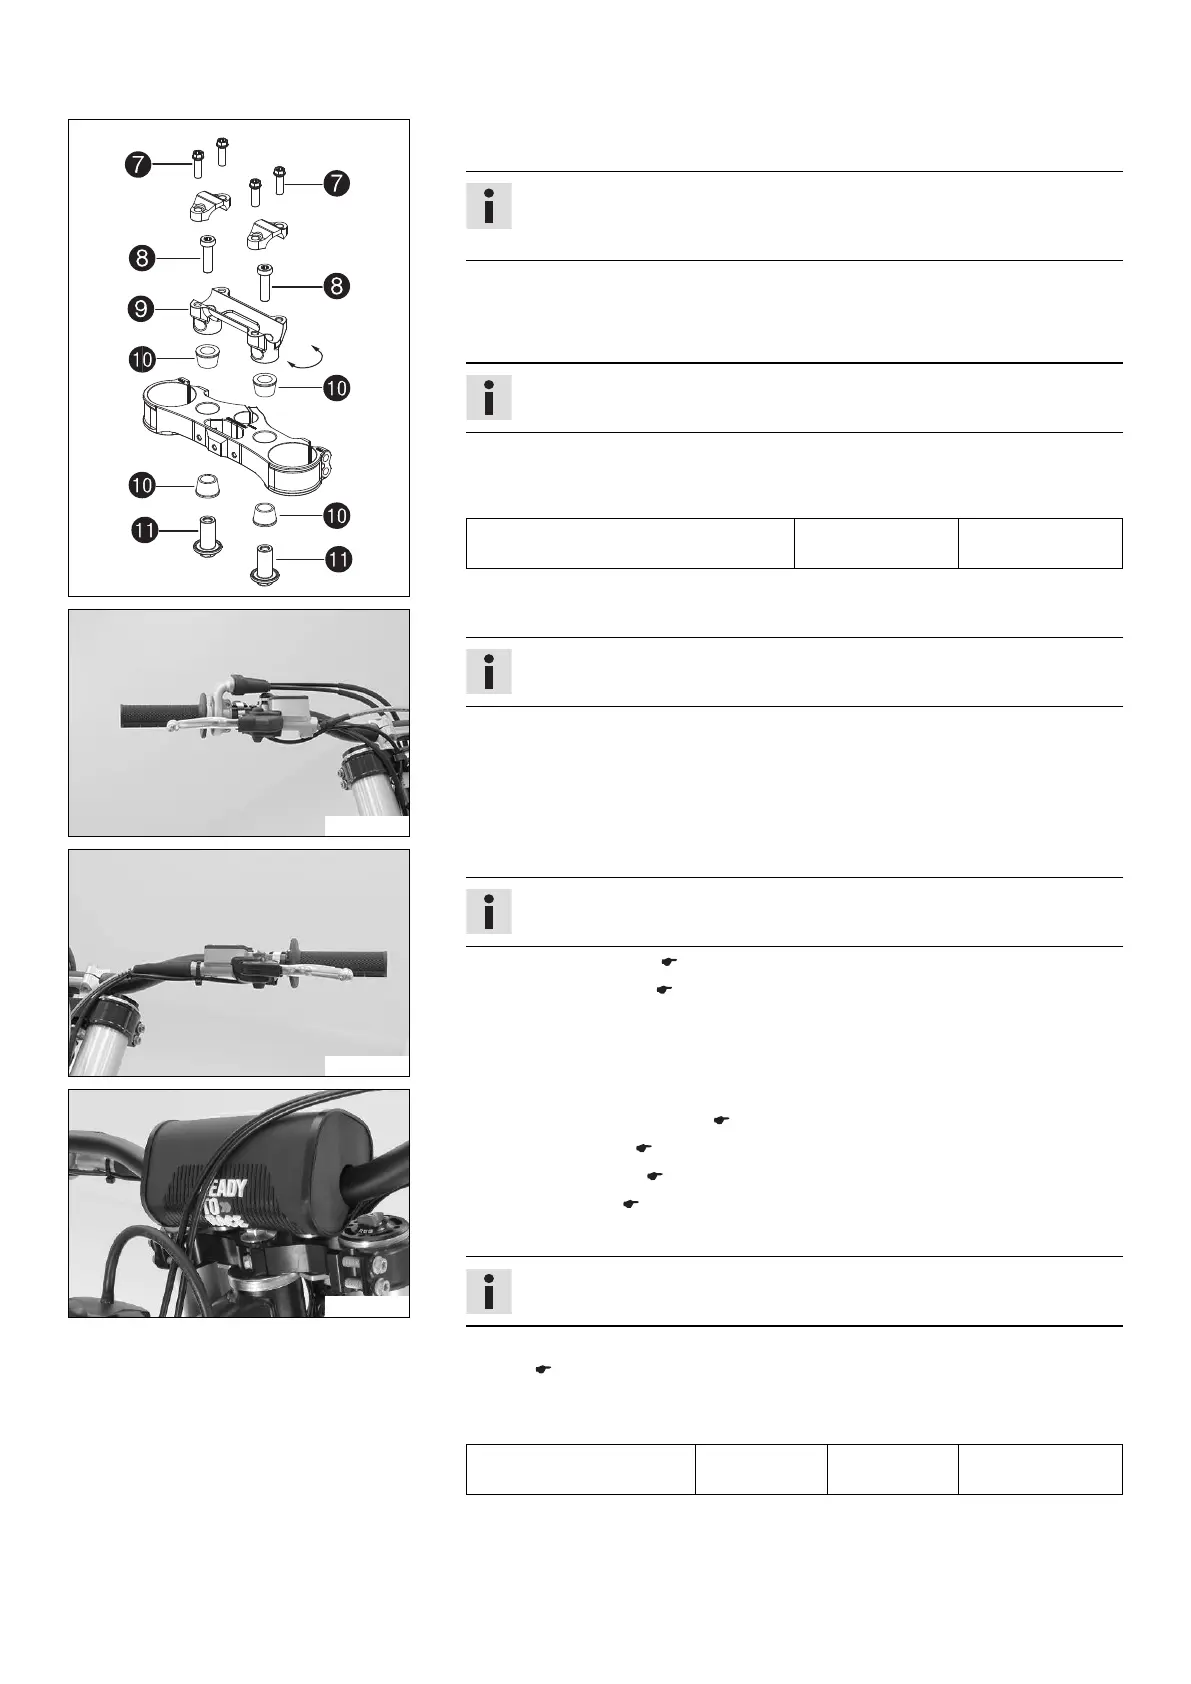
– Mount the fuel tank breather correctly.
M01069-01
– Mount the handlebar cushion.
– Install the start number plate. ( p. 7)
– Install the footrests. ( p. 8)
– Recharge the battery. ( p. 10)
– Install the battery. ( p. 9)
– Unpack and mount the KTM PowerParts included in the delivery (optional).
Info
Read the accompanying KTM PowerParts fitting instructions.
– Apply the label included in the delivery (optional).
– Refuel. ( p. 12)
– Position all controls in their exact positions on the handlebar. Tighten all screws.
Guideline
Screw, handle bar fixed
grip, left
M4 5 Nm
(3.7 lbf ft)
Loctite
®
243™
– Prepare the vehicle according to the specifications in the KTM Dealer.net for han-
dover to the customer.
 Loading...