Disassembly/Assembly
PC3x Keyboard Assembly
3
-
21
Note: If you need access to the keyboard to replace one or more keys, it is not necessary to
entirely remove the Keyboard Assembly from the PC3x. Follow the procedure on page 3-22.
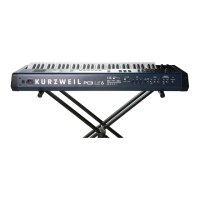
11. Remove the Keyboard Assembly.
Replacing the PC3x Keyboard Assembly
1. Place the keyboard on the bottom enclosure. Be sure that the flat ribbon cables from the
keyboard are correctly positioned to connect them to the Connector Board.
Note: If you have disconnected the Bass and Treble ends of the flat ribbon cables from the
keyboard contact boards during service, be sure that you have reconnected them and secured
them with tape. Be sure that the small ribbon cable connecting the Bass and Treble Contact
Boards is connected.
2. Connect the flat ribbon cables to J306 and J307 on the Connector Board.
3. Secure the flat ribbon cables to the bottom enclosure. Be sure to reapply the nylon
reinforced tape that secures the cables to the bottom enclosure.
4. Lift the Wheels Assembly and connect the Aftertouch flex cables. Be sure to reapply the
nylon reinforced tape that secures the flex cables to the bottom enclosure.
5. Slide the left side of the unit forward and install the four screws and washers to secure the
Wheels Assembly to the bottom enclosure.
6. Move the PC3x back onto your work surface.
7. Slide the PC3x forward so that you can install the six keyboard front screws.
8. Move the PC3x back onto your work surface.
9. Tilt the PC3x up and install the six keyboard rear screws.
 Loading...


