2
Installing the Tri-Sat AutoSwitch
Kit
This section explains how to install the Tri-Sat
AutoSwitch Kit. These instructions require
additional/alternate installation steps than those
specified in the TracVision Installation Guide.
These instructions supersede the TracVision
installation and operation instructions where
applicable.
Step 1 - Set Up the System
The following instructions explain how to
modify the TracVision system for Tri-Sat
AutoSwitch use.
Upgrading Previously Installed TracVision Systems
If you are installing the Tri-Sat AutoSwitch Kit to
upgrade a TracVision system that is already
installed on a vehicle, follow the steps below:
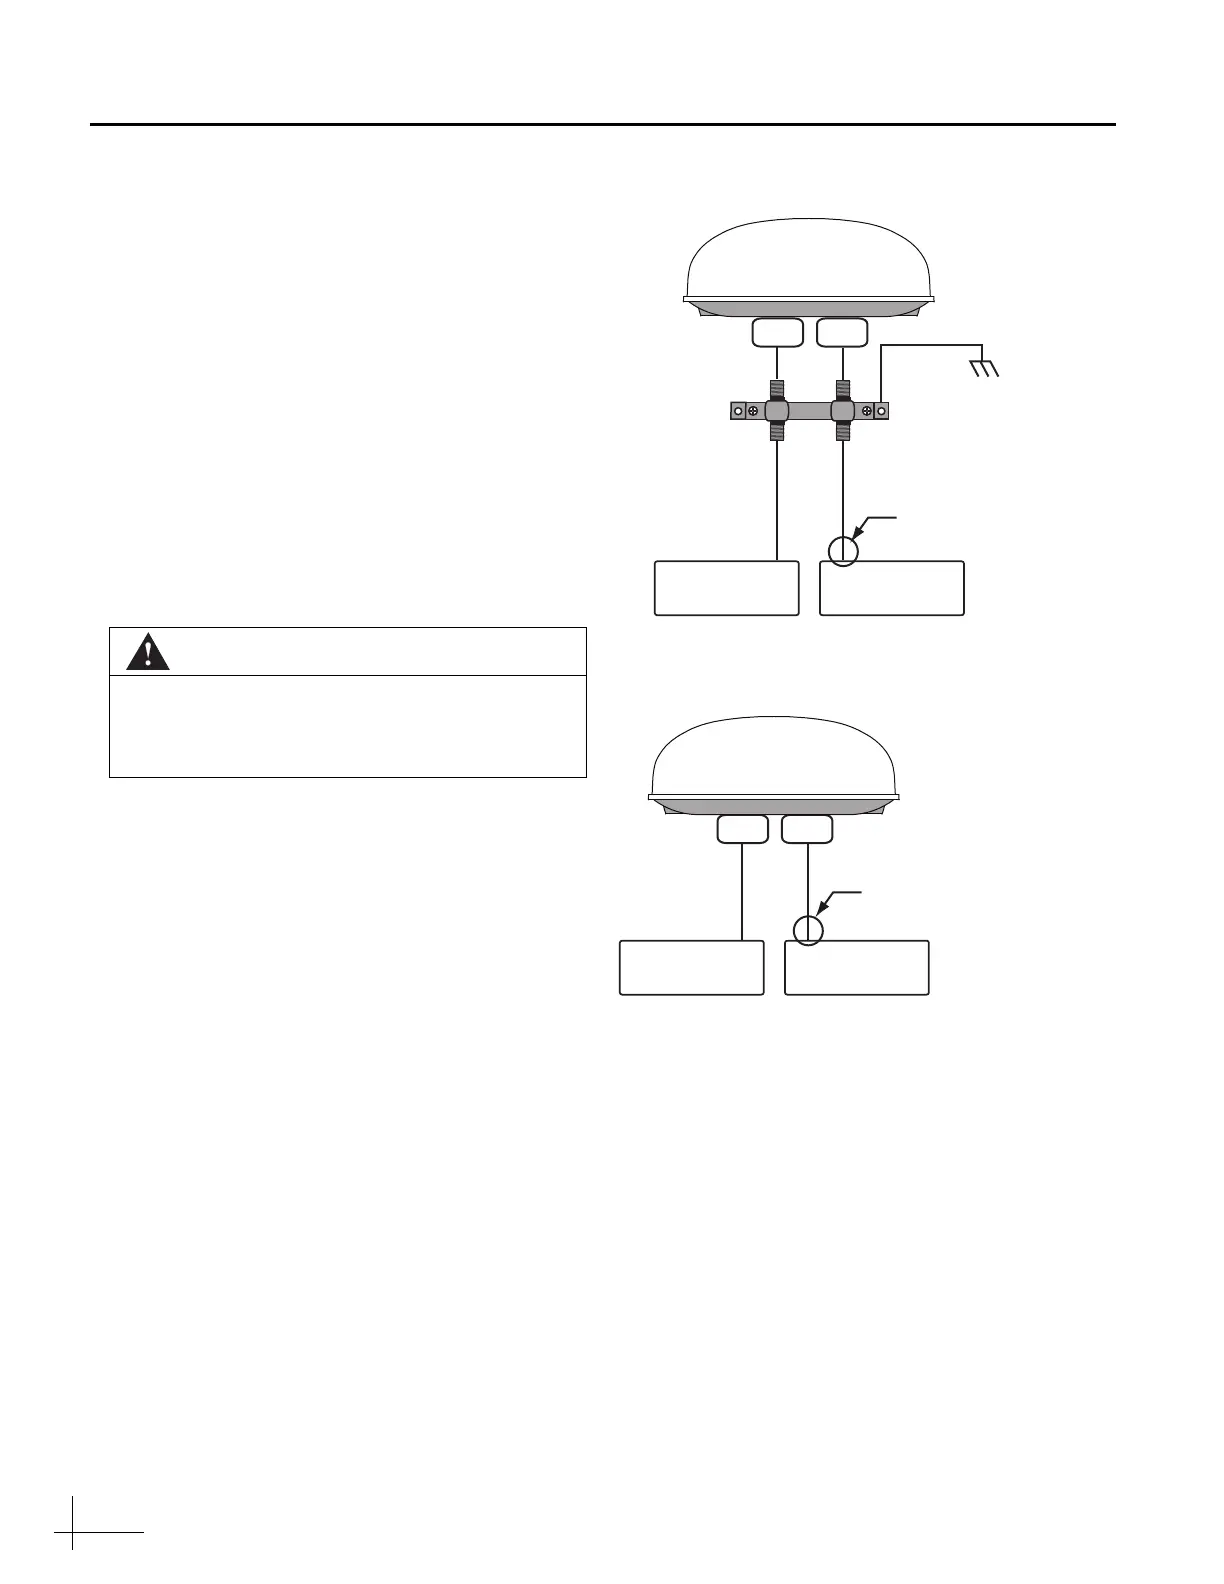
a. Systems with a grounding block -
Disconnect any components connected to the
grounding block’s RF1 connector (see
Figure 1).
Systems without a grounding block -
Disconnect any components connected to the
antenna’s RF1 cable (see Figure 2).
b. Proceed to “Step 2 - Connect the Tri-Sat
AutoSwitch Kit” on page 3
CAUTION
For your own safety, be sure to disconnect
power from all wired components before
performing this procedure.
Figure 1 Disconnecting Components with Grounding Block
Figure 2 Disconnecting Components without Grounding Block
Antenna
RF1RF2
Grounding
Block
Vehicle
AC Ground
To Connected
Component(s)
Disconnect
Here
To Connected
Component(s)
To Connected
Component(s)
Disconnect
Here
To Connected
Component(s)
RF1RF2
Antenna
 Loading...