Do you have a question about the Kwikset Premis and is the answer not in the manual?
Confirm the hole in the door is 2-1/8" (54 mm) or 1-1/2" (38 mm).
Confirm the backset is 2-3/8" or 2-3/4" (60 or 70 mm).
Confirm the hole in the door edge is 1" (25 mm) deep.
Confirm the door thickness is between 1-3/8" and 2" (35-51 mm).
Determine latch type based on door edge condition (chiseled or not).
Hold latch flush against the door edge before installation.
Confirm D-shaped hole is centered for proper latch function.
Install the correct latch (A or B) based on door preparation.
Secure the strike plate to the door frame, ensuring minimum depth.
Determine if an adapter ring is needed based on door hole diameter.
Locate and keep the necessary screws for mounting within reach.
Attach the exterior assembly and mounting plate to the door.
Remove interior cover and battery pack; ensure turnpiece shaft points up.
Connect cables and securely install the interior assembly.
Insert four AA batteries into the battery pack, ensuring correct polarity.
Ensure the door is open and insert the battery pack into the lock.
The lock automatically retracts and extends the latch to learn door orientation.
Follow manual procedure if the touchscreen indicates a failure.
Remove the security screw to unlock the interior cover window.
Attach the interior cover to the lock assembly.
Fasten the interior cover using three screws.
Download the Premis mobile application from the App Store.
Follow in-app instructions to pair your smartphone with the lock.
Activate screen, press lock symbol to lock door (requires user code).
Activate screen, enter user code to unlock door.
Automatically re-locks door after a set delay; configurable in app.
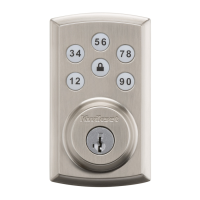
Various methods to activate the touchscreen for input.
Displays random digits before user code entry for enhanced security.
Indicates lock status (locked, unlocked) and battery level.
Audible feedback for operations and system events; can be muted.
Interprets LED flashes and beeps for errors or status.
Initiate door handing manually if the lock is moved to a new door.
Removes lock from app/HomeKit system; retains user data.
Removes lock from app/HomeKit and all user codes.
Resets lock to factory defaults, removing all data and settings.
Refer to the online Premis User Guide for comprehensive troubleshooting.
Key precautions for protecting codes, batteries, and physical security.
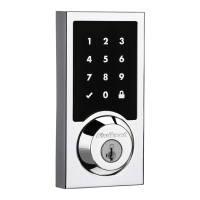
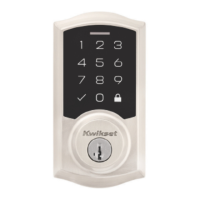
The Kwikset Premis Touchscreen Smart Lock is a sophisticated security device designed to provide convenient and secure access to your home. It integrates a touchscreen interface with smart home capabilities, allowing for various methods of locking and unlocking your door.
The primary function of the Kwikset Premis Smart Lock is to secure your door and provide multiple access options. It features a touchscreen keypad for code entry, traditional key access, and smart home integration for remote control. The lock is designed to be installed on standard doors, replacing existing deadbolts.
The lock operates by extending or retracting a latch bolt, which can be controlled manually via a turnpiece on the interior assembly, by a physical key, or electronically through the touchscreen or a connected smart device. The exterior assembly houses the touchscreen keypad and keyway, while the interior assembly contains the battery pack, turnpiece, and electronic components.
A key feature is its "door handing process," which automatically learns the orientation of your door (left-hand or right-hand) during installation. This ensures the latch bolt operates correctly. If the automatic process fails, a manual door handing procedure is available.
The lock supports user codes, which can be programmed via the Premis app or directly at the lock. These codes allow individuals to unlock the door without a physical key. For enhanced security, the "SecureScreen™" feature displays random digits before user code entry, ensuring fingerprints are spread across the keypad and preventing code detection from smudge patterns.
Smart home integration is a core aspect of the Premis lock. It is HomeKit™ compatible, allowing control via Siri commands, the Premis app, or other HomeKit-enabled devices like Apple TV (4th generation or later) for remote access. This means you can lock and unlock your door, manage user codes, and monitor the lock's status from your smartphone or other Apple devices.
The "Auto-Lock" feature provides an additional layer of security by automatically re-locking the door after a set period (defaulting to 30 seconds after unlocking), which can be adjusted within the Premis app.
Using the Kwikset Premis Smart Lock offers flexibility and convenience.
Maintaining the Kwikset Premis Smart Lock ensures its continued optimal performance and security.
| Connectivity | Bluetooth |
|---|---|
| Compatibility | Apple HomeKit |
| Power Source | 4 AA Batteries |
| User Codes | Up to 30 |
| Re-key Technology | SmartKey Security |
| Auto-Lock | Yes |
| Keyway | KW1 |
| Backup Key | Yes |
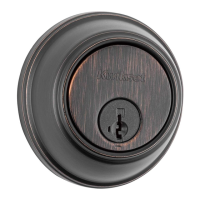
| Finish Options | Satin Nickel, Venetian Bronze |
| Smartphone App | Kwikset App |
| Voice Control | Yes, via Siri |
| Remote Access | Yes, via Apple HomeKit |
| Security | BHMA Grade 2 |