Do you have a question about the Kwikset Signature Series and is the answer not in the manual?
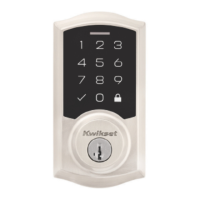
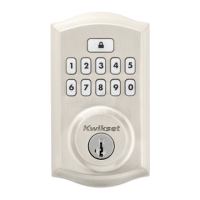
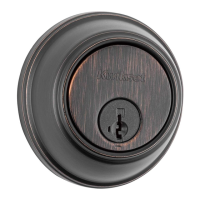
| Keyway | KW1 |
|---|---|
| Material | Metal |
| Finish | Satin Nickel, Venetian Bronze, Polished Brass |
| Security Grade | ANSI Grade 2 |
| Re-key Technology | SmartKey |
| Compatibility | Standard doors |
| Strike Plate | Reinforced |
| Door Thickness | 1-3/8" to 1-3/4" |
| Backset | Adjustable 2-3/8" or 2-3/4" |
| Handing | Reversible |
| Warranty | Limited Lifetime |
Check the primary door hole diameter for the deadbolt installation.
Confirm the backset measurement of the door latch mechanism.
Verify the diameter of the hole on the door's edge for the latch.
Ensure the door thickness is within the specified range for the lock.
Check if the door edge is chiseled for latch installation.
Insert the latch into the door edge hole, ensuring it is flush.
Verify if latch holes are centered in the door hole.
Choose between Latch "A" or Latch "B" based on door preparation.
Mount the strike plate onto the door frame securely.
Insert the lock cylinder into the exterior assembly components.
Confirm door hole diameter for correct exterior assembly fit.
Secure the exterior assembly and mounting plate to the door.
Remove battery cover and pack from the interior assembly.
Attach the interior assembly to the mounting plate.
Insert batteries and start the lock's orientation learning process.
Verify the latch bolt retracts and extends correctly after programming.
Start the process to add the lock to your smart home controller.
Press button "A" on the lock when prompted by the system.
Attach the interior cover using screws.
Learn how to access the battery pack via the cover window.
Move the interior assembly closer to the controller for successful pairing.
Repeat the steps to add the lock if the initial attempt fails.
Follow system instructions to remove the lock from the network.
Read and understand all safety warnings and guidelines.
Understand product requirements for Z-Wave network compatibility.