EasyManua.ls Logo

Kwikset SMARTCODE 917 User Manual

Kwikset SMARTCODE 917
4 pages
To Next Page IconTo Next Page
Page #1 background imageLoading...
Page #1 background image
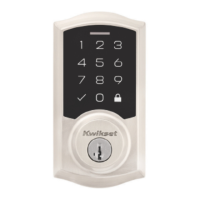
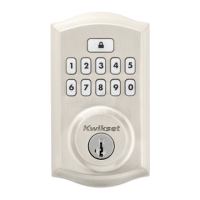
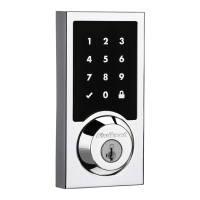
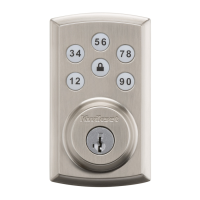
ContemporaryTraditional
Kwikset
1-800-327-5625
www.kwikset.com
A
B
Levers
P
H
Q
Parts in the box
Latch
Strike
Keys
Exterior Assembly
Fasteners
SmartKey
Tool
Interior Assembly
C
L
K
G
E
D
J2
J1
N
Allen Wrench
R
M
26298
68221
G
L
K
J2
J1
Spindle
F
9V
Battery
26298
68574
Rev 01
Installation and User Guide
If drilling a new door, use the supplied template and the complete
door drilling instructions available at www.kwikset.com/doorprep.
backset
Measure to conirm that the hole in
the door is 21/8" (54 mm).
*If you are installing this lever below
an existing lock or you plan to install a
lock above this lever, make sure that the
distance between holes is at least 61/2"
(165 mm).
Measure to conirm that the backset is
either 23/8" or 23/4" (60 or 70 mm).
23/8" or 23/4"
60 or 70 mm
See
note
below*
13/8" – 13/4"
35 – 44 mm
Measure to conirm that the hole in
the door edge is 1" (25 mm).
Measure to conirm that the door
is between 13/8" and 13/4" (35 mm
and 44 mm) thick.
A B C D
1"
25 mm
ENGLISH
21/8"
54 mm
Required tools
Ruler
Hammer
Wood block
Phillips head screwdriver
Additional Tools (depending on application)
N P
actual
size
Install the latch and strike
P (2x)
C
A
slant of latch
bolt faces
door frame
slant of latch
bolt faces
door frame
A
B
C D
Are the latch holes centered in the door hole?
Is the door edge chiseled?
Install strike on the door frame.
Hold the latch in front of the door hole, with the
latch face lush against the door edge.
lush
YES NO
No adjustment is required.
Proceed to next step.
Move the pin to
extend the latch.
door frame
YES NO
A
A
B
N (2x)
or
or
chiseled not
chiseled
Install latch in door with
supplied screws.
Use a lathead screwdriver to
lift tabs on collar of rectangular
face to remove it from latch.
Install drive-in collar.
Align tabs with
holes in collar.
B
Ensure collar
snaps into place.
Pull collar to test
for tight it.
A
Install latch in door
with wood block
and hammer.
Flathead screwdriver
ContemporaryTraditional
1 / 4
1
Prepare the door and check dimensions
2
Question and Answer IconNeed help?

Do you have a question about the Kwikset SMARTCODE 917 and is the answer not in the manual?

Kwikset SMARTCODE 917 Specifications

General IconGeneral
Lock TypeElectronic Deadbolt
KeypadYes
User CodesUp to 30
Battery4 AA batteries
SmartKey SecurityYes
StyleTraditional
ConnectivityZ-Wave
Finish OptionsSatin Nickel, Venetian Bronze
Auto-LockYes
InstallationStandard door prep
Smart Home ProtocolZ-Wave Plus
WarrantyLifetime mechanical and finish warranty, 1-year electronics warranty
Backup Power9V battery backup
KeywayKW1
Voice ControlYes (with compatible hub)
Remote AccessYes, via smart home system
SecurityANSI Grade 2

Summary

Prepare the door and check dimensions

Door and Backset Measurements

Verifies door hole size, backset, edge bore, and thickness for installation.

Install the latch and strike

Latch Installation and Alignment

Mounts the latch into the door and checks its bolt orientation.

Strike Plate Installation

Attaches the strike plate to the door frame.

Install Exterior and Interior Assemblies

Exterior Keypad and Spindle Installation

Installs the outer keypad and spindle.

Connect Cable and Secure Interior Assembly

Connects wiring and fastens the interior side.

Optional Security Set Screw

Installs a set screw for added security.

Install Levers and Test Operation

Install and Secure Levers

Attaches the interior and exterior levers.

Test Latch Operation

Verifies the latch bolt functions correctly with the strike.

Install Battery and Add User Codes

Install 9V Battery

Connects and secures the 9V battery into the interior assembly.

Add User Codes

Programs new user codes into the lock.

Manage Programming and Lock Modes

Enable/Disable Programming Code

Sets up a code for remote programming access.

Test Lock Functionality

Verifies unlocking with user codes and keys.

Configure Turnpiece Modes

Sets auto-lock or passage mode for the turnpiece.

Emergency Egress and Re-keying

Explains safe exit and lock re-keying procedures.

Advanced Features and Troubleshooting

Additional User Code Management

Guides on programming, deleting, and disabling user codes.

Turnpiece Functionality Control

Manages auto-lock duration and turnpiece behavior.

Factory Reset and Mute Lock

Procedures for resetting the lock and controlling sound.

Troubleshooting and Safeguards

Addresses keypad issues and provides safety warnings.

Related product manuals