Wireless Stereo Headset 3
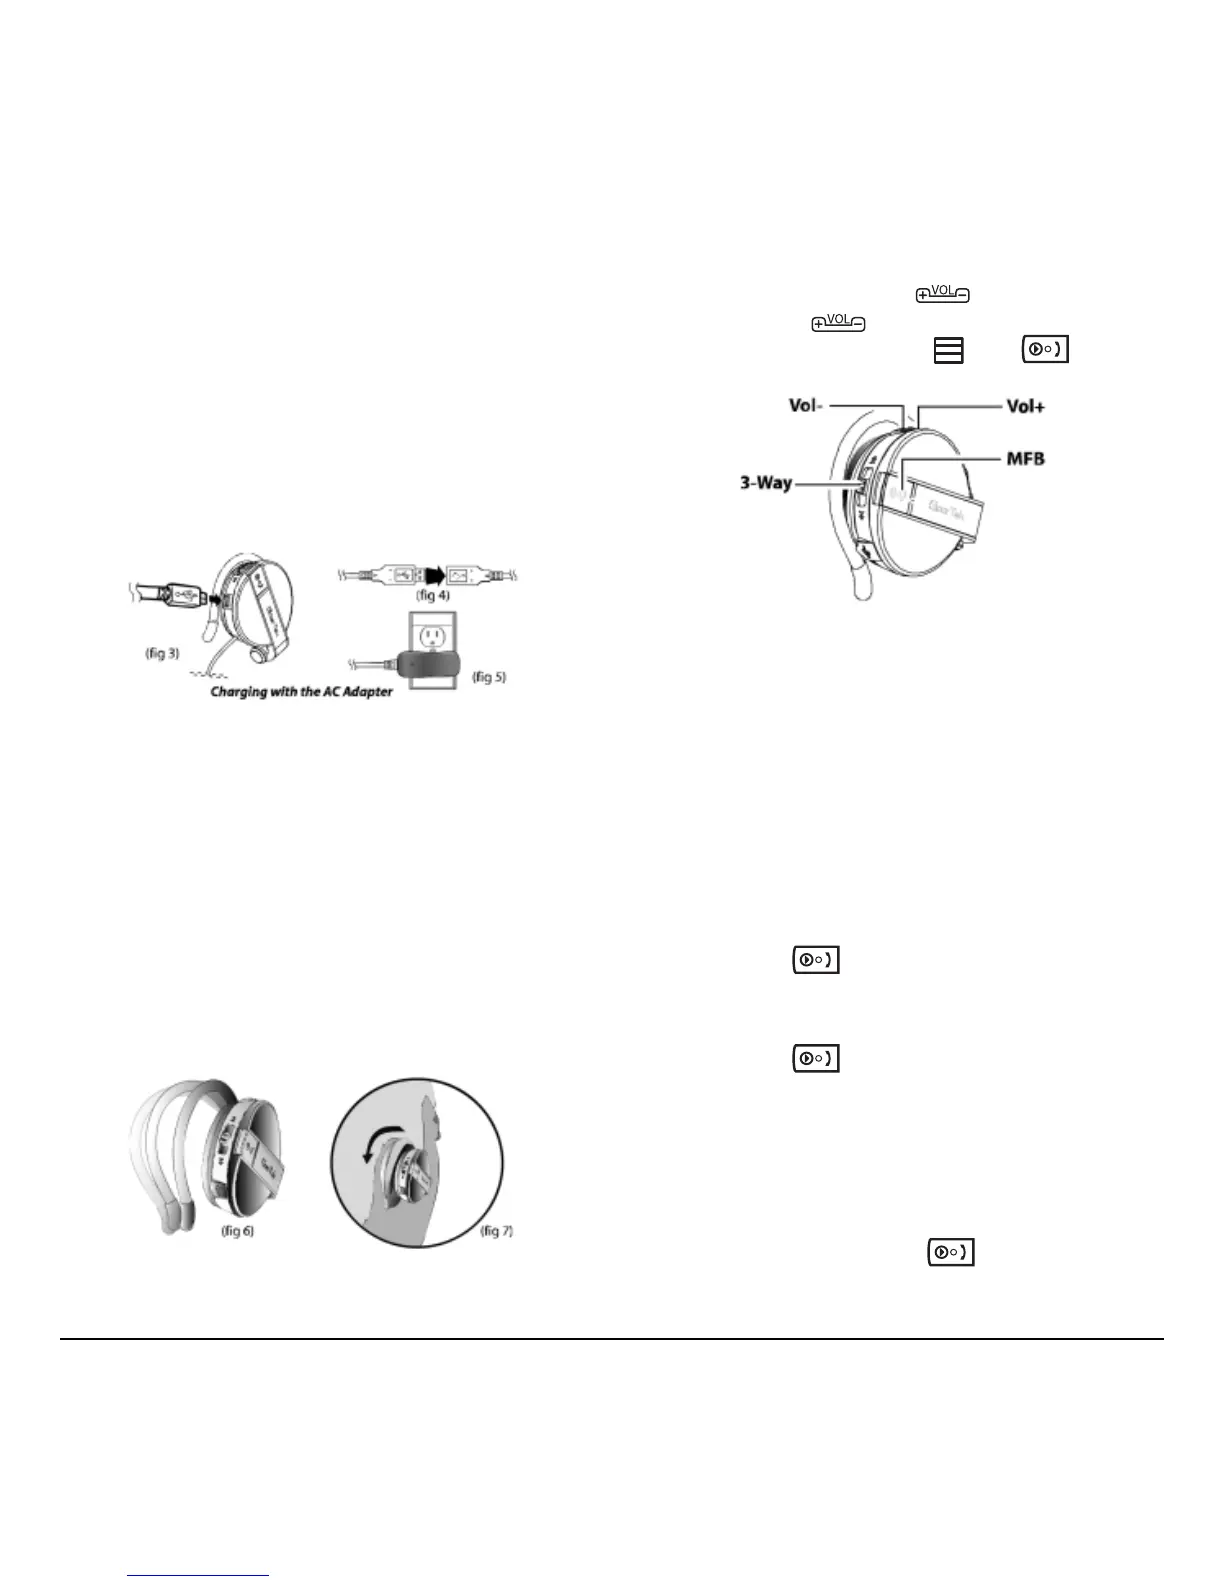
Charging with the AC adapter
1. Open the charging port dust cover.
2. Connect the small connector on the USB cable
to the USB charging port on the headset (fig 3).
3. Connect the other end of the USB cable to the
USB connector on the AC adapter (fig 4).
4. Plug the AC adapter into an electrical outlet.
The LED lights red (fig 5).
5. Unplug the cable when the red LED turns off.
Tip: You can use the headset while it is
charging.The LED flashes blue/red.
Wearing the headset
The headset is designed to rest comfortably on your
ears with the cable behind your neck. The speaker
unit with the controls goes over your right ear.
1. Hold the headset and push the ear rest with one
finger to extend it (fig 6).
2. Hook the ear rest over your ear and release the
speaker (fig 7).
Practice using controls
With the headset on, push DOWN with your
index finger and
UP with your middle finger.
Use your thumb to press the
and (fig 8).
Of course, you can use any method to operate the
controls. Just select a method and it will quickly
become second nature.
Powering the headset on and off
The headset LED lights to indicate operation status.
While trying out headset functions, you can put the
left speaker on and hold the right speaker to see the
controls and the LED.
Power up into standby mode
• Long-press until the LED flashes blue.
Power up into pairing mode
1. Long-press until the LED flashes red/blue.
After about 3 seconds, the LED flashes blue,
indicating that the Wireless Stereo Headset is in
standby mode.
Important: You cannot go from standby mode
to pairing mode. You must turn the headset
off, and then long-press
to enter
pairing mode.
(fig 8)