28
g). Left-hand oven only -
h). Pull the unit forward to access the rear of the cooker.
i). Remove both cover boxes by removing the xing
screws and lifting clear. Feed the thermostat capillary
clear of the oven.
j). Disconnect the wires from the thermostat and undo
the two xings which secure the control to the
mounting plate.
k). Fit the replacement and re-assemble in reverse order.
Ensure that the phial is screwed to the oven rear,
positioned centrally between the clips. Check that
the thermostat functions correctly.
9. To Remove an Oven Cut-o Thermostat
a). Disconnect the appliance from the electricity supply.
b). Pull the unit forward to gain access to the cover box.
Undo the cover screws and lift clear.
c). The control is located on the earth plate beside the
oven element connections.
d). Disconnect the thermostat wiring. Undo the xings
that secure the thermostat to the earth plate and
remove.
e). Fit replacement control and re-assemble parts in
reverse order.
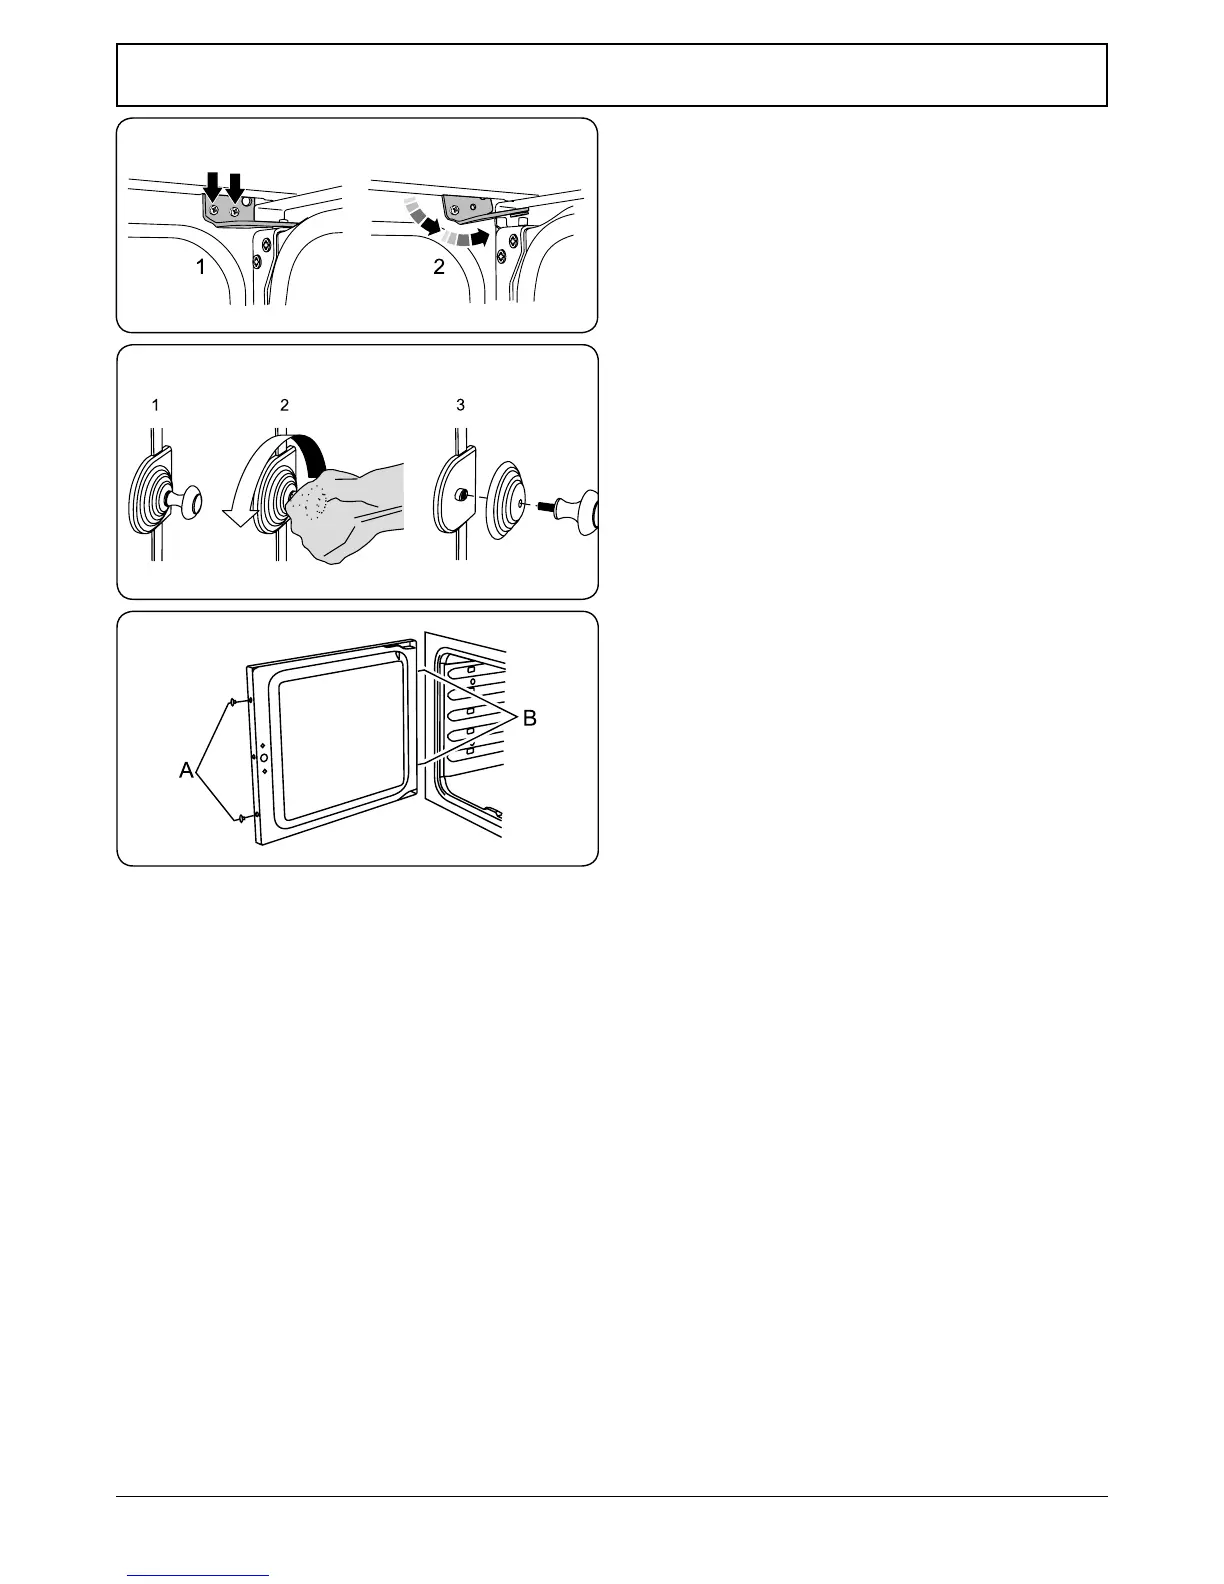
10. To Remove the Oven Door (Fig.8.3)
a). Door is very heavy - take care.
b). Open the oven door.
c). Support the door and remove the two screws which
secure the upper hinge to the front frame of the unit.
d). Remove the door from the lower hinge by lifting
slightly and moving it outward.
e). Re-assemble in reverse order.
11. To Change the Oven Outer Door Panel or
Door Trim Parts
a). The door outer panel and all the trim parts are
available as separate spares so that individual parts
can be changed.
b). Unscrew the door handle and remove the handle and
door trim handle disk (Fig.8.4).
c). Open the oven door.
d). Remove the hexagon headed screws ‘A’ and ‘B’ (two
each side) from the door (Fig.8.5).
e). Carefully lift o the door outer.
f). Place the outer panel on a clean at surface.
g). The door trim handle plate is held in place by screws
on the inside. Studs and nuts hold the other trims.
h). Replace the damaged parts and re-assemble in
reverse order.