30
f). Fit the replacement element and re-assemble parts in
reverse order.
g). Check that the oven operates correctly.
17. To remove the Left-hand Oven Bottom and Top
Elements
a). Disconnect the appliance from the electricity supply.
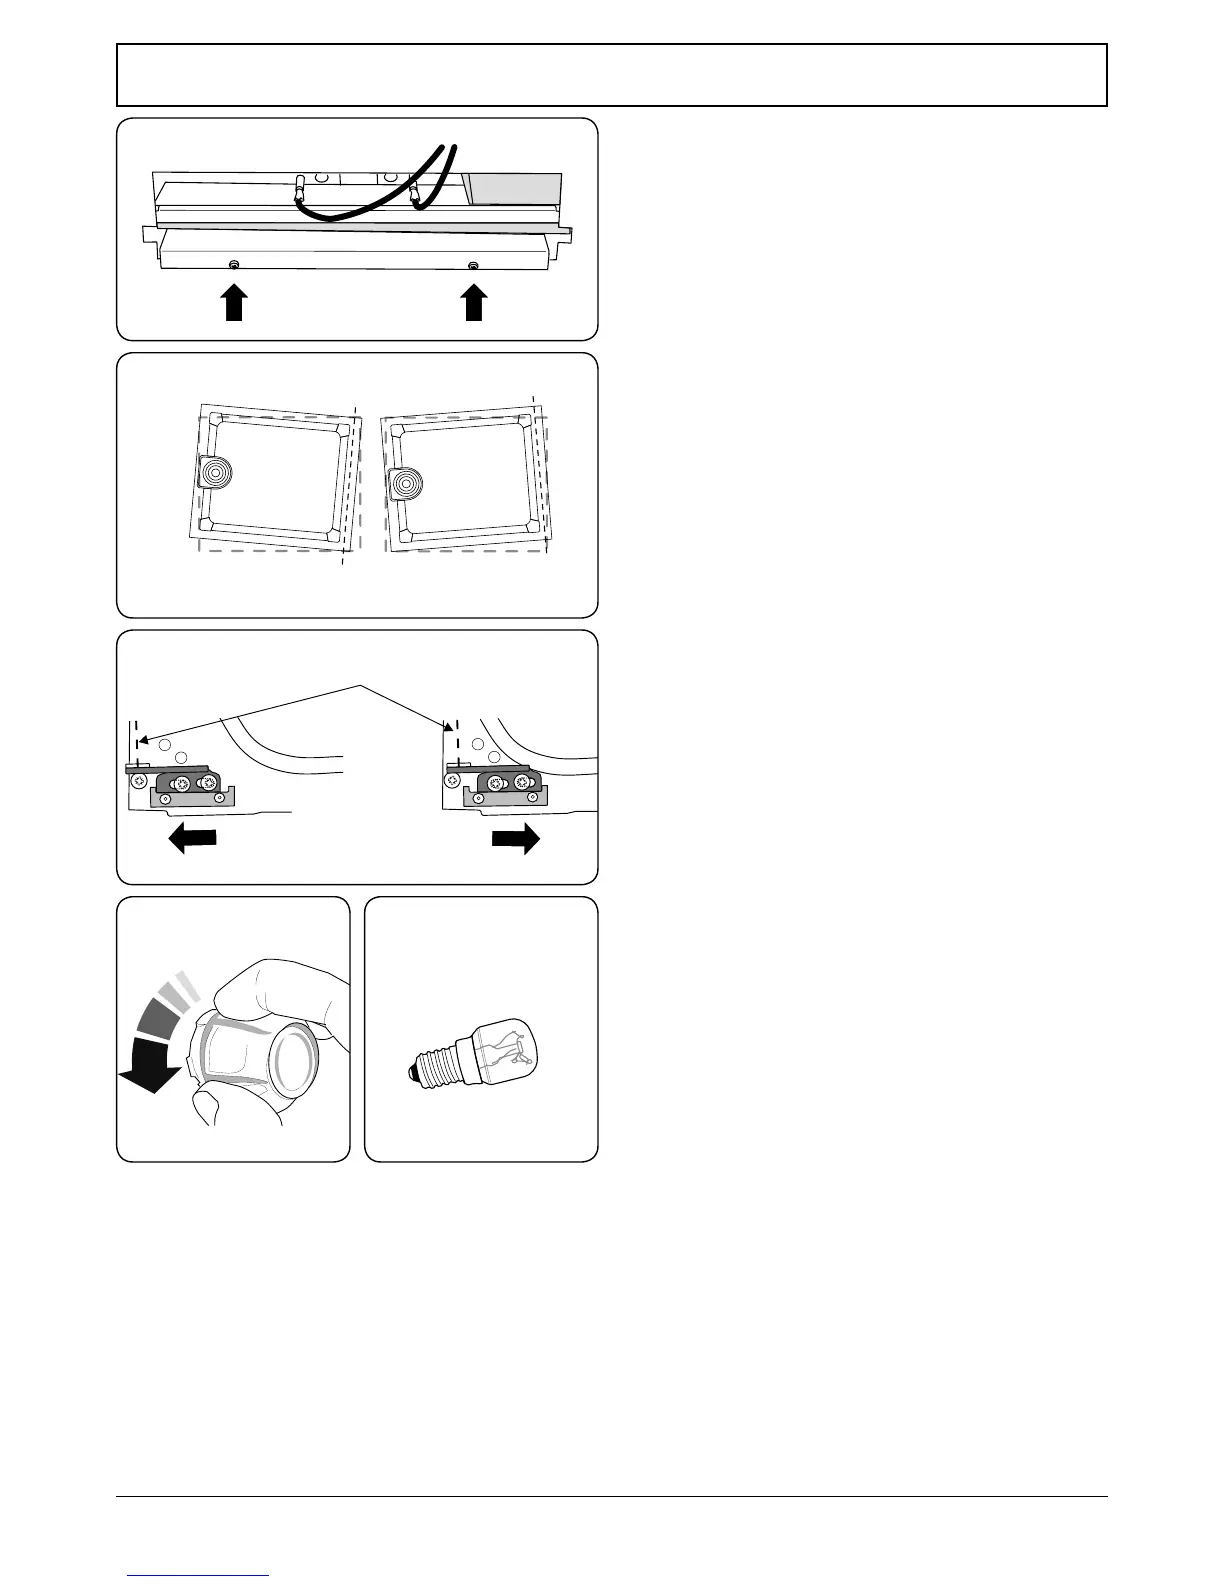
Bottom Element (Fig.8.10)
b). Pull the unit forward to access the cover boxes at the
rear of the unit. Remove the xings that secure the
cover and lift it clear.
c). Undo the terminal connections, noting their
positions.
d). Remove the xings that secure the bottom element
cover.
e). Undo the terminal connections, noting their
positions.
f). Remove the lower element support xings.
g). Remove the element bracket xings and withdraw
element.
h). Replace the element and re-assemble parts in reverse
order.
Top Element
i). Open the left-hand oven door and undo the xings
that secure the heat shield.
j). Remove the top element bracket xings and
withdraw element.
k). Replace the element and re-assemble parts in reverse
order. Check that the oven operates satisfactorily.
18. To Adjust the Oven Door Angle
a). The door bottom hinge can be adjusted to alter the
angle of the door (Fig.8.11).
b). Loosen the bottom hinge xing screws and use
the notch and a at bladed screwdriver to move
the position of the hinge to set the hinge position
(Fig.8.12). Retighten the hinge screws.
19. To Change Oven Light Bulb
a). Disconnect the appliance from the electricity supply.
b). Make sure the oven is cool. Open the oven door and
remove the oven shelves. Unscrew the bulb cover by
turning anticlockwise. It may be very sti (Fig.8.13).
c). Taking care to protect your ngers in case the bulb
should shatter, unscrew the old bulb.
d). Fit an Edison screw tting 15W 240V lamp, FOR
OVENS. It must be a special bulb, heat resistant to
300°C (Fig.8.14).
e). Screw in the new bulb, and then screw back the bulb
cover. Turn on the electricity supply and check that
the bulb now lights.
ArtNo.324-0005 Oven light bulb
ArtNo.320-0007 Oven door hinge adjustment 2
Eect of hinge adjustment - exagerrated for clarity
Centreline of hinge pin
Oven door omitted for clarity
Fig.8.10
Fig.8.11
Fig.8.12
Fig.8.13 Fig.8.14