Do you have a question about the La Crosse Technology C82929 and is the answer not in the manual?
Explains how to connect the alarm clock to the La Crosse View app for enhanced features.
Lists the operating system and connectivity requirements for mobile devices to use the app.
Instructs users on preparing the alarm clock for connection by ensuring the Wi-Fi indicator flashes.
Details the power source and backup battery requirements for the alarm clock's operation.
Addresses the compatibility of the alarm clock's power input for international use with adapters.
Provides step-by-step instructions for the initial setup and connection of the alarm clock.
Explains the purpose of the Extra Sensor area and its capacity for additional compatible sensors.
Guides users on the process of adding compatible external sensors to the alarm clock.
Details the steps required to remove or delete previously added external sensors from the alarm clock.
Outlines the procedure for adding external sensors to the associated mobile application.
Clarifies if the alarm clock automatically synchronizes time via Atomic Time signals.
Explains how to manually adjust the time settings on the alarm clock.
Explains common error messages like "LOST WIFI" and "SEE APP TO CONNECT".
Confirms the presence of a backlight and how to adjust its intensity levels.
Explains the Auto Dim feature for automatic backlight adjustment based on time.
Clarifies the necessity of the power cord for sensor updates and Wi-Fi connection.
Explains the meaning of battery icons appearing on the alarm clock display.
Guides on correcting the day of the week if it is displayed incorrectly.
Confirms the availability of 12-hour and 24-hour time format options.
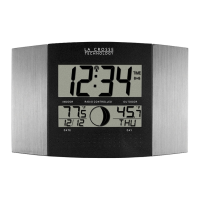
Indicates that Moon Phase is displayed instead of Forecast icons when used as a standalone device.
Details how to adjust the projection intensity levels (HI-MED-LO-OFF).
Explains how to rotate the projected image 270 degrees using the projection tube.
Describes how to select the display item (Time, Temp, etc.) for projection.
Explains how to set the projection to alternate between Time and another selected item.
Provides instructions on how to set the alarm hour and minutes.
Explains how to set the snooze duration in 5-minute intervals up to 120 minutes.
Explains how to activate or deactivate the alarm and how the icon appears.
Details how to stop the alarm ringing, including snooze functionality.
Describes how to activate snooze, its duration display, and how to exit snooze.
Provides steps to set and start the nap timer, including duration and saving settings.
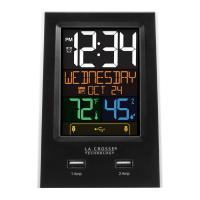
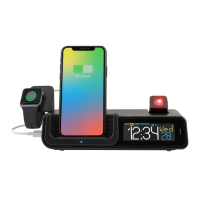
Details the 1 Amp USB charge port and its power output capabilities.
Explains the 8 additional forecast icons from AccuWeather available when connected.
States that AccuWeather HI/LO temperature predictions replace Indoor Comfort Statements.
Describes how to customize data streams with text messages or AccuWeather information.
Explains the importance of barcodes and ID numbers for the La Crosse View app.
Provides instructions for performing a factory reset and its consequences.
Details how to switch temperature display between Fahrenheit and Celsius on the sensor and clock.
This document serves as a comprehensive guide for the C82929 alarm clock, designed for weather enthusiasts who value proper running equipment. It provides valuable information on the setup, positioning, and troubleshooting of the device. For optimal viewing, it is recommended to use Adobe Reader version 10 or greater.
The C82929 alarm clock offers versatile functionality, operating either as a standalone device or connected to the La Crosse View™ app. When connected, it leverages advanced features and data streams for an enhanced user experience.
To connect your alarm clock to the La Crosse View app, ensure your mobile device meets the following requirements:
Before initiating the connection, ensure your alarm clock's Wi-Fi Indicator is flashing. If it's not, press and hold the PLUS (+) and MINUS (−) buttons simultaneously until it begins flashing, indicating it's ready to connect.
Next, check your network by connecting your mobile device (phone or tablet) to your router's 2.4GHz Wi-Fi network. For more information on router settings, visit www.lacrossetechnology.com/router_info.
Download the free La Crosse View™ app from the App Store or Google Play Store onto your mobile device. Once downloaded, open the app and follow the on-screen instructions. When connecting, it is highly recommended to follow along with the detailed support videos available at Bit.ly/LaCrosseView_Support_Playlist.
The C82929 alarm clock requires a 5-volt power cord for operation. CR2032 batteries are included for backup of time and date, but battery operation alone will not update sensor or Wi-Fi data. The power cord is essential for full functionality.
For international use, the power cord input is 100-240V, meaning it may work in other countries if the proper plug adapter (not included) is used. However, there is no guarantee of compatibility. As a standalone alarm clock, it can be used anywhere.
To set up your alarm clock, first install the power cord into a wall outlet and then into the alarm clock. Remove the insulation tab from the CR2032 battery. You can choose to connect to the La Crosse View™ app immediately or use it as a standalone alarm clock, with the option to connect later.
The Extra Sensor area on the alarm clock display can show readings from up to 4 additional, compatible sensors. These sensors can also be scanned to your La Crosse View App. If you desire extra Temperature/Humidity sensors, they can be displayed here. If no additional sensors are present or desired, this area will show the 30 NAP.
Optional extra sensors include Thermo-Hygro, Wind Speed, Rain, and Water Leak sensors, or any combination thereof. To view these sensors, simply press and release the EXTRA SENSOR button. Additional sensors can be purchased from the PARTS TAB at http://bit.ly/C82929. Note that not all sensors will read to the alarm clock; some may only read to the app. Check the chart to confirm compatibility.
To add sensors to your La Crosse View app, open the app and follow these steps. A video guide for adding devices to the La Crosse View app is available at http://bit.ly/LaCrosseView_Support_Vid_10.
When operating as a standalone alarm clock, you may occasionally see "SEE APP TO CONNECT" or "LOST WIFI."
When connected, these and other status messages are available by pressing the SET button.
Note: If the connection to the app is lost, the last readings from the Internet will remain for up to 3 hours to allow the connection to reestablish on its own.
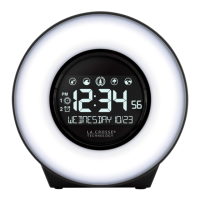
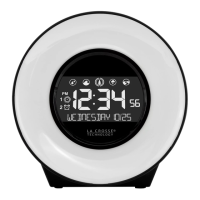
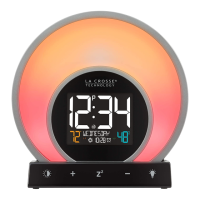
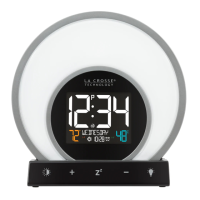
The alarm clock has a backlight with 5 intensity levels.
You can set the backlight to automatically dim to level 1 at a set hour for sleeping and return to full brightness when you wake.
No, the alarm clock cannot operate on battery power only. The power cord is required for sensors to update and, when connected, to maintain Wi-Fi connection and sensor updates.
A battery icon will appear near your INDOOR humidity reading when the batteries in your alarm clock need to be changed.
When operating as a standalone alarm clock, the day of the week is set when the Year, Month, and Date are set. If the day of the week is incorrect, but the month and date are correct, check the YEAR setting in the program menu.
Yes, you can select either 12-hour or 24-hour time format in the program menu.
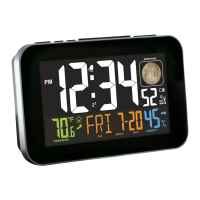
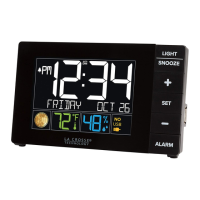
When operating as a standalone alarm clock, you will see Moon Phase icons instead of Forecast icons. For connected alarm clocks, Forecast Icons replace Moon Phase, and Internet HI/LO Temperature replaces Indoor Comfort.
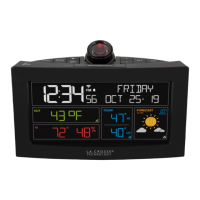
The alarm clock offers projection with intensity levels, rotation, and the ability to select what is projected.
Press and release the button to adjust the Projection Intensity (HI-MED-LO-OFF). The projection level will briefly show on the alarm clock.
The projection tube on the back of your station allows you to rotate the projected image 270 degrees. Simply turn the bottom of the tube to adjust.
Time is the default projection image. Press and release the PROJ INFO button to select a different item to project. The alarm clock will stay on the last item selected. Options include:
You can choose to alternate the Time Projection with another item, with Time and the selected item alternating every 5 seconds.
The Nap Timer is a convenient feature to avoid reprogramming your time alarm. Set it once, then simply press the NAP button to start the timer.
There is a 1 Amp USB charge port on the back of the station. The power cord must be in use to charge a device.
When your alarm clock is connected to the La Crosse View™ app, you will see an additional 8 forecast icons from AccuWeather. Your forecast will update multiple times per day. The forecast icons predict weather conditions for the next 12 hours.
There may be small discrepancies between data displayed on your alarm clock and data shown through other AccuWeather services (e.g., website, mobile app). This is common due to differences in the timing of when forecast data is fetched. Connected weather alarm clocks receive forecast updates at least 4 times daily.
Daily AccuWeather HI/LO Temperature predictions will replace Indoor Comfort Statements.
When connected, you can customize the Data Stream with Text Messages or AccuWeather information.
Wind Speed, Wind Direction, Wind Gust, UV Index, Percentage of Clouds, Sunrise Time, Sunset Time, Snow Accumulation, Moon Rise Time, Moon Set Time, Probability of T-Storms, Tornado, or Hail, Mold Risk, Air Quality, and more!
Enter up to 20 characters for special events or reminders, such as: "SOCCER TONIGHT," "ICE CREAM IN FREEZER," "GREAT JOB MATH TEST," or anything else you can think of!
The barcodes are important identifiers for the La Crosse View™ app if you choose to connect.
A factory reset will delete all sensor ID numbers and, if connected, remove all Wi-Fi connections. This is an effective way to return your alarm clock to "out of the box" condition, more so than simply removing all power. All history records will be removed, so write down anything you want to keep before performing a reset.
| Display Type | LCD |
|---|---|
| Time Format | 12/24 hour |
| Alarm Function | Yes |
| Snooze Function | Yes |
| Temperature Display | Yes |
| Backlight | Yes |
| Indoor Temperature Range | 32°F to 122°F (0°C to 50°C) |
| Power Source | AC adapter |
| Battery | AAA (not included) |