Page A - 62
A
LW 225 E / LW 245 B
Version: 19.11.2015
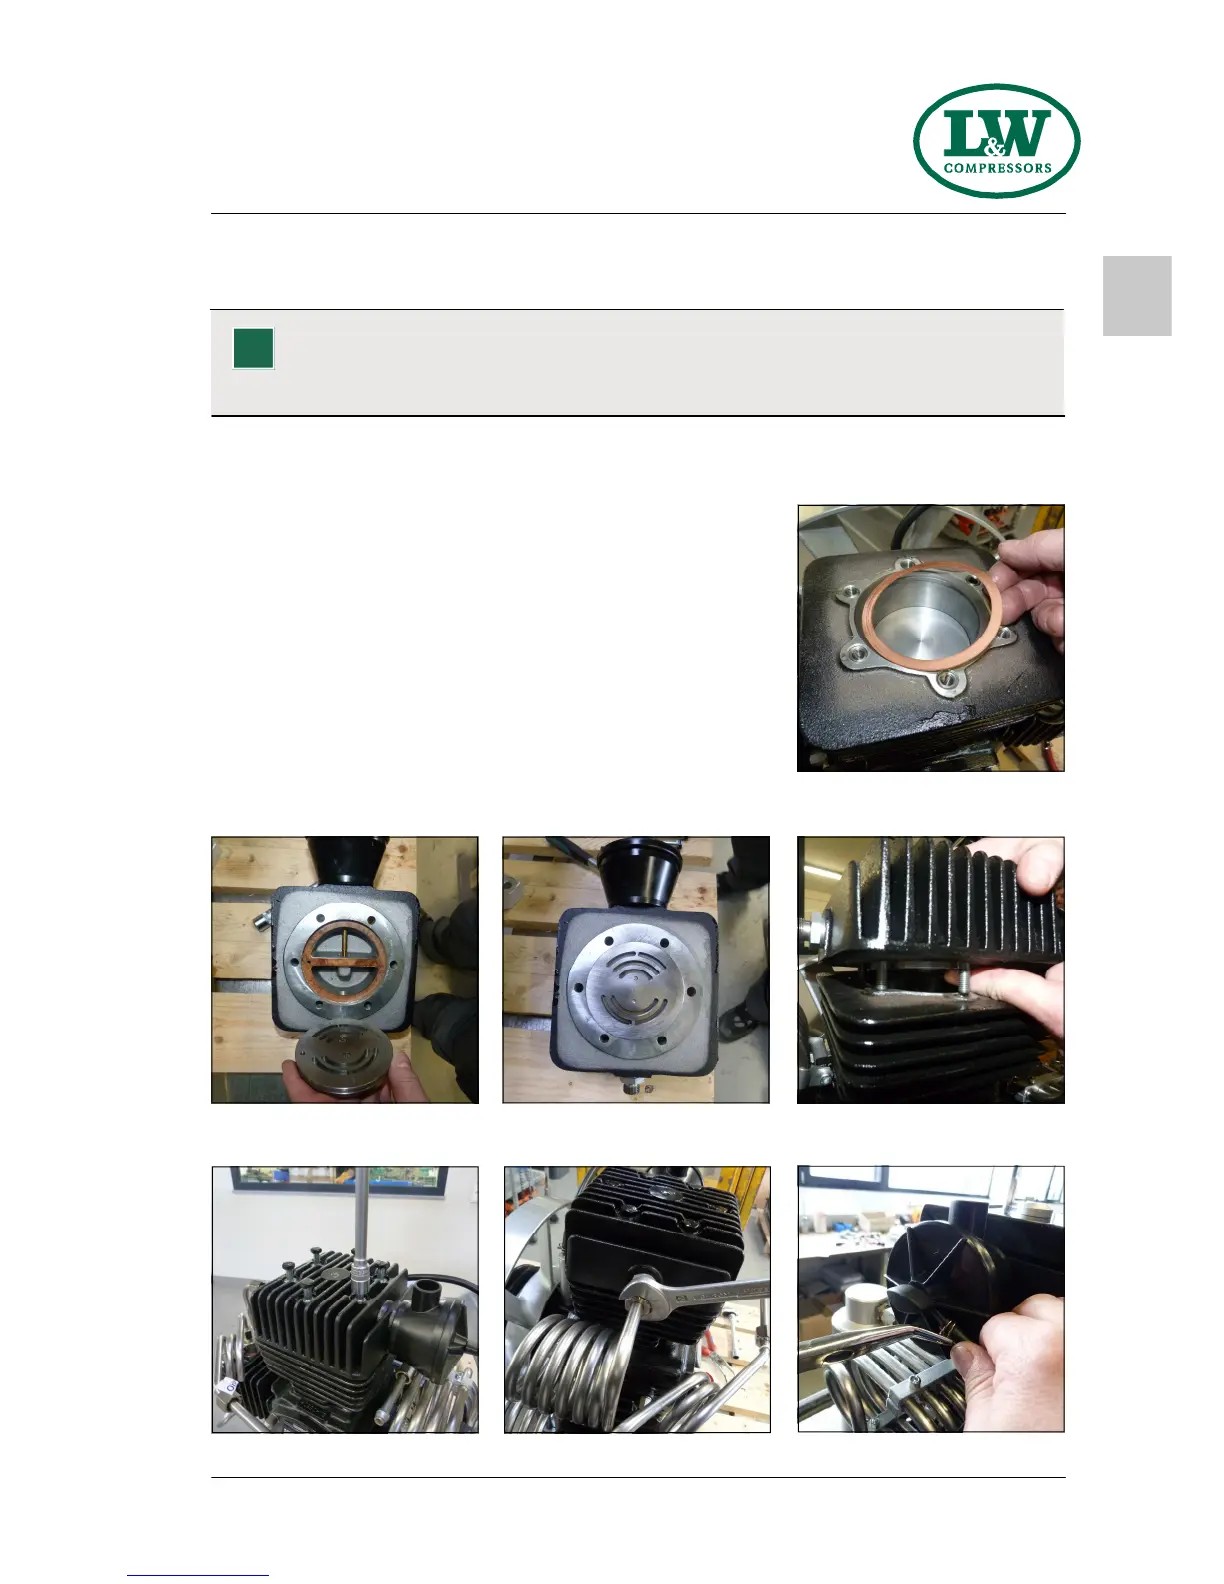
Replace in- & outlet valve 1st stage
Replace the inlet and outlet valve 1st stage as follows:
• Insert lower valve gasket (Fig.1).
• Insert upper valve gasket (Fig.2).
• Insert in– and outlet valve. CAUTION: Observe correct position
between valve centre hole and valve head locating pin (Fig. 2+3).
• Place valve head carefully on top of the cylinder (take care to
keep valve in place) (Fig.4)
• Tighten valve head screws crosswise (Fig.5).
• Set tight connecting nut and fix vent hose to air intake housing.
Don´t forget to fix spring wire clamp (Fig. 7).
Inlet and outlet valves change 1st stage is now completed
.
Note
The figures can differ from the delivered parts.
i
Fig. 2 - Correct position of in-and
outlet valve
Fig. 4 - Take care to kkeep valve in
place
Fig. 3 - Correct position of in-and
outlet valve
Fig. 6 - Pipe connection
Fig. 1 - Lower valve gasket
Fig. 5 – Valve head screws
Fig. 7 - Fix spring wire clamp
M A I N T E N A N C E A N D S E R V I C E
 Loading...