LaserPoint s.r.l.- Plus2 Power & Energy Meter Instruction Manual - All Rights Reserved 6
5. Switching Plus 2 ON and OFF - Quick start
To start a power measurement in a quick easy way, simply follow this list of actions:
- Connect a LaserPoint head to Plus 2 by plugging the head connector into the instrument 15 pin socket
(fig.2) and properly tighten the connector side screws.
- Switch Plus 2 on by keeping the On/Off switch (fig.2) pressed for few seconds until the instrument
display lights on. Should the display show “NO HEAD”, check the connector is properly plugged in the
instrument 15 pin socket.
- Check the desired laser wavelength value is displayed in the Wavelength key (Fig.4 ( g) )
- Start the measurement cycle by placing the active area of the detector head in front of the laser source.
Carefully ensure the laser beam hits the active sensor area only to avoid possible head damage and
misleading power measurements. The measured laser beam power value is soon displayed on the
instrument screen.
- To switch the instrument off press the ON/OFF switch until the display goes off.
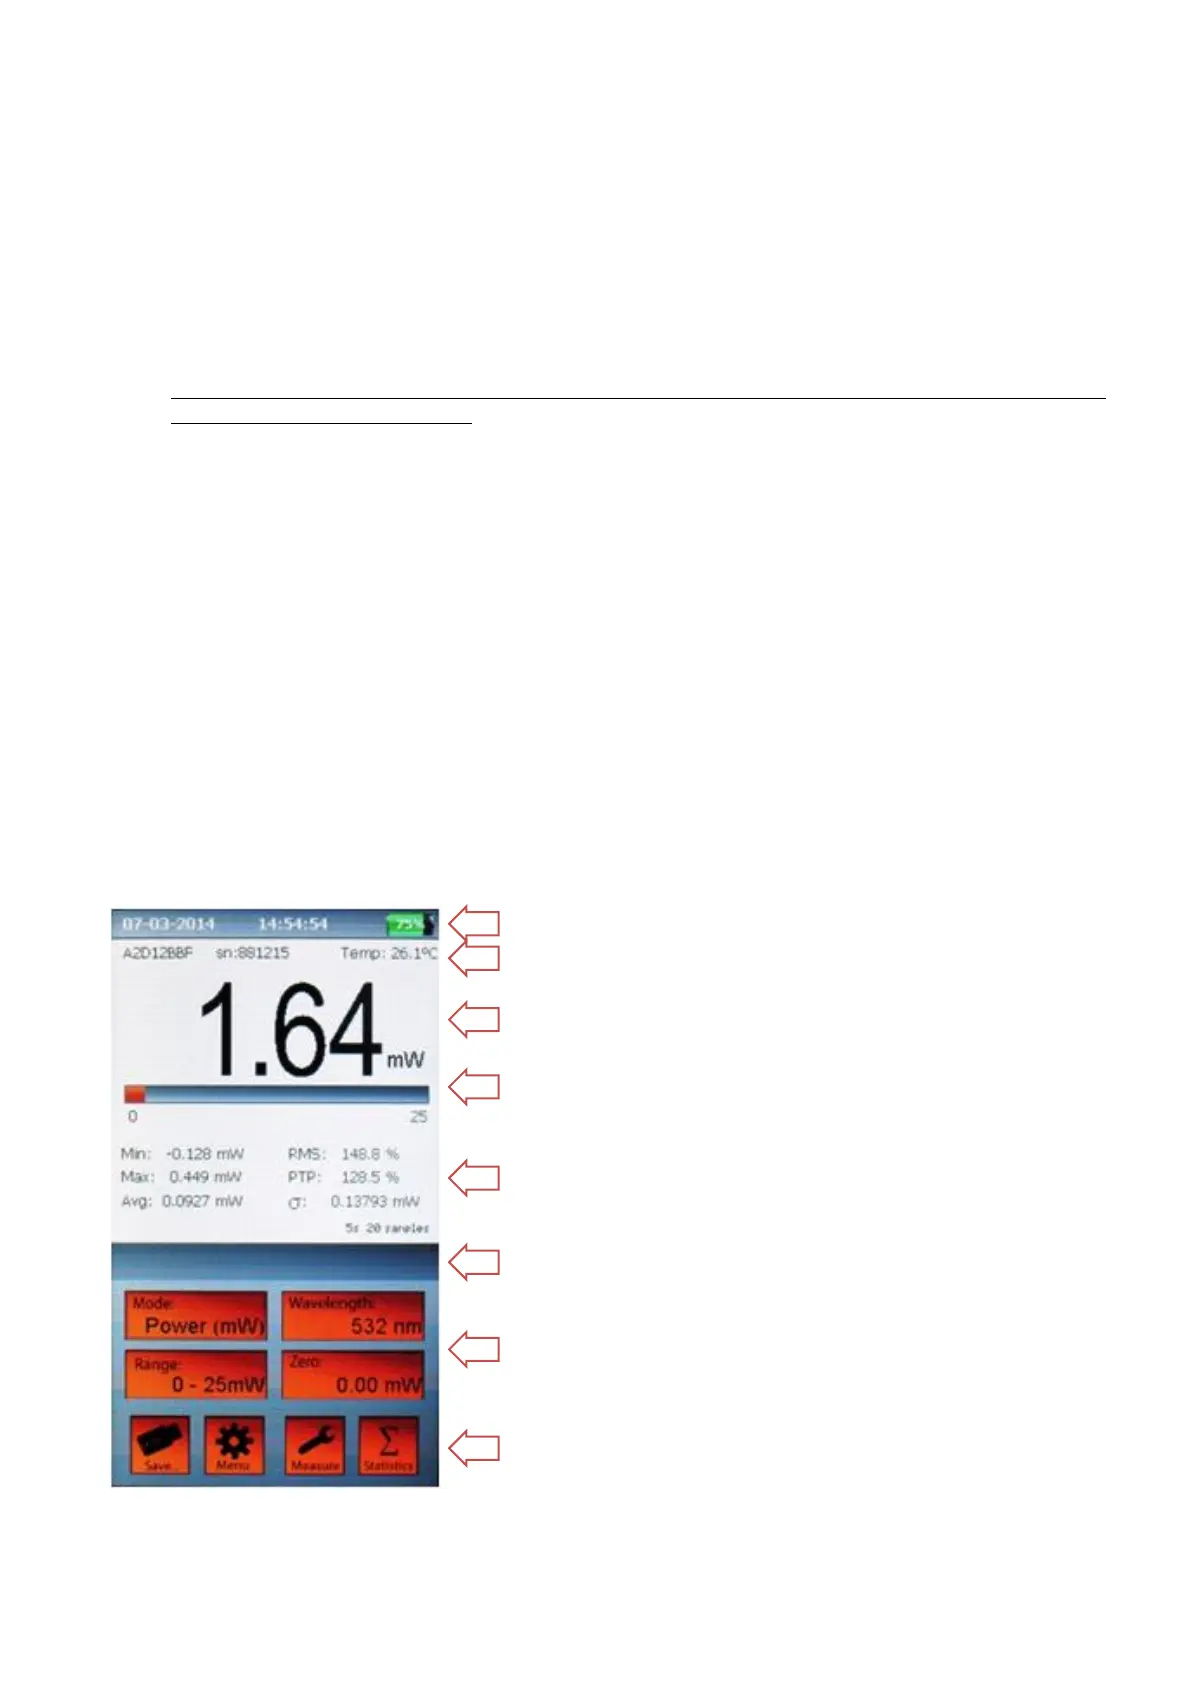
6. The touch screen display
After Plus 2 has been switched on, its multifunctional touch screen becomes the actual interactive interface
between the user and the instrument.
Fig.4 shows an image of Plus 2 meter touch screen; its display is split in two main parts: its upper part is
dedicated to reports the measurement related information and is the read out only part of the touch screen display.
The lower part is the actual interactive area of the instrument and is filled with the touch screen keys dedicated to
the instrument and measurement settings.
After touching one of the screen keys, a window as first interaction user-instrument element appears on the
display. The window generally offers two main interactive tools: a dialogue box with two or more options or a
digital keyboard, depending on what kind of input the instrument needs. These two kind of tools allow the user to
select an option or generate and enter a numerical input. Both parts of the display have horizontal sections
dedicated to specific information or interactive actions as described below:
a) Date - Time - Battery/line icon
b) Sensor Head model, serial number and operating
sensor temperature (°C)
c) 4 digits display and measured entity units
d) Analogue bar graph normalized to the selected full
scale
e) Sample counts and time regarding the statistical
elaboration, if selected. Warnings, alarms and alert
messages are also displayed in this section
f) Data logging duration and visualisation of specific
measurement settings
g) Four function keys with entity value visual
information: Mode, Wavelength, Range and Zero
h) Four function keys: Save, Menu, Measure and
Statistics offer quick access to specific interactive
windows.
Fig. 4 The touch screen display