Do you have a question about the LAUNCH TECH X-431 PRO V4.0 and is the answer not in the manual?
General safety guidelines for operating the X-431 PRO V4.0 device.
Specific safety measures when working with vehicle ECUs and related components.
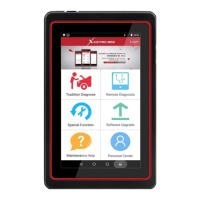
Overview of the X-431 PRO MINI as an advanced vehicle diagnostic tool.
Key functionalities of the diagnostic tool, including diagnose, update, repair data, and remote diagnosis.
Detailed description and diagram of the X-431 PRO V4.0 V2.0 handset components.
Detailed description and diagram of the X-431 PRO V4.0 V3.0 handset components.
Technical specifications for the X-431 PRO V4.0 V2.0 tablet.
Technical specifications for the X-431 PRO V4.0 V3.0 tablet.
List of all items included in the X-431 PRO V4.0 V2.0 package.
List of all items included in the X-431 PRO V4.0 V3.0 package.
Instructions for charging the X-431 PRO V4.0 device using the provided adapter.
Guidelines for battery care, charging, and optimal usage to maintain performance.
Step-by-step instructions on how to power the device on and off correctly.
Basic touch gestures like tap, long press, and slide for device navigation.
Explanation of the device's on-screen buttons and their functions for user interaction.
Guidance on adjusting screen brightness to conserve battery and improve visibility.
Procedure for setting the device's automatic sleep mode to save power.
Steps to connect the diagnostic tool to a wireless Wi-Fi network.
Procedure to disconnect the device from an active Wi-Fi network connection.
A step-by-step flowchart illustrating the diagnostic process for new users.
First-time setup and initial operations, including launching the app and starting diagnostics.
Guide to creating a user account and activating the VCI device with serial and activation codes.
Description of the diagnostic software interface elements like the search bar and vehicle region buttons.
Overview of the main functions available in the Job menu, such as Diagnose, Special Function, etc.
Explanation of the diagnostic toolbar buttons for printing data and controlling the session.
Pre-test conditions and necessary steps before connecting the VCI device to a vehicle.
Information on how to locate the Data Link Connector (DLC) on various vehicle models.
Methods for connecting the VCI device to a vehicle's DLC for OBD II and non-OBD II types.
Function to retrieve a comprehensive health report of vehicle ECUs.
Option to perform a quick scan of all installed systems on the vehicle.
Manually select specific test systems and functions for diagnosis.
Displaying system mode, vehicle VIN, software, and ECU version details.
Viewing detailed diagnostic trouble codes (DTCs) and their descriptions.
Erasing diagnostic trouble codes from the vehicle's ECU after repairs.
Capturing and viewing real-time live data for parameter monitoring.
Performing active tests on vehicle components and subsystems.
Resets the engine oil life system after maintenance is performed.
Resets the electronic parking brake system after brake pad replacement.
Calibrates the steering angle sensor to ensure accurate steering alignment.
Bleeds air from the Anti-lock Braking System to restore brake sensitivity.
Resets the tire pressure monitoring system after sensor replacement or tire changes.
Learns crankshaft position sensor data for accurate engine misfire diagnosis.
Manages immobilizer system functions, including anti-theft key matching.
Writes or rewrites injector codes in the ECU for precise fuel injection control.
Resets the vehicle battery monitoring unit and performs battery matching.
Clears Particulate Matter (PM) from the DPF filter to maintain performance.
Resets throttle actuator initial settings to default states for accurate air intake control.
Description of the remote diagnosis interface elements, including search and contact features.
Steps to initiate and conduct a remote diagnosis session with another technician.
Process for updating the diagnostic software and mobile application to the latest versions.
Instructions for renewing the software subscription using payment methods like PayPal.
View, delete, and share diagnostic reports generated during vehicle diagnosis.
Manage activated VCI devices and switch between multiple connectors.
Procedure to activate a VCI device using its serial number and activation code.
Process to upgrade and fix diagnostic firmware for the device.
Provide feedback on diagnostic problems for analysis and troubleshooting.
Check the status of paid and unpaid orders for services or parts.
Check the expiry status of a diagnostic software subscription renewal card.
View and configure personal user information settings.
Modify the login password for the user account.
Configure application settings and view software version information.
Set the preferred units of measurement (Metric or English).
Define workshop details, address, and contact information for printouts.
Establish a wireless connection between the tablet and a Wi-Fi printer.
Information regarding the software version and legal disclaimers.
Log out the current user ID from the system.
Functionality for sending and receiving emails on the device.
Steps to set up an email account on the device.
Procedure to add an additional email account to the device.
Using the built-in web browser for internet access and browsing.
Launching the web browser application.
Instructions for downloading files, pictures, and applications via the browser.
Transferring media files and applications between the PC and the tablet.
Connecting the tablet to a PC using a USB cable for data transfer.
Steps to access the tablet's storage or files on a PC.
Guide to installing applications from unknown sources on the device.
Clear browsing records and app cache to improve tablet performance and speed.
Tips and methods to conserve battery power on the device.
Troubleshooting steps for communication errors between the device and the vehicle's ECU.
Troubleshooting steps when unable to access the vehicle's ECU system.
Procedure for activating a new VCI device, including initial registration and connection.
Troubleshooting steps for a slow-performing system, including app management and rebooting.
Instructions for performing a factory data reset on the tablet, with a warning about data loss.
| Brand | LAUNCH TECH |
|---|---|
| Model | X-431 PRO V4.0 |
| Type | Automotive Diagnostic Scanner |
| Operating System | Android |
| Processor | Quad-Core |
| RAM | 2 GB |
| Storage | 16 GB |
| Connectivity | Wi-Fi, Bluetooth |
| Languages | Multiple languages supported |
| Special Functions | Oil reset, TPMS |
| Functions | Comprehensive vehicle diagnostics |
| Update Method | Online updates |
| Diagnostic Functions | Read and clear DTCs, live data, active tests |