EasyManuals Logo

Launch CReader 3001 User Manual

Launch CReader 3001
37 pages
To Next Page IconTo Next Page
To Previous Page IconTo Previous Page
Page #27 background imageLoading...
Page #27 background image
LAUNCH
3001
User’s Manual
22
4. Connection
4.1 Preparation & Connection
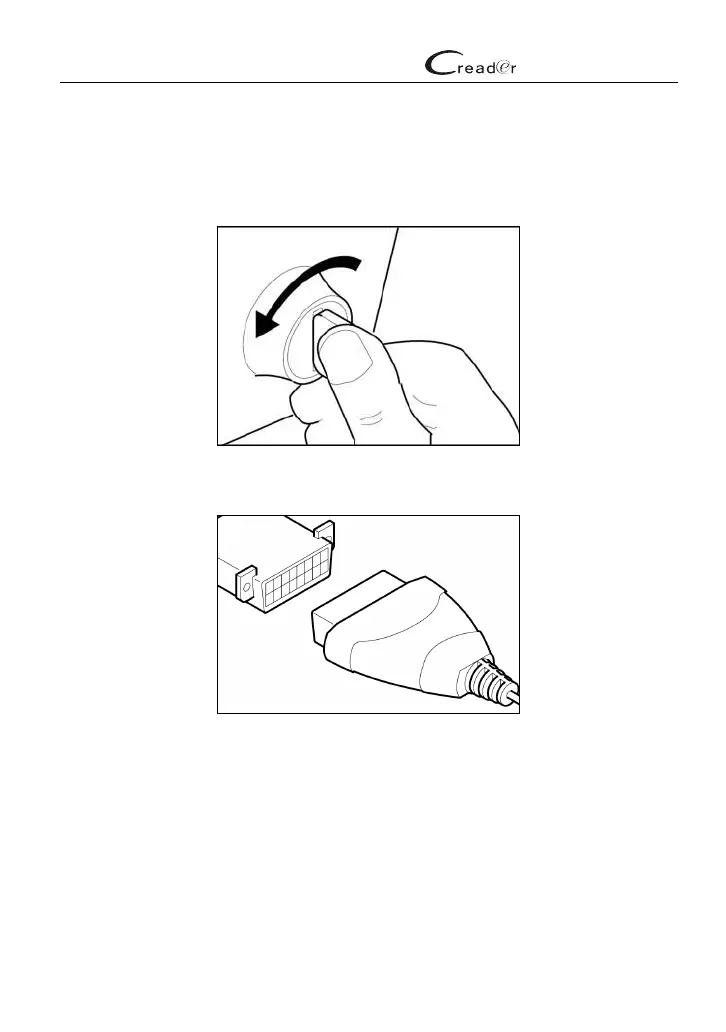
1. Turn the ignition off.
2. Locate vehicle’s DLC socket: Refer to Chapter 2.2 for the location.
3. Plug the other end of the diagnostic cable into the vehicle’s DLC.
*Notes:
A plastic DLC cover may be found for some vehicles and you need to remove it
before plugging the diagnostic cable.
The cable connector is keyed and will only fit one way. If you have problems
connecting the cable connector to the DLC, rotate the connector 180
0
and try again.
4. Turn the ignition on. Engine can be off or running.
5. After finishing, the system will start initializing. After initialization, the system
will enter the main menu interface.

Questions and Answers:

Question and Answer IconNeed help?

Do you have a question about the Launch CReader 3001 and is the answer not in the manual?

Launch CReader 3001 Specifications

General IconGeneral
Screen Resolution320 x 240 pixels
Display2.4 inch TFT color display
ConnectivityUSB
Power Source9V - 18V via OBD II port
Supported ProtocolsJ1850 VPW, J1850 PWM, and CAN
CompatibilityCompatible with most 1996 and newer OBD II & CAN compliant vehicles
FunctionsRead Codes, Erase Codes, I/M Readiness, Data Stream, Freeze Frame, Vehicle Information
Update MethodUSB update
LanguagesEnglish, French, Spanish, German, Russian, Portuguese

Related product manuals