Page | 28 Proofer Operators Manual 1-2022 (English)
Copyright 2022 LBC Bakery Equipment Inc. Tulalip WA
Retarder/Proofer Control Set-up and configurations
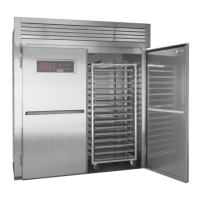
LBC Retarder/proofers are available in a broad variety of sizes to be used in a variety of applications.
Controls are provided that can be configured to maximize performance, minimize energy usage, control
water consumption, and reduce wear and tear. This section covers the settings and peripheral
components of the control and how to properly configure them.
Retarder/Proofer Control Functions under 0008 access code:
To access the Retarder/Proofer function settings:
1) Press the POWER button to turn the retarder control off.
2) Press the “Up” arrow button and the Auto/Manual button
simultaneously until "0000" appears in the temperature
and humidity displays.
3) Press the Up or Down Arrow button to change the display
to "0008".
4) Press the Time button to advance through the functions.
5) Press the up or down arrows to change the setting.
6) Press the Time button to advance to F1.
8) Press the POWER button to exit the function settings.
• F1: This setting is used to change the displayed temperature by offsetting it up or down. This
should be used only when compared to an accurate thermometer. Example: If the displayed
temperature is 90F and an accurate temperature sensing device displays 85, the offset can be
increased by 5 degrees from its current setting. So, if the offset is at -7, increasing the offset by 5
degrees will result in an offset of -2.
• F2: This setting is used to change the displayed humidity by offsetting it up or down. This
should be used only when compared to an accurate hygrometer. Example: If the displayed
humidity is 90% and an accurate humidity sensing device displays 85%, the offset can be
decreased by 5% from its current setting. So, if the offset is at -7, decreasing the offset by 5
degrees will result in an offset of -12.
• F3: This setting will limit how far from the set point the temperature display can vary. It is not
recommended to use this at any setting other than “00”.
• F4: This setting will limit how far from the set point the humidity display can vary. It is not
recommended to use this at any setting other than “00”.
• F5: This setting controls the PID function of the heat control. Leave this at “00”.
• F6: This setting controls the length of the PID cycle. Leave it set to “00”.
• F7: This setting controls the frequency of the PID cycle. Leave it set to “00”.
• F8: This setting sets the frequency of the humidity cycle. Set this number to “32”. If the
humidity is slow to recover with a load in the proofer, lower this number to “16”.
• F9: This setting controls how long the humidity output will be on per humidity cycle. “Set it to
04”. If the humidity is overshooting when loaded, lower this to “02”.
• F10: This setting determines how long the control will wait before starting the refrigeration
cycle. This delay is meant to protect the compressor from overheating. This does not need to
be greater than “00”.