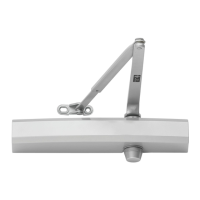
Page 15
CONTROLLER SETTING ADJUSTMENTS
PMOC KCOL EGLAHCS 7002 © YNA
ETAD.GFM
ROPPUS LACINHCET T
1-800-526-2400
rllosregni.ncl.WWW and.com
®
2
3
4
9
5
6
7
8
1
Consult diagram above. Each setting / indicators labeled #1 - #9, which correspond with numbers below. Adjustments for #2 & #3
are made with a small at blade screwdriver. Turn clockwise to increase speed / force or counterclockwise to decrease speed / force.
Controller functions are preset before shipment. Adjustments should be made only if necessary. Factory pre-set positions are shown
on controller label.
1. ON/OFF SWITCH - Allows operator to be turned on & off without disconnecting power.
2. OPENING SPEED - Adjusts opening speed of door. Opening speed must be within ANSI A156.19 specications (see TABLE 3
on pg. 18). Large, heavy doors and / or strong door closer backcheck settings may require a slower speed adjustment for proper
operation. As a general rule, a slower door speed and use of an auxiliary door stop will provide smoother operation.
3. OPENING FORCE - Adjusts amount of force the door exerts when opening (15 lbs. max). Normal adjustment is for door to open
90° or encounter an auxiliary door stop, where motor will stop. If clutch slips more than 1/4 turn when door stops, adjust OPENING
FORCE down until there is minimal or no clutch slippage. If OPENING FORCE is increased too much, it may overpower clutch &
motor. Motor will stop running after 15 seconds. It will then go into HOLD OPEN DELAY and cycle through the closing sequence.
4. TIME DISPLAY - Displays a numeric value relating to the timing adjustment indicated on the mode display. 16 = Approximately 5
Seconds.
5. UP BUTTON - Increases time display number or change from (OFF to ON) when in programming mode.
6. DOWN BUTTON - Decreases time display number or change from (ON to OFF) when in programming mode.
7. MODE BUTTON - Advances through programming setups indicated on Mode Indicator.
8. OPERATING INDICATORS - Displays operating information about internal functions and external hardware.
9. MODE INDICATION - When programming, indicates the program mode currently being displayed.