UHF Digital Hybrid Wireless
®
Rio Rancho, NM
21
Menu Item Descriptions
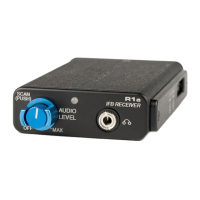
LEVEL
This setup screen displays the audio output level of the
receiver in dBu when the transmitter is fully modulated.
Press the MENU/SEL button to toggle between receiver
1 and receiver 2. Use the UP or DOWN buttons to
change the level. Range is from -50 to +5 dBu in 1 dB
steps. Press the BACK button to leave this screen.
The output levels at the two jacks may be set indepen-
dently, regardless of the diversity mode setting.
DEFAULT
Restores the factory default settings.
LOCALE
The LOCALE setup screen has two settings, “--” and
“JA”. If “JA” is selected, C2 band coverage stops at
713.9 MHz. If “--” is selected, C2 band coverage goes
all the way to 716.775 MHz.
Note: LOCALE settings appear in menu ONLY on
C2 Band Units.
SMARTUNE
The receiver will scan through its tuning bandwidth and
automatically find clear frequencies. The newly found
frequency will be displayed and can then be sent to the
matching transmitter via the IR link, or be set manually.
Note: Pressing BACK during an active scan will
restore the operating frequency to what it was set
at pre-scan.
When the DIVMODE is set to SWITCHED, there are
two different frequencies that can be discovered, so the
LCD screens will prompt you through the procedure for
one receiver, then continue to repeat the process for
the other receiver. When the DIVMODE is set to RATIO,
there is only one frequency to be found.
The sample screens below are for the SWITCHED
mode. Similar screens appear for the RATIO mode, but
there is only one frequency to be discovered.
OK
SYNC
1
TUNE RX2
NOW? YES
IS TX1
ON? NO
TX 1
BAND
B1
SMART
TUNE
1
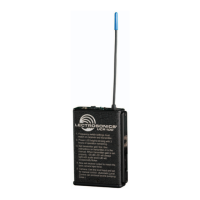
Navigate to the SMARTUNE screen
and press MENU/SEL.
The scan can cover all three
blocks in the band, or only one of
the three. Use the UP and DOWN
arrows to select.
After the scanning is complete,
the LCD will prompt to transfer
the frequency to the matching
transmitter. Press the DOWN arrow
to start the IR transfer, or MENU/
SEL to continue.
After leaving the SYNC screen,
the LCD will ask about setting up
the other receiver. Use the UP and
DOWN arrows to toggle YES/NO
then press MENU/SEL.
The transmitter for the first channel
must be turned on before the
second channel is scanned. Make
sure the first channel transmitter
is on, then use the UP and DOWN
arrows to toggle to a YES answer
and press MENU/SEL.