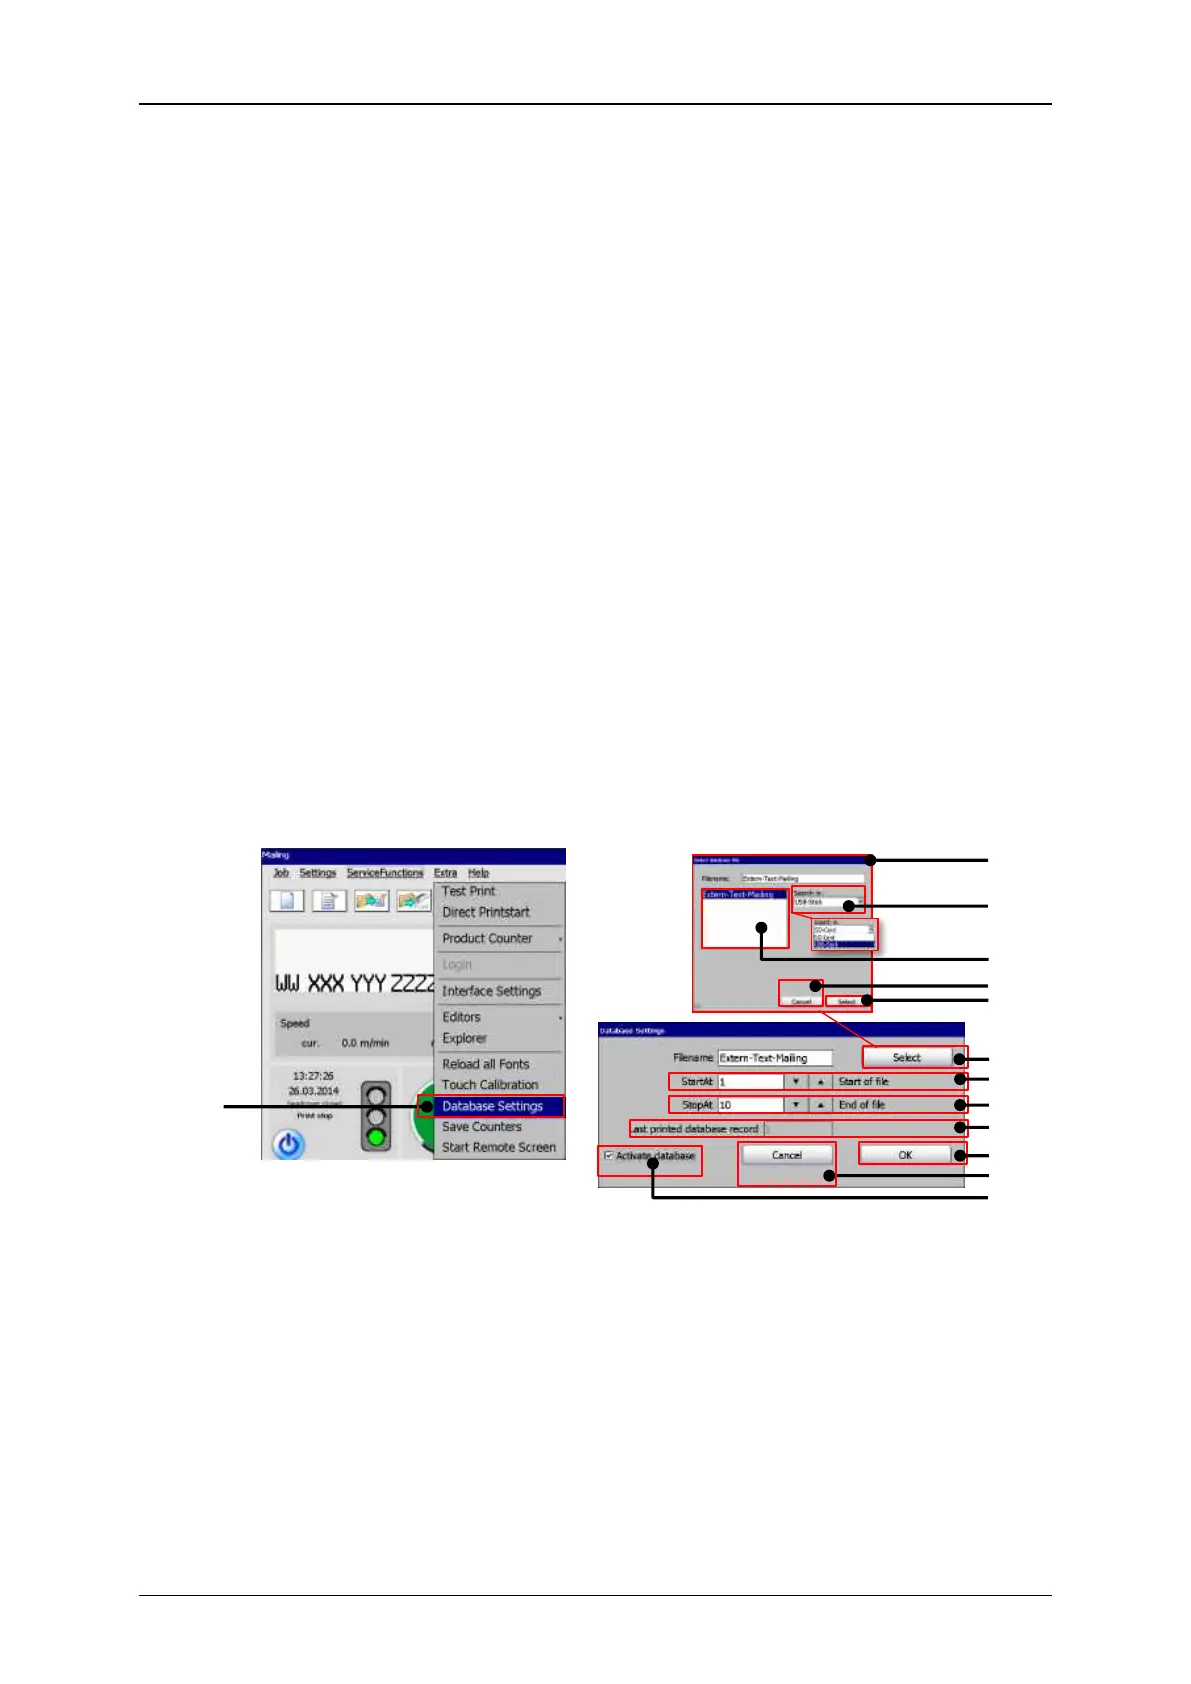
See figure 166
Firstly you have to connect the USB stick to the USB port of the JET3 printer. In the
next step you will have to set the parameter for the database. The database settings
are an option of the <Extra> drop-down menu (1).
Pressing the <Select> button of the dialog box (2) will open an <Open File> dialog
box (3). Selecting “USB” from the drop-down list (4) will show the *.ljd files on the
USB stick (5).
Choose the requested file and confirm with the <Select> button (7). You can leave
this dialog box without any changes by pressing the <Cancel> button (6).
Now some basic information of the loaded data file is shown in the database settings
dialog box. There are display fields which show the number of the first (8) and the
last record (9) and the number of the last printed record (10).
You will have to check off the checkbox <Activate database> (13) before you can
leave the dialog box with the <OK> button (11) to confirm the settings. You can
leave the dialog box without changes by pressing the <Cancel> button (12).
 Loading...


