☞
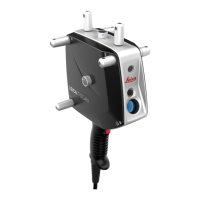
For measurements that require utmost accuracy, a warm-up time
of 30 minutes must be observed for the T‑Scan sensor before
starting the measurement.
Observe the following guidelines for the Laser Tracker:
•
Set up the Laser Tracker in a way that the 6DOF position of the T‑Scan
sensor can be captured from all required measurement positions.
•
Ensure that the T‑Scan sensor is operated within the working range of
the Laser Tracker system.
•
Ensure that the visual contact between the tracking head and the
reflectors/LEDs on the T‑Scan sensor is given.
•
When orientating the T‑Scan sensor, be careful of the tilt between the
prism surface of the locked-on side of the T‑Scan and the measurement
beam of the Laser Tracker. The maximum tilt between prism surface
and beam is ±46°.
☞
Do not expose the Laser Tracker system to vibrations or other
disturbing influences that may affect the accuracy of the system.
Pay attention to the ambient temperature and possible airflow.
To obtain the non-contact measurement data, the T‑Scan sensor uses the
principle of laser triangulation:
The laser source directs its laser beam to the measuring object. A part of the
diffuse reflected light hits the receiving optical lens in a certain angle. This
angle is called triangulation angle and is used to determine the distance.
Necessary surface characteristics
To achieve optimal measurement results, the measuring object should have a
bright, diffusely reflecting surface, where the emerging laser light does not
penetrate. Objects with surfaces that do not diffusely reflect the laser light
are less suitable. Objects with surfaces that absorb the laser light completely
are not suitable at all.
Orientate the T‑Scan sensor in a way that the emerging laser beam perpen-
dicularly impinges on the surface of the measuring object (a). This ensures
that the laser beam is reflected in an optimal way for the best accuracy.
This advice also applies for the laterally deflected laser beam (scan line).
Working with the
Laser Tracker
Triangulation
Optimal orienta-
tion of the T‑Scan
sensor
26 Operation

 Loading...