8
Chapter 2 Frame Mortise & Tenon Jig User Guide
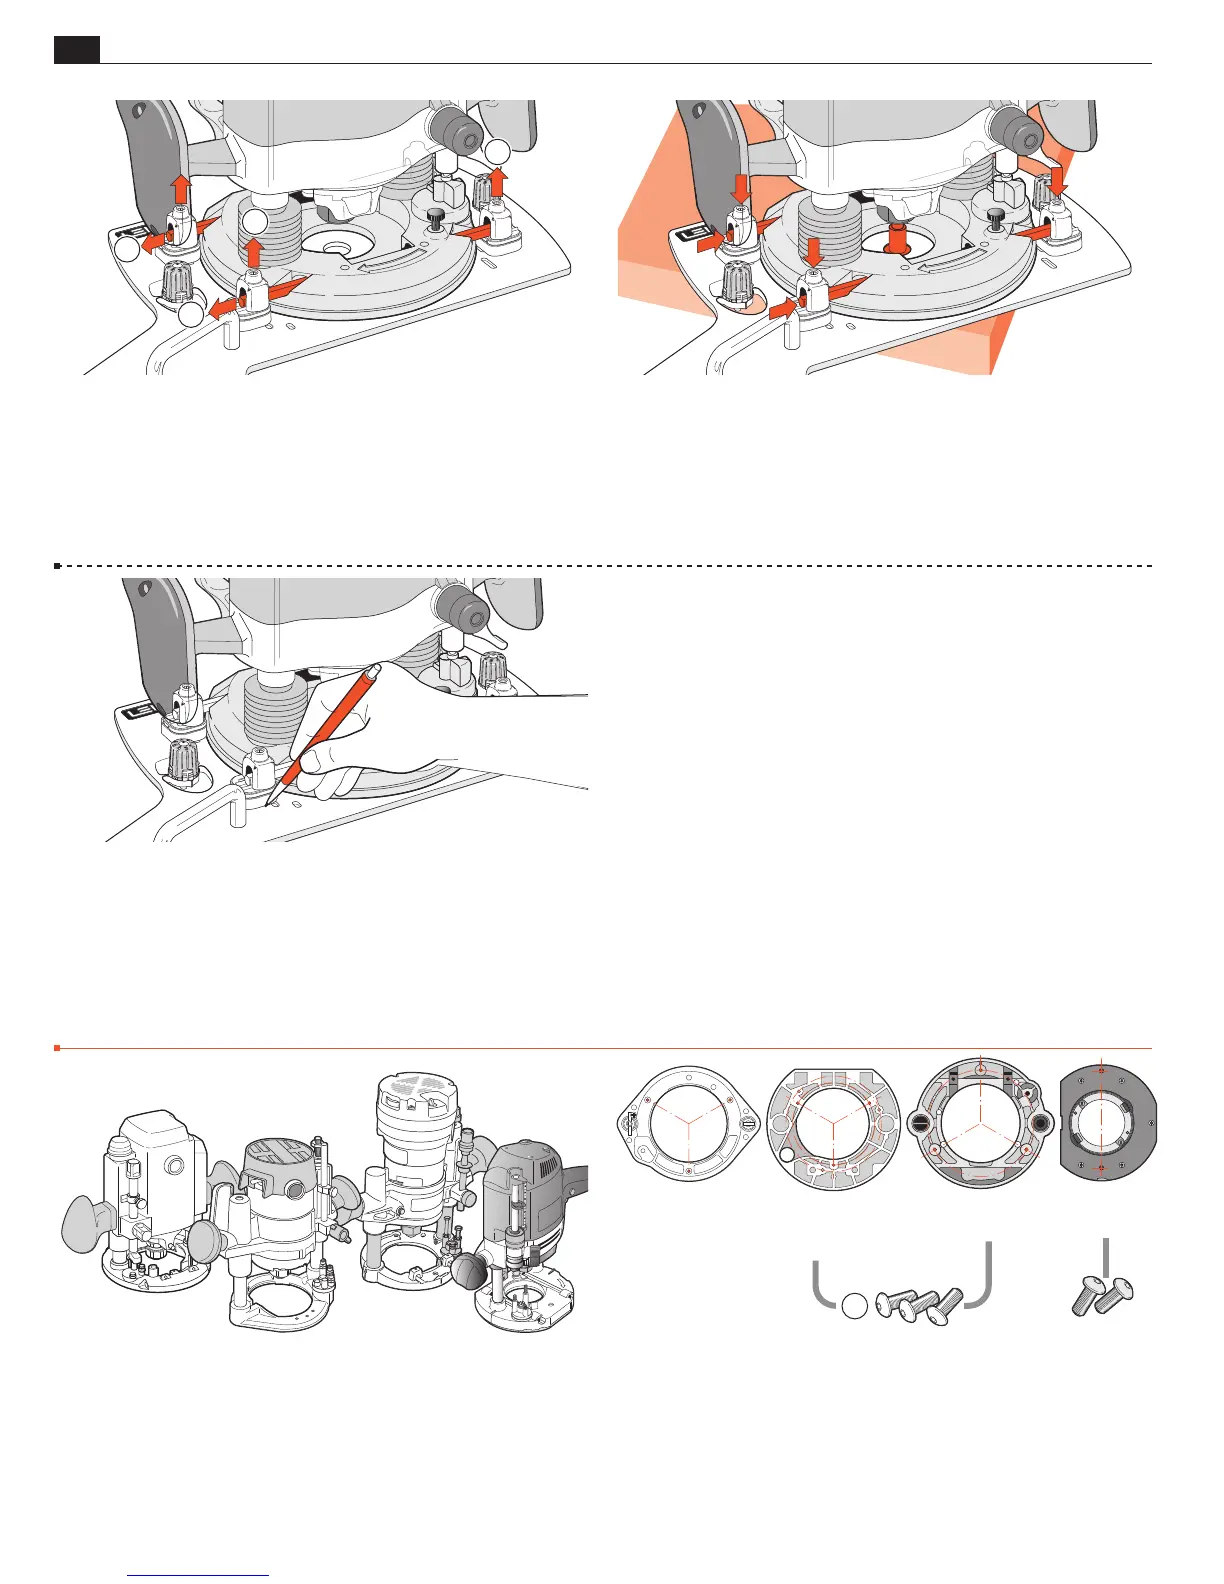
MOUNTING THE ROUTER
2-27 Here’s how to remove the router for use elsewhere:
Loosen the four top U-Post set-screws
➀
Slide out the two rods
➁
.
Do not remove the U-Posts. In about a minute, the router is free
to be used for other tasks.
2
2
1
1
2-28 To re-mount the router: place the Sub-Base over the corner
of the bench. Make sure surfaces are clean. Place the router on the
Sub-Base with the centering mandrel in the center hole. Insert
the fence rods. Evenly tighten the four U-Post set-screws. Check
that the mandrel rotates freely. In about two minutes the router/
Sub-Base assembly is ready for making mortises and tenons.
2-30 These routers do not have suitable through fence rod holes:
Porter Cable 693, 890, 890 Type 2, 893, 7529, 8529; Flex OFT
2926VV; Festool 1400, 2200; Makita RP0910, Makita RP1100
series; Triton TRC001, MOF001. We’ve provided Sub-Base holes
and screws to mount these directly to the Sub-Base. Using Porter
Cable 7529 and 8529 as examples, here’s how.
2-31 Note: Porter Cable 7529 & 8529 (Flex OFT2926VV) have
two sets of 3 threaded holes. Use the inner circle of FMT Pro Sub-Base
holes. The outer circle holes align with threaded holes, but are not deep
enough for the screws. For Porter Cable (Flex) 693 & Makita RP1100
series routers use the outer circle of Sub-Base holes. Firmly attach
the Sub-Base using the three 6410 hex socket button head screws
provided
➀
. Do not use the router’s Sub-Base screws. See 2-32.
PORTER CABLE
7529 and 8529
(FLEX OFT2926VV)
PORTER CABLE
693
890
890 Type 2
893
MAKITA
RP1100 SERIES
FESTOOL
1400 and 2200
1
2-29 Hint: If you plan to fit a different make/model router and
later use the current one again, you can greatly speed up the re-
installation of the first router by marking around the original four
U-Post/shim-stop positions.
■
Screw Mounting