Centring the 50 W ultra-high-pressure
mercury
lamp
microscope
. Insert
neutral-density
screen
in the op
tical
path to
reduce
the
lighting
intensity. Place the
adjust-
ment
device on the dustglass
of
the
microscope.
Remove all filters from the
filter
slot.
Fully open the field
diaphragm
in the
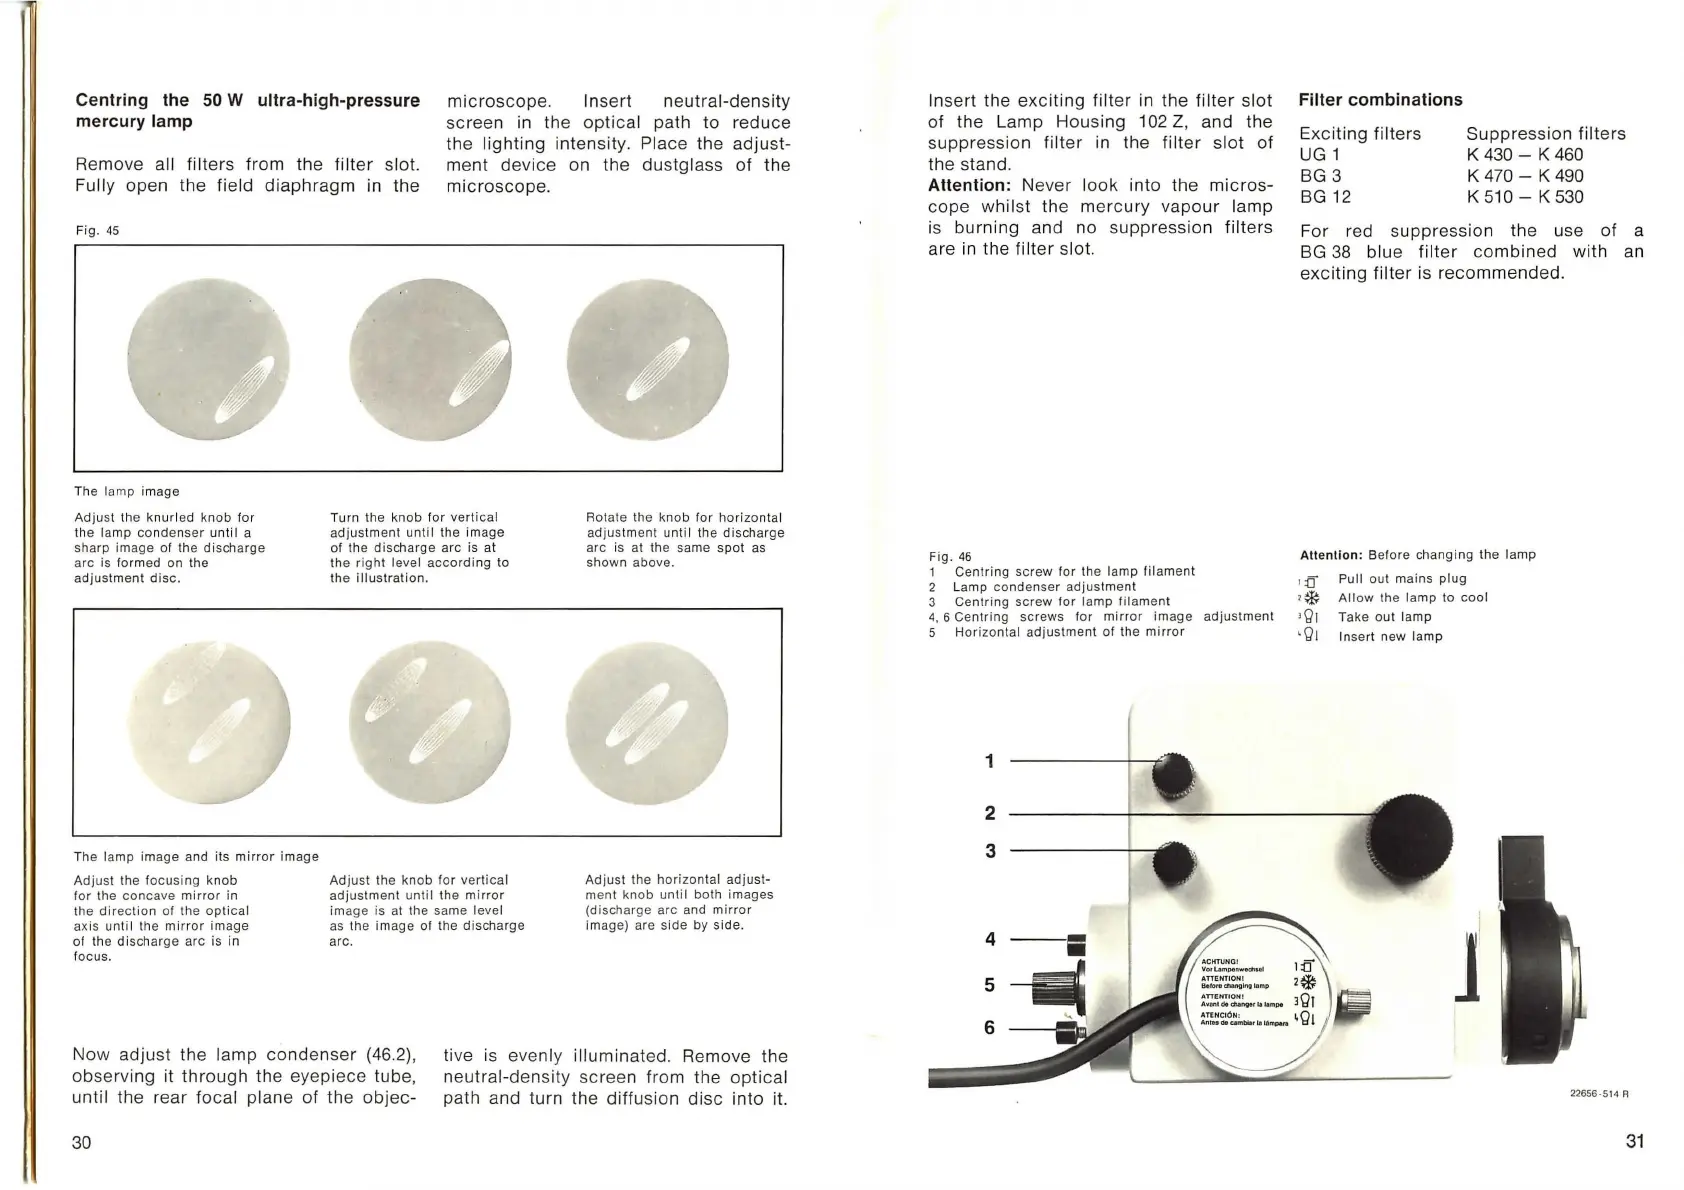
Fig.
45
The lamp image
Ad just
th
e knurled knob for
the lamp condenser unti
I a
sharp image
of
the
disc
harge
arc is form ed on the
adjus
tm
e
nt
disc.
The lamp image and its
mirror
im
ag
e
Adjust the f
oc
using kn
ob
for
the concave mi
rro
r in
the
direct
ion of the
optical
axis
un
til
th
e m
irr
or
image
of the discharge arc is in
f
oc
u
s.
Turn the
kn
ob for vertic
al
adj
us
tment unti l the im
ag
e
of
th
e discharge arc is at
the right level
accor
ding
to
th
e
illu
s
tr
at ion.
Ad
just
the knob fo r ver
tica
l
adjus
tm
ent
until
the mir
ror
image
is at the
sa
me level
as
the image of the
disc
harge
arc.
Rotate
th
e knob for horizontal
ad
j
us
tm
ent until the
di
scharge
arc is at the same spot as
shown above.
Ad just the horizontal
a
dju
st-
ment knob unti l both images
(discharge arc and mirror
image) are
side
by side.
Now
adjust
the lamp
condenser
(46.2).
ob
serving it
through
the eyepi
ece
tube,
until the rear focal plane
of
the
objec-
live
is
evenly
illuminated
. Remove the
neutral-den
sity sc
re
en from the
optical
path and turn the diffusion
disc
into
it.
30
Insert the ex
citing
filter
in
the
filter
slot
of
the Lamp Housing 102 Z, and the
suppression
filter
in
the
filter
slot
of
the stand.
Attention: Nev
er
look
into the
micros-
cope
whilst
the
mercury
vapour
lamp
is
burning
and no suppression
filters
are
in
the
filter
slot.
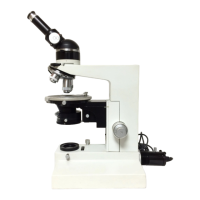
Fig .
46
1 Ce
ntri
ng
screw
for the lamp filame
nt
2 Lamp cond enser a
dju
stme
nt
3 Ce
ntr
ing screw f
or
lamp filament
4, 6 Centring screws f
or
mirr
or
image ad
just
ment
5 Horizontal
adj
ustment
of
the
mir
ror
1
2
3
4
5
6
Filter combinations
Ex
citing
filters
UG 1
BG
3
BG 12
Suppression
filters
K
430-
K 460
K
470-
K 490
K
510-
K 530
For
red suppression the use
of
a
BG
38
blue
filter
combined
with
an
exciting
filter
is
recommended.
Attention
: Before chang ing th e lamp
,
:0
Pull out mains plug
'* All
ow
the lamp to cool
' QI Take out lamp
•Q1
Insert new
lamp
j
22656·514 A
31