DC60-DM60-ROOFTOP-IOM-1310-E - 17 -
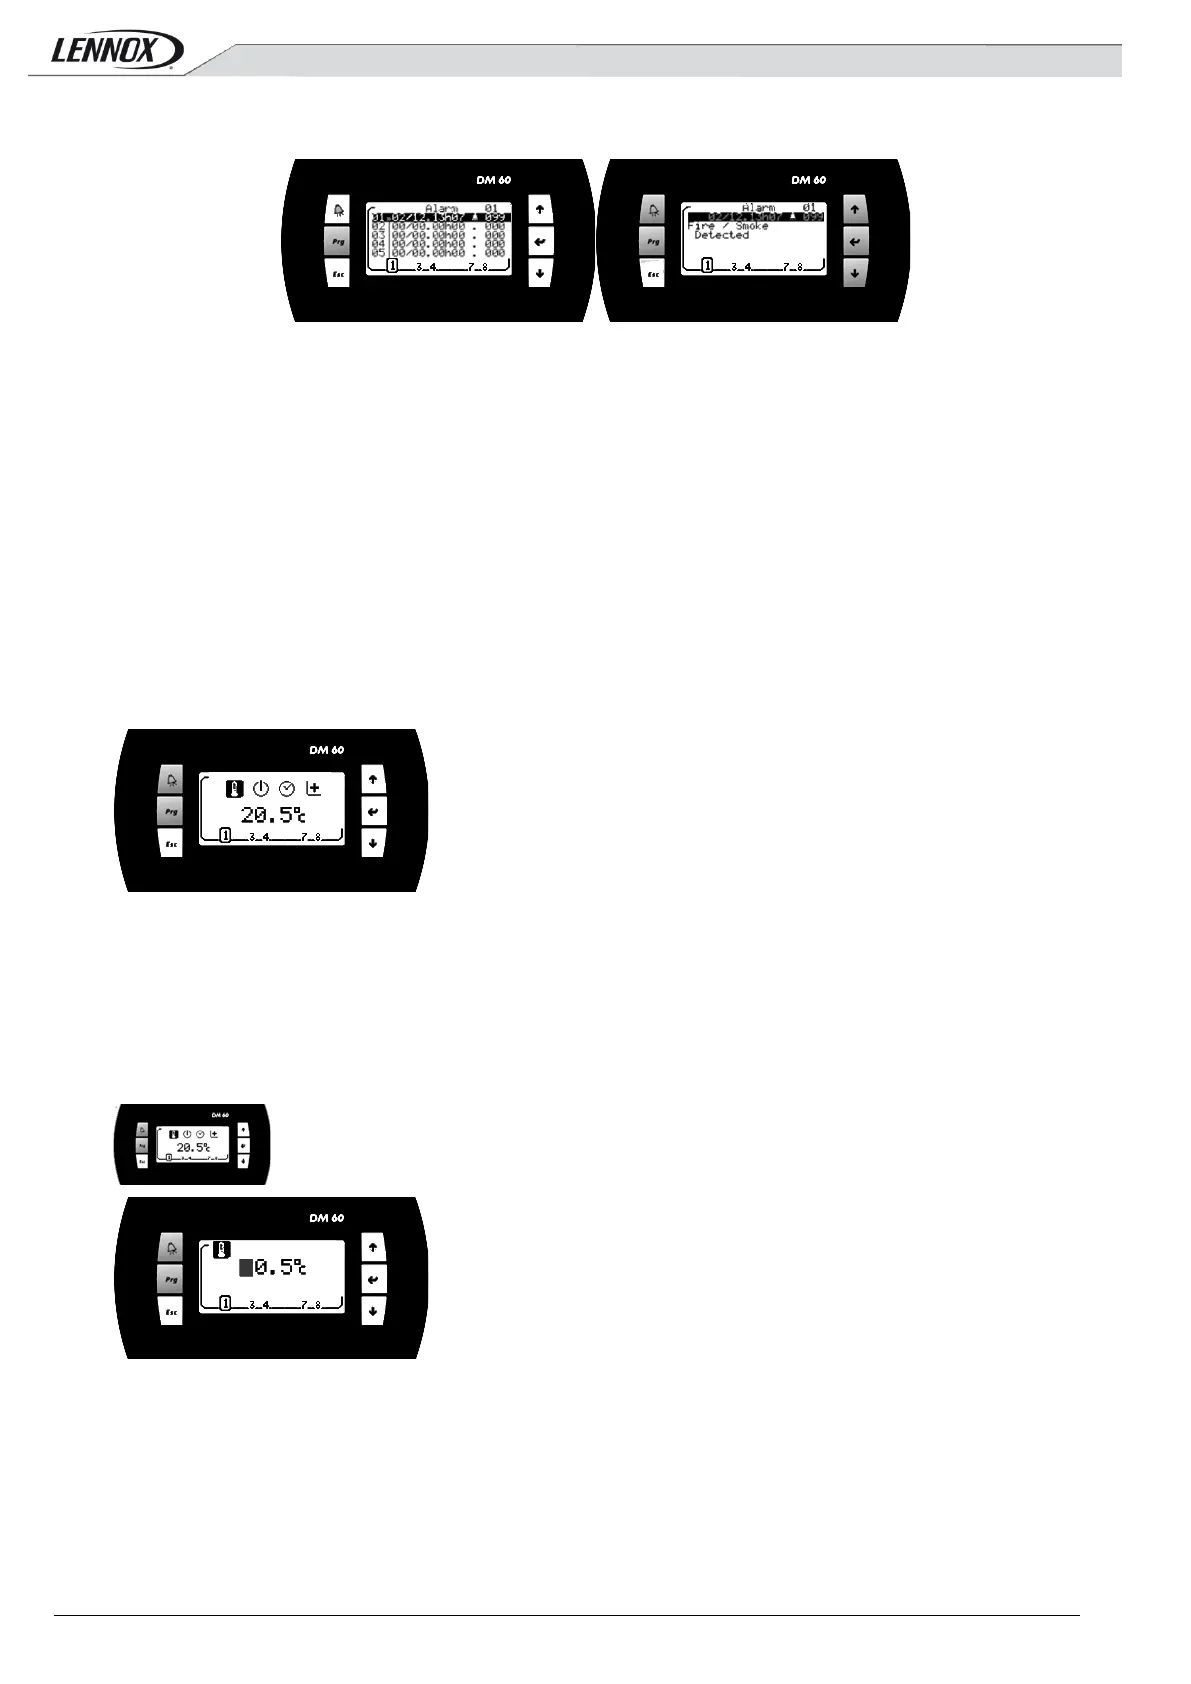
2.2.4 Alarm list
History used to store the last 99 alarms occurred on the unit.
Each alarm is stored on the date and time the fault occurred.
An active alarm is signified by the symbol 'Bell'.
An alarm not active is signified by the symbol '.'.
Each alarm is signified by a 3 digit code
To have the text of fault code, position the cursor on the desired line, by using the 'Up Arrow' or 'Down Arrow' and
then confirm by pressing 'Enter'
Button 'Esc': Return to main screen.
Button 'Up Arrow': Positions you in the list.
Button 'Enter': Go to text of failure code.
Button 'Down Arrow': Positions you in the list.
2.2.5
Setup menus
Button 'Alarm': Go to Alarm list.
Button 'Esc': Return to main screen.
Button 'Up Arrow': Selects the previous function.
Button 'Enter': Go to the screen of the selected function.
Button 'Down Arrow': Selects the next function.
2.2.6
Setting; Customer Temperature
View and/or modify the offset, or set point, of the temperature control desired for the Unit selected.
If the set-point is changed, this value is maintained as long as the scheduling of Unit doesn't change modes (Night,
Day, Day I, Day II, BMS).
At each change of the mode the Climatic™60 sets the value of this set-point on the preset value in the mode
concerned.
Button 'Alarm': Go to Alarm list.
Button 'Esc': Return to Setup menus of the unit.
 Loading...