Page 11
6− Attach the control panel cover to the mounting base.
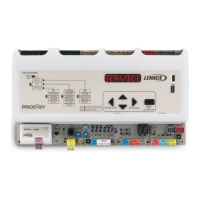
B − Control Center
Install the Harmony
®
II control center in a non−condensing
area, such as a closet, but where the temperature will not
exceed 130F. A convenient, central location is necessary
to facilitate the wiring from thermostats, dampers, pres-
sure switch (if used), FM21 (if used), control panel, and
HVAC equipment. The control center mounting box must
be grounded. The electrical power for the zoning control
center and furnace or blower coil unit must be from the
same source. In addition, the Harmony
®
II control center
power−up must occur at the same time or before the fur-
nace or blower coil unit power−up.
C − Thermostats
In Central Control mode, the zone 1 thermostat is designated
as the master thermostat. The other thermostats are not used.
In the Zone Control mode, the unused zones are referred to as
zone 2, zone 3, and zone 4.
For Option 1 (G32V/G21V/GSR21V and condensing unit), a
single−stage thermostat (1 HEAT/1 COOL) is recommended.
Option 2 (CB31MV and Lennox heat pump) and Option 3
(G32V/G21V/GSR21V, Lennox heat pump, and FM21) re-
quire a two−stage heat pump thermostat (2 HEAT/1COOL).
One of the unique features of the Harmony
®
II zone control
system is that any conventional or programmable thermo-
stat may be used. However, Lennox recommends that the
zone 1, master thermostat be programmable. Individual
zone thermostats may also be programmable. Refer to the
Lennox engineering handbook for appropriate thermo-
stats.
You may use autochangeover thermostats on all zones.
The fan switch on all thermostats of the zone control sys-
tem is non−functional. You can use non−autochangeover
thermostats, but you must synchronize the thermostat’s
system switch with the current zone mode. For example,
zones 2, 3, and 4 thermostat system switches must be in
Heat for heating to be supplied to those zones.
Locate each thermostat in its zone. If two or more rooms
are within one zone, place the thermostat in a location that
is close to all rooms. For example, if a zone contains two
bedrooms, try to place thermostat in a hallway location
near both bedrooms.
Install thermostats as directed in the thermostat installation
instructions. Do not install thermostats in drafty areas, be-
hind doors or in corners, near radiant heat sources such as
appliances and sunny windows, near concealed pipes and
chimneys, or in unconditioned spaces such as closets or
exterior walls.
D − Dampers
Motorized dampers in the supply duct system allow air to
distribute to the zones. The dampers use 24 VAC to close
and spring−return to open. Rectangular and round damp-
ers are available from Lennox in sizes ranging from 6 inch-
es (152mm) to 14 inches (357mm) (round) and 10 inches
(254mm) x 8 inches (203mm) to 20 inches (508) x 8 inches
(203mm) (rectangular). See Lennox engineering hand-
book for zone damper model numbers.
Each application of the zone control system will be unique
and may require more than one damper per zone. The rec-
ommended damper transformer with zone control center will
handle up to five dampers. If more dampers are needed, a
larger transformer and isolation relays will be necessary. See
the wiring diagram in the Common System Component Wir-
ing section. Refer to the Zone Design section in this manual.
For more effective zone isolation, the return duct system
may also be dampered by zone; the dampers for each
zone must be wired in parallel.
Install dampers in the desired location and run thermostat
wire from the damper to the control center.
E−Damper Transformer
The dampers are powered by a separate, field provided
24VAC transformer. The transformer must have an adequate
VA rating for the number of operating dampers. Minimum VA
rating = 11 x (no. of dampers − 1). For example, a system using
five dampers will need a 24VAC damper transformer with a
rating of at least 44 VA.
Install the damper transformer in an electrical junction box
near the control center.
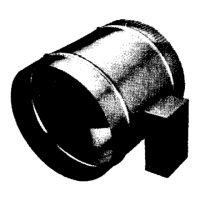
F−Discharge Air Temperature Probe
1− Locate an area in the discharge plenum downstream
from the cooling coil to install the discharge air temper-
ature probe.
2− Install the probe so that the discharge air passes over
the sensor before the air is distributed into the duct
system.
3− Ensure that the sensor is mounted according to the air-
flow sticker on the mounting plate.
G−Pressure Switch
A pressure switch is only required for applications that use
a heat pump (Option 2 or Option 3). Using the pressure
switch is a safety measure to protect the compressor from
high head pressure during first−stage heating. The Lennox
part number for the pressure switch is 21J18.
NOTE − If pressure switch is factory installed in the unit, do
not remove switch or switch wires.
1− Install the pressure switch with a saddle valve (3/8 inch
or 1/2 inch) in the discharge line between the compres-
sor and the reversing valve.
 Loading...