Page 21
Service
The unit should be inspected once a year by a qualified
service technician.
CAUTION
Label all wires prior to disconnection when servic
ing controls. Wiring errors can cause improper and
dangerous operation. Verify proper operation after
servicing.
A-Lubrication
All motors are lubricated at the factory. No further
lubrication is required.
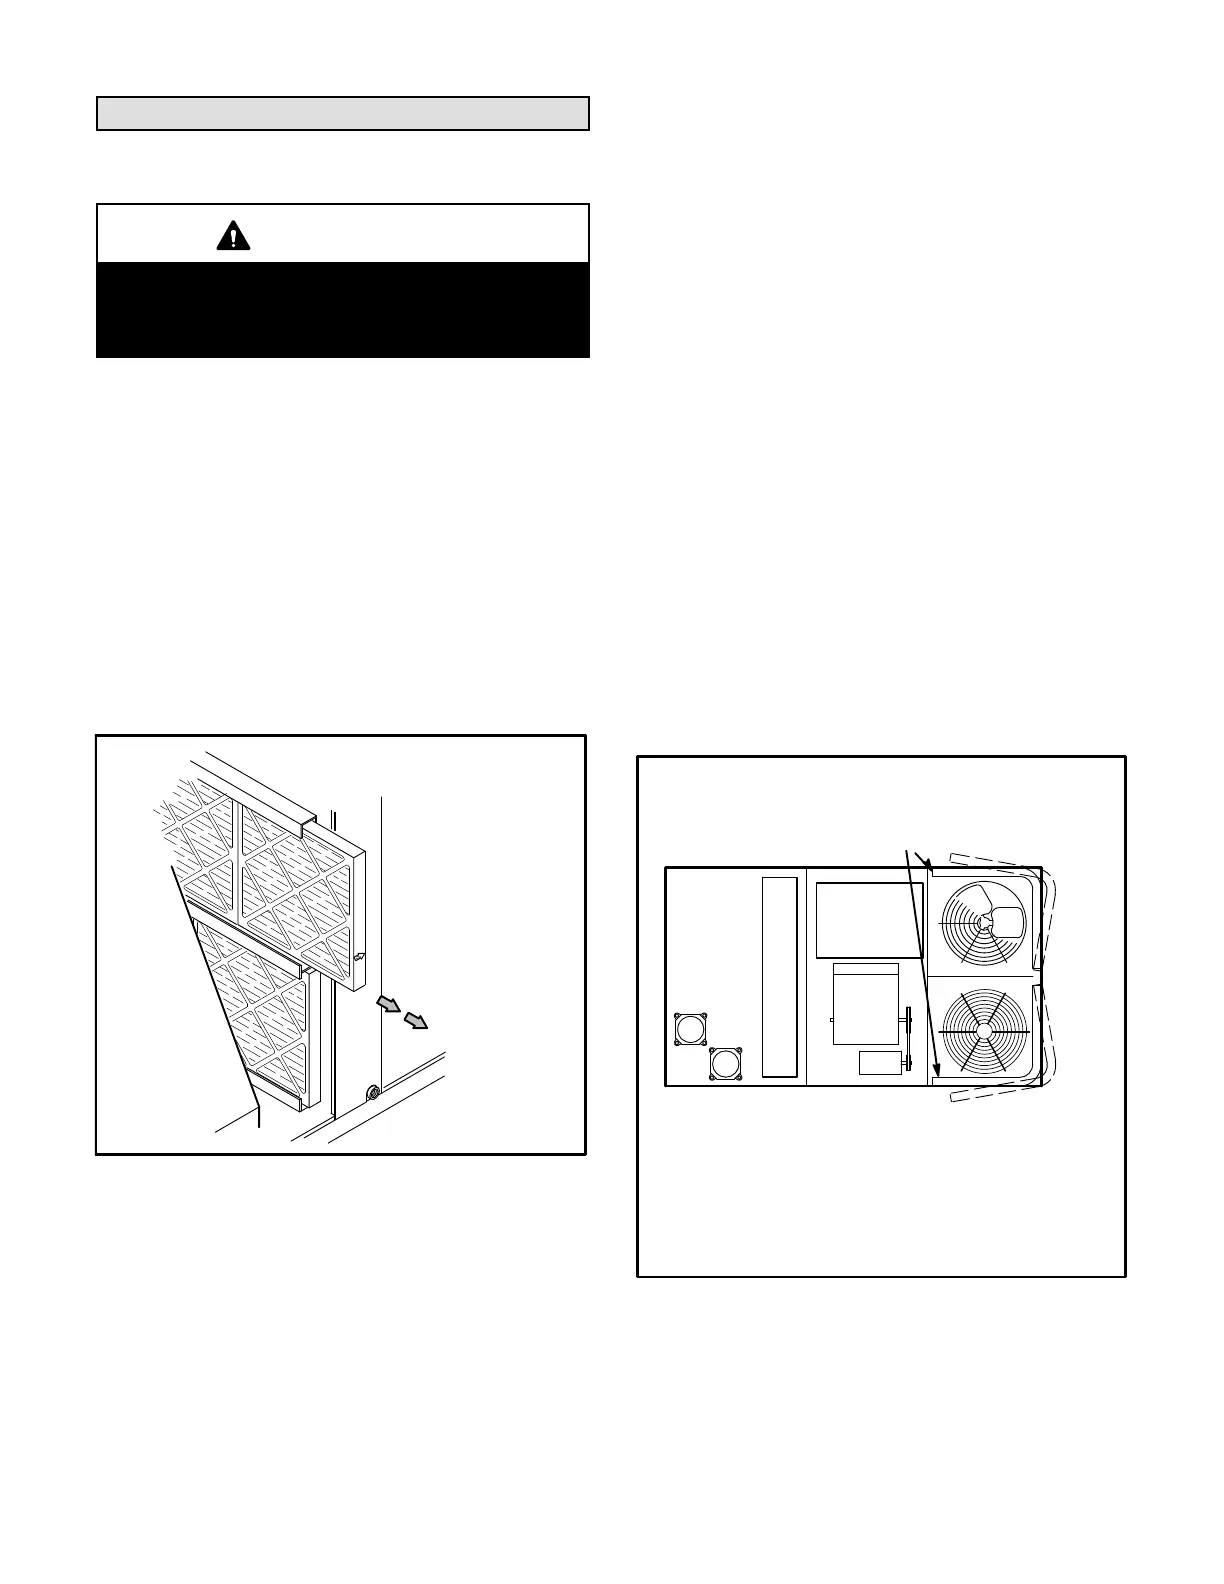
B-Filters
Units are equipped with four 20 X 25 X 2” filters. Filters
should be checked monthly and replaced when
necessary with filters of like kind and size. Take note of
air flow direction marking on filter frame when
reinstalling filters. See figure 18.
NOTE-Filters must be U.L.C. certified or equivalent for
use in Canada.
FIGURE 18
REMOVE FILTERS
PULL TO
REMOVE
FILTERS
C-Supply Air Blower Wheel
Annually inspect supply air blower wheel for accumulated
dirt or dust. Turn off power before attempting to remove
access panel or to clean blower wheel.
D-Indoor Coil
Inspect and clean coil at beginning of each cooling and
heating season. Clean using mild detergent or
commercial coil cleanser. Flush coil and condensate
drain with water taking care not to get insulation, filters
and return air ducts wet.
E-Outdoor Coil
Clean condenser coil annually with detergent or
commercial coil cleaner and inspect monthly during the
cooling season.
Condenser coils are made of two formed slabs. Dirt and
debris may become trapped between the slabs. To clean
between slabs, carefully separate coil slabs and wash
them thoroughly. See figure 19. Flush coils with water
following cleaning.
F-Filter Drier
The unit is equipped with a bi-flow filter drier. if
replacement is necessary, order another of like design.
FIGURE 19
1- Remove screws securing coil end plate to mullion.
2- Remove clips connecting coils slabs and separate
slabs 3-4” (76-102mm).
3- Clean coils with detergent or commercial coil cleaner.
4- Rinse thoroughly with water and reassemble.
ENDPLATE IS
SECURED TO MULLION
TOP VIEW
BLOWER
CLEAN CONDENSER COIL (092-120 SHOWN)