Page 54
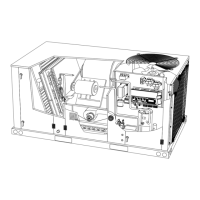
D-Condenser Coil
Clean condenser coil annually with detergent or commercial
coil cleaner and inspect monthly during the cooling season.
Condenser coils are made of single and two formed slabs.
On units with two slabs, dirt and debris may become
trapped between the slabs. To clean between slabs, care
fully separate coil slabs and wash them thoroughly. See fig
ure 16. Flush coils with water following cleaning.
Note - Remove all screws and gaskets prior to cleaning pro
cedure and replace upon completion.
E-Supply Blower Wheel
Annually inspect supply air blower wheel for accumulated
dirt or dust. Turn off power before attempting to remove ac
cess panel or to clean blower wheel.
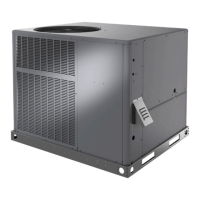
VII-ACCESSORIES
The accessories section describes the application of most of
the optional accessories which can be factory- or field-installed
to the LCH units.
A-C1/T1CURB
When installing the LCH units on a combustible surface for
downflow discharge applications, the C1/T1CURB 8 inch,
14‐inch, 18 inch or 24‐inch height roof mounting frame is
used. The roof mounting frames are recommended in all
other applications but not required. If the LCH units are not
mounted on a flat (roof) surface, they MUST be supported
under all edges and under the middle of the unit to prevent
sagging. The units MUST be mounted level within 1/16” per
linear foot or 5mm per meter in any direction.
The assembled mounting frame is shown in figure 17. Re
fer to the roof mounting frame installation instructions for
details of proper assembly and mounting. The roof mount
ing frame MUST be squared to the roof and level before
mounting. Plenum system MUST be installed before the
unit is set on the mounting frame. Typical roof curbing and
flashing is shown in figure 18. Refer to the roof mounting
frame installation instructions for proper plenum construc
tion and attachment.
B-Transitions
Optional supply/return transitions T1TRAN10AN1 is
available for use with the LCH 3, 4 and 5 ton units and the
T1TRAN20N-1 is available for the 6 ton units utilizing
optional T1CURB roof mounting frames. Transition
must be installed in the C1/T1CURB mounting frame be
fore mounting the unit to the frame. Refer to the manufac
turer's instructions included with the transition for detailed
installation procedures.
C-Supply and Return Diffusers
Optional flush mount diffuser/return FD9-65 and
FD11-95 and extended mount diffuser/return RTD9-65
and RTD11-95 are available for use with all LCH units.
Refer to manufacturer's instructions included with tran
sition for detailed installation procedures.
D-Outdoor Air Dampers
E1DAMP11A-1 manually operated outdoor air damper and
E1DAMP21A-1 motorized outdoor air damper is available
for LCH 3 and 4 ton units (see figure 19 or 20).
E1DAMP11AT-1 manually operated outdoor air damper and
E1DAMP21AT-1 motorized outdoor air damper is available
for LCH 5 and 6 ton units. Both sets include the outdoor air
hood. The manual damper is set at a fixed point to bring out
side air into the building anytime the blower is operating. The
motorized damper opens when the blower is operating and
the thermostat is sending an occupied signal to the Unit Con
troller. If the thermostat signal is unoccupied, the motorized
damper will not open. Washable filter supplied with the out
door air dampers can be cleaned with water and a mild de
tergent. It should be sprayed with Filter Handicoater when
dry prior to reinstallation. Filter Handicoater is R.P. Products
coating no. 418 and is available as Part No. P-8-5069
E-Economizer
(Field- or Factory-Installed)
Unit may contain an optional economizer. See figure 21.
The economizer uses outdoor air for free cooling when the
temperature is suitable.