Page 29
Cleaning the Burners
NOTE - Use papers or protective covering in front of the
furnace during cleaning.
1 -
furnace.
2 - Remove access panel.
3 - Label the wires from gas valve and rollout switches
then disconnect them.
4 - Mark and disconnect sensor wire from the sensor.
Disconnect plug from the ignitor at the burner box.
5 - Disconnect gas supply piping. Remove the four
screws securing the burner manifold assembly to the
vestibule panel and remove the assembly from the
unit.
6 - Remove screws securing burner box and remove
burner box.
7- To clean burners, run a vacuum cleaner with a soft
brush attachment over the face of burners.
Visually inspect inside the burners and crossovers for
any blockage caused by foreign matter. Remove any
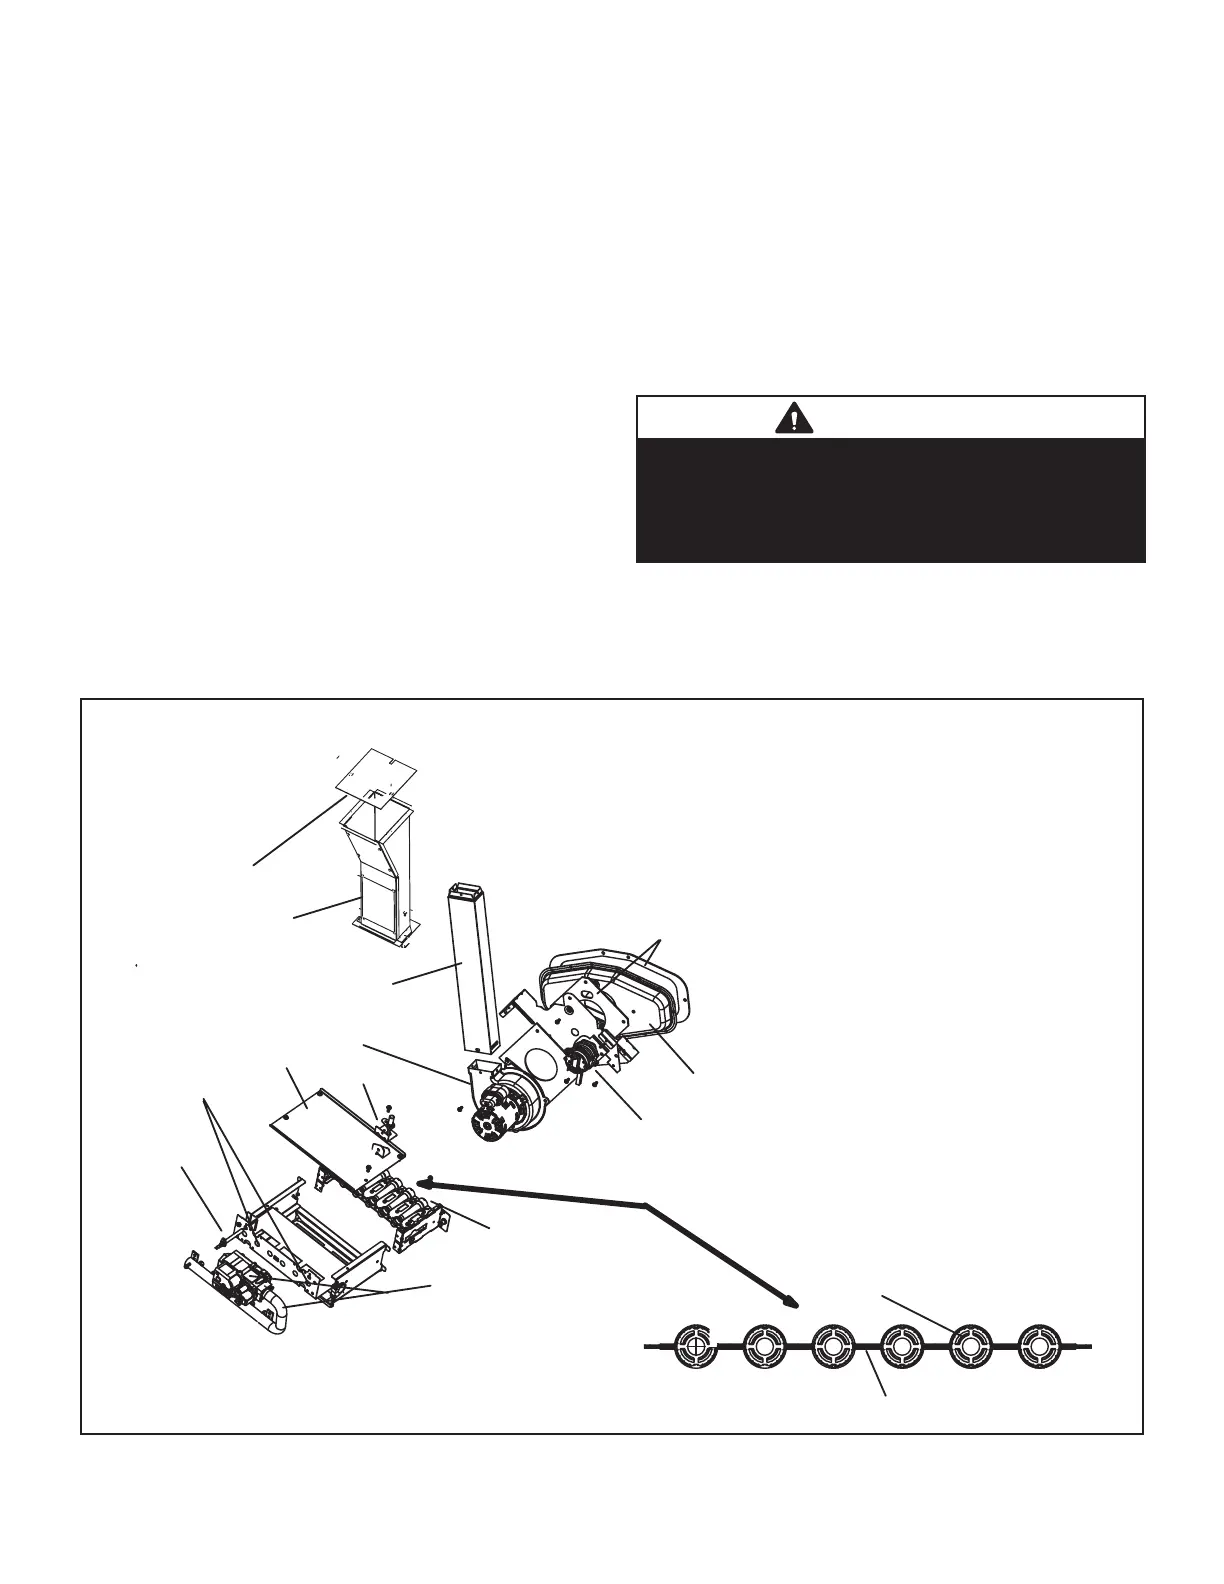
blockage. Figure 25 shows burner detail.
8 - Reinstall the burner box assembly using the existing
four screws. Make sure that the burners line up in the
center of the burner ports.
9 - Reconnect the sensor wire and reconnect the 2-pin
plug to the ignitor wiring harness.
10 - Follow lighting instructions to light and operate
furnace for 5 minutes to ensure that heat exchanger
is clean and dry and that furnace is operating
properly.
11 - Replace access panel.
CAUTION
Some soaps used for leak detection are corrosive to
certain metals. Carefully rinse piping thoroughly after
leak test has been completed. Do not use matches,
gas leaks.
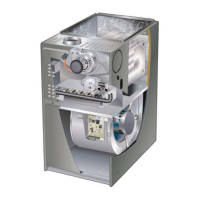
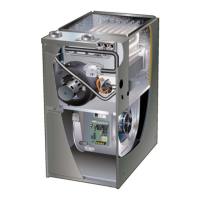
BURNER ASSEMBLY REMOVAL
gasket
collector box
orifice plate
internal flue pipe
pressure switch
combustion air inducer
burners
manifold and gas valve
retention rings
cross over
gasket
collector box
orifice plate
internal flue pipe
pressure switch
combustion air inducer
burners
manifold and gas valve
flue chase
gasket
ignitor
rollout switch
sensor
Figure 25