EasyManua.ls Logo

Lennox SL25XPV-036

Lennox SL25XPV-036
23 pages
To Next Page IconTo Next Page
Loading...
©2021 Lennox Industries Inc.
Dallas, Texas, USA
Page 1
General
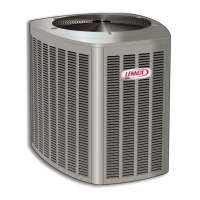
This SL25XPV outdoor air conditioner with all-aluminum
coil is designed for use with HFC-410A refrigerant only.
These instructions are intended as a general guide and do
not supersede local codes in any way. Consult authorities
having jurisdiction before installation.
INSTALLATION
INSTRUCTIONS
HEAT PUMP
508104-01
4/2021
Dave Lennox Signature
®
Collection SL25XPV System
WARNING
Improper installation, adjustment, alteration, service
or maintenance can cause property damage, personal
injury or loss of life. Installation and service must be
performed by a licensed professional HVAC installer or
equivalent, or service agency.
IMPORTANT: Special procedures are required for clean-
ing the all-aluminum coil in this unit. See page 22 in this
instruction for information.
CONTROL
PANEL ACCESS
LOCATION
6 (152)
36 (914)
12 (305)
30 (762)
24
(610)
LINE SET
CONNECTIONS
ACCESS
PANEL
REAR VIEW OF UNIT
48 (1219)
MINIMUM CLEARANCE BETWEEN TWO UNITS
CLEARANCE ON ALL SIDES — INCHES (MILLIMETERS)
MINIMUM CLEARANCE
ABOVE UNIT
NOTES:
Clearance to access panel must be 30
inches (762mm).
Clearance to one of the other three
sides must be 36 inches (914mm).
Clearance to one of the remaining two
sides may be 12 inches (305mm) and
the final side may be 6 inches
(152mm).
Note: Dimensions are not to scale.
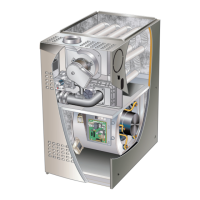
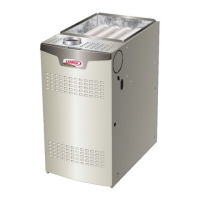
THIS UNIT IS A INTEGRAL COMPONENT OF A SYSTEM THAT
WILL REQUIRE A COMMUNICATING THERMOSTAT AND
COMMUNICATING AIR HANDLER OR FURNACE.
SL25XPV
Communicating air handler
or furnace
Communicating
thermostat
SETTING THE UNIT – Clearances
THIS MANUAL MUST BE LEFT WITH THE
HOMEOWNER FOR FUTURE REFERENCE
PACKING LIST
OUTDOOR UNIT
WARRANTY
CARD
GROMMETS (2)
BUSHING (1)
RAST 6-PIN
CONNECTOR (1)
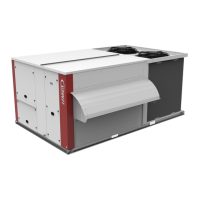
This unit must be installed with an approved indoor air
handler or coil. For AHRI Certied system match-ups and
expanded ratings, visit www.LennoxPros.com.
Question and Answer IconNeed help?

Do you have a question about the Lennox SL25XPV-036 and is the answer not in the manual?

Lennox SL25XPV-036 Specifications

General IconGeneral
BrandLennox
ModelSL25XPV-036
CategoryAir Conditioner
LanguageEnglish

Summary

SETTING THE UNIT - Clearances

SETTING THE UNIT (Continued) - Unit Placement

REFRIGERANT PIPING

ADDING REFRIGERANT FOR LONG LINE SETS

WEIGH IN CHARGING METHOD FOR LONG LINE SETS

Method for adding refrigerant to long line sets using weigh-in.

REFRIGERANT PIPING - Removing Existing Indoor Metering Device

REFRIGERANT PIPING - Brazing Procedures

PIPING PANEL REMOVAL PREPARING LINE SET

Prepare the line set and panel for brazing operations.

CAP AND CORE REMOVAL

Remove service valve caps and cores before brazing.

ATTACH THE MANIFOLD GAUGE SET FOR BRAZING LIQUID AND SUCTION VAPOR LINE SERVICE VALVES

Attach the manifold gauge set to service valves for brazing.

WRAP SERVICE VALVES

Wrap service valves with water-saturated cloths during brazing.

FLOW NITROGEN

Flow nitrogen through the system during brazing to prevent oxidation.

BRAZE LINE SET

Braze the liquid and suction/vapor lines to the service valves.

REFRIGERANT PIPING - Install Indoor Expansion Valve

INDOOR EXPANSION VALVE INSTALLATION

Install the indoor expansion valve unit.

LEAK TEST AND EVACUATION

CONNECT GAUGE SET

Connect the manifold gauge set for leak testing.

TEST FOR LEAKS

Perform the procedure to test the system for leaks.

EVACUATION

CONNECT GAUGE SET FOR EVACUATION

Connect the gauge set for the evacuation process.

ELECTRICAL - Circuit Sizing and Wire Routing

ELECTRICAL - Outdoor Control (A175) Jumpers and Terminals

ROUTE CONTROL WIRES

ROUTE HIGH VOLTAGE AND GROUND WIRES

UNIT START-UP

OPERATING BALL-TYPE SERVICE VALVE

OPERATING ANGLE-TYPE SERVICE VALVE

CHARGING

HEAT PUMP OPERATION

SL25 XPV START-UP AND PERFORMANCE CHECKLIST

Related product manuals