Page 5
1 − Make wiring connections per the
appropriate wiring diagram on
pages 6 and 7. Refer to the table
below for terminal designations.
Terminal Description
W
First−stage heating
(conventional)
S1 Remote outdoor sensor
S2 Remote outdoor sensor
R 24V power
O Reversing valve
B Reversing valve
G Fan relay
Y
First−stage compressor
(Conventional or
heat pump)
C 24V common
L Equipment monitor
2 − Refer to inner terminal labels when
using the thermostat with conven-
tional systems (gas, oil or electric
heat plus air conditioning). Refer to
outer terminal labels in heat pump
applications. See figure below.
3 − Loosen screws of terminals that will
be used. Insert appropriate wires in
the terminal block under the loos-
ened screws. Securely tighten
each screw.
C
Y
B
O
R
G
INSERT WIRE IN HOLE
WIRE HOLE
WALLPLATE
SCREW
TERMINALS
LETTER
DESIGNATIONS
LABELED WIRES
TERMINAL
BLOCK
4 − Connect wires to the correspond-
ing screw terminals per the ap-
propriate diagram.
5 − Push excess wire back into the
wall.
6 − Plug hole with nonflammable in-
sulation to prevent drafts from af-
fecting thermostat.
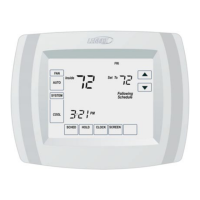
LED Indicator
An LED indicator is located in the up-
per right corner of the thermostat. It is
only visible when lit.
When an equipment monitor is con-
nected to the thermostat L terminal,
the LED lights when the monitor sends
a check or failure message to the ther-
mostat.
The LED requires the use of 24Vac
common power. The indicator will not
light when the thermostat is powered
by the batteries alone, or when 24Vac
power is interrupted.
Outdoor Temperature Sensor
Install the optional outdoor tempera-
ture sensor (X4148) as outlined in the
instructions provided with the sensor.
 Loading...