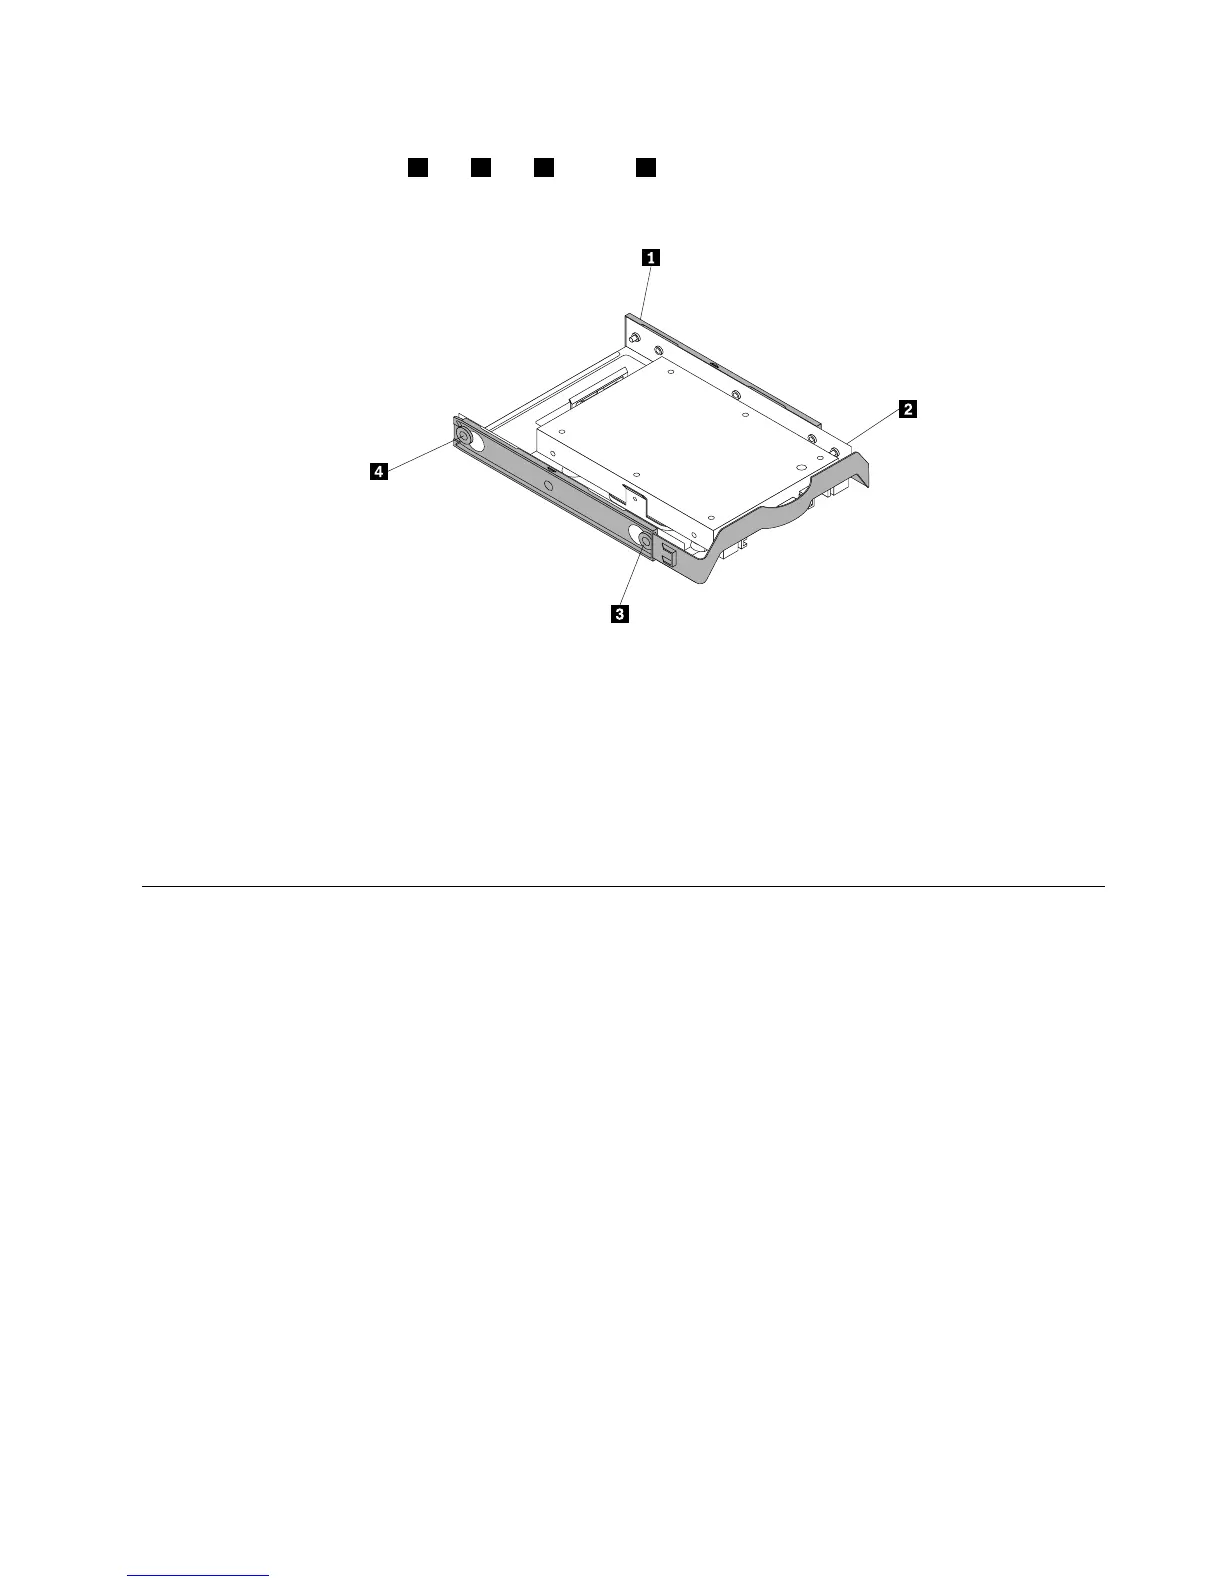
2.Toinstallthesolid-statedrivewiththestorageconverterintothe3.5-inchharddiskdrivebracket,flex
thebracketandalignpin1,pin2,pin3,andpin4onthebracketwiththecorrespondingholesin
thestorageconverter.
Figure71.Installingthesolid-statedrivewiththestorageconverterintotheharddiskdrivebracket
3.Installthesolid-statedriveintothedesiredharddiskdrivebay.See“Replacingtheprimaryharddisk
drive”onpage126
or“Replacingthesecondaryharddiskdrive”onpage128.
Whattodonext:
•Toworkwithanotherpieceofhardware,gototheappropriatesection.
•Tocompletetheinstallationorreplacement,goto“Completingthepartsreplacement”onpage156.
Replacingthefrontfanassembly
Attention:DonotopenyourcomputerorattemptanyrepairbeforereadingandunderstandingtheChapter
1“Safetyinformation”onpage1.
Thissectionprovidesinstructionsonhowtoreplacethefrontfanassembly.
Note:Thefrontfanassemblyisonlyavailableinsomemodels.
Toreplacethefrontfanassembly,dothefollowing:
1.Removeallmediafromthedrivesandturnoffallattacheddevicesandthecomputer.Then,disconnect
allpowercordsfromelectricaloutletsanddisconnectallcablesthatareconnectedtothecomputer.
2.Removethecomputercover.See“Removingthecomputercover”onpage93.
3.Disconnectthefrontfanassemblycablefromthepowerfanconnectoronthesystemboard.See
“Locatingpartsonthesystemboard”onpage72.
Chapter8.ReplacingFRUs(machinetypes:10A0,10A1,10A6,10A7,10AG,10AK,10AL,and10BE)131

 Loading...