Do you have a question about the Lenovo ThinkCentre M710e and is the answer not in the manual?
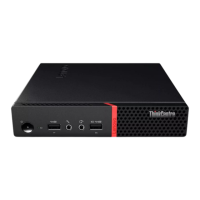
Identifies and describes the components visible on the front panel of the computer.
Identifies and describes the connectors and ports located on the rear panel of the computer.
Details the layout and components of the computer's main motherboard.
Explains the location and purpose of the label identifying the computer's model and serial number.
Provides instructions on how to secure the computer cover using a padlock loop for physical security.
Explains how to attach Kensington-style and standard cable locks to secure the computer or peripherals.
Outlines essential safety precautions, static discharge handling, and identification of replaceable units before maintenance.
Step-by-step guide for removing and installing the computer's vertical stand accessory.
Instructions for safely disconnecting and replacing the computer's power cord.
Detailed steps to safely remove the main chassis cover of the computer.
Guide for removing and replacing the front panel assembly of the computer.
Instructions for removing and installing the computer's optical drive (CD/DVD).
Steps for removing and installing 3.5-inch and 2.5-inch storage drives.
Procedure for removing and installing the computer's internal card reader module.
Instructions for removing and installing the computer's internal speaker.
Guide for removing and installing the illuminated red dot component.
Steps for safely removing and installing the computer's power supply unit.
Procedure for removing and installing the computer's chassis intrusion detection switch.
Instructions for removing and installing an M.2 form factor storage drive.
Guide for removing and installing the CMOS coin-cell battery.
Steps for removing and installing RAM modules (DIMMs) into the computer.
Instructions for removing and installing expansion cards in PCI Express slots.
Procedure for removing and installing the CPU heat sink and fan cooling assembly.
Detailed steps for safely removing and installing the computer's central processing unit (CPU).
Comprehensive guide for removing and installing the computer's motherboard.
Final steps to reassemble the computer after component replacement and verify functionality.
| Chipset | Intel B250 |
|---|---|
| Operating System | Windows 10 Pro |
| Networking | Gigabit Ethernet |
| Processor | Intel Core i3/i5/i7 |
| RAM | Up to 32 GB DDR4 |
| Storage | M.2 SSD |
| Graphics | Integrated Intel HD Graphics |
| Front Ports | 2 x USB 3.0 |
| Rear Ports | 2 x USB 2.0, Ethernet (RJ-45), VGA |
| Other Ports | Serial port (optional) |
| Expansion Slots | 1 x PCIe x16, 1 x PCIe x1, 1 x M.2 |
| Optical Drive | DVD-ROM or DVD-RW |
| Audio | Integrated |
| Power Supply | 180W |