Adjusting the Display Image
This section describes the functions of the user controls used to adjust the display
image.
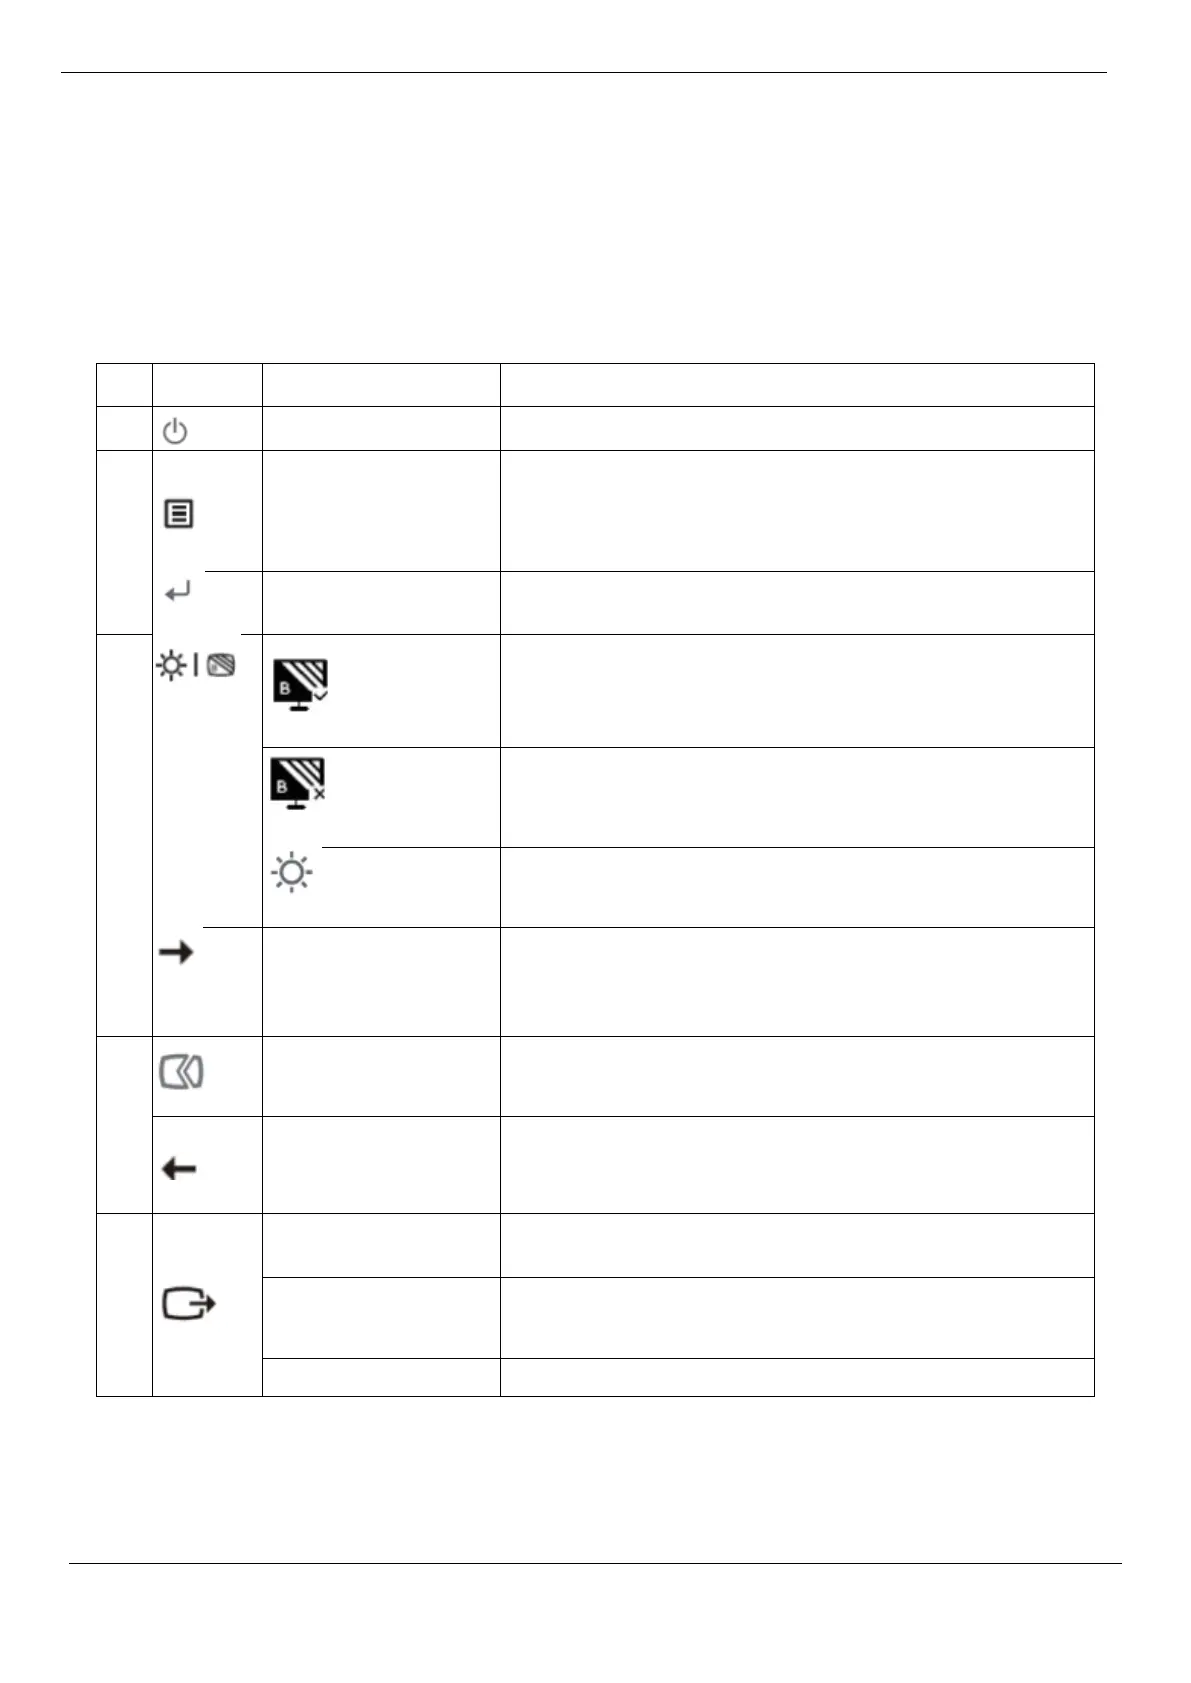
Using Direct Access Controls
When On Screen Display (OSD) is not displayed, you can use direct access
controls.
To access the OSD menu
Press to confirm the selection
Press and hold for 10 seconds to lock the menu/unlock the
menu
Press to go to the next level/submenu status of the main
menu, or the previous level of the adjustment bar
Press and hold for 3 seconds to enable low blue light
Press and hold for 3 seconds to disable low blue light
Downward Browsing Key
Increase the value on the adjustment bar/Adjustment
Press down to move to the next item
Screen optimization (size, position, phase and clock) (analog
[VGA] sources only)
Upward Browsing Key
Decrease the value on the adjustment bar/Adjustment
Press down to move to the previous item
Signal source switching
Return to previous level in OSD mode
Press and hold for 10 seconds to enable/disable the DDC-CI
function.
2-3 Display User Guide




 To Next Page