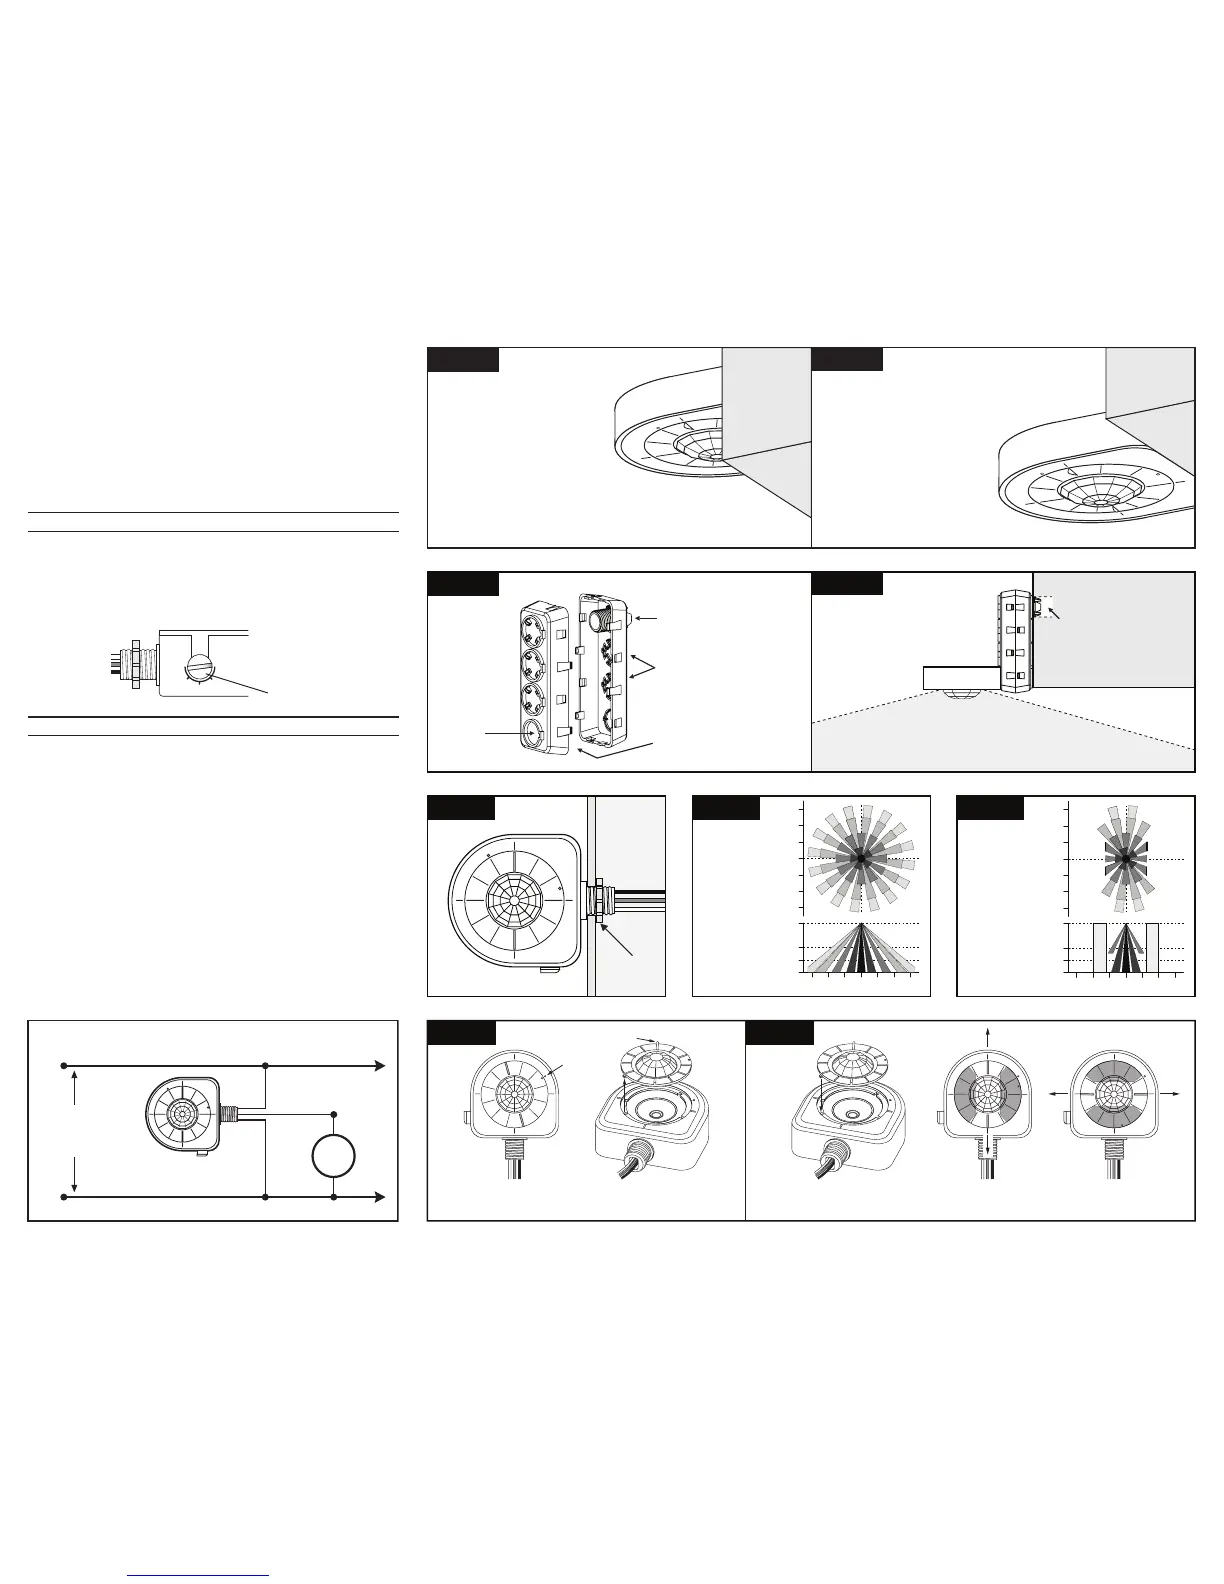
6. After wiring connections are completed, snap the two Adapter body halves
together.
NOTE: To open the Adapter, use a small, flat blade screw driver and
carefully insert into slots and push tabs down while pulling the two halves
apart.
7. Restore power at circuit breaker or fuse.
NOTE: Allow approximately 1 minute for charge-up. If the lights turn ON
and the LED blinks when a hand is waved in front of the lens, then the
Sensor was installed properly. If the operation is different, refer to the
Troubleshooting Section.
The Sensor is factory preset to work without any adjustments. If you desire to
change the factory settings, refer to the SETTINGS section.
SETTINGS
Time-Delay: Settings should be determined during the installation period.
This adjustment controls the amount of time the lights stay ON after the last
detected motion. You may select settings varying from 30 seconds
to 20 minutes and any time in between.
NOTE: After power is turned ON, allow two minutes for this unit to warm up
before performing Time-Delay settings.
TROUBLESHOOTING
• Lights will not turn ON
- Circuit breaker or fuse is OFF: Turn the breaker ON. Ensure the
lights being controlled are in working order (i.e., working bulbs, ballasts,
etc.)
- Sensor is wired incorrectly or may be defective: Confirm that the
sensor’s wiring is done correctly and inspect visually for problems.
- Lens is dirty or obstructed: Inspect the lens visually and clean if
necessary, or remove the obstruction.
• Lights will not turn OFF
- Sensor is wired incorrectly or may be defective: Confirm that the
sensor’s wiring is done correctly and inspect visually for problems.
- Sensor may be mounted too closely to an air conditioning or
heating vent: Move the sensor or close the vent.
- The line voltage has dropped: Perform the necessary tests to ensure
the line voltage has not dropped beneath 100V.
• Lights turn OFF and ON too quickly
- Sensor may be mounted too closely to an air conditioning or
heating vent: Move the sensor to another location or close the vent.
- Time delay set improperly: Adjust the TIME DELAY.
PK-93439-10-00-5A
 Loading...