EasyManuals Logo

Lexmark CX922 User Manual

Lexmark CX922
334 pages
To Next Page IconTo Next Page
To Previous Page IconTo Previous Page
Page #73 background imageLoading...
Page #73 background image
Notes:
View the printer IP address on the printer home screen. The IP address appears as four sets of
numbers separated by periods, such as 123.123.123.123.
If you are using a proxy server, then temporarily disable it to load the web page correctly.
2 Click Shortcuts > Add Shortcut.
3 From the Shortcut Type menu, select Network Folder, and then
configure
the settings.
4 Apply the changes.
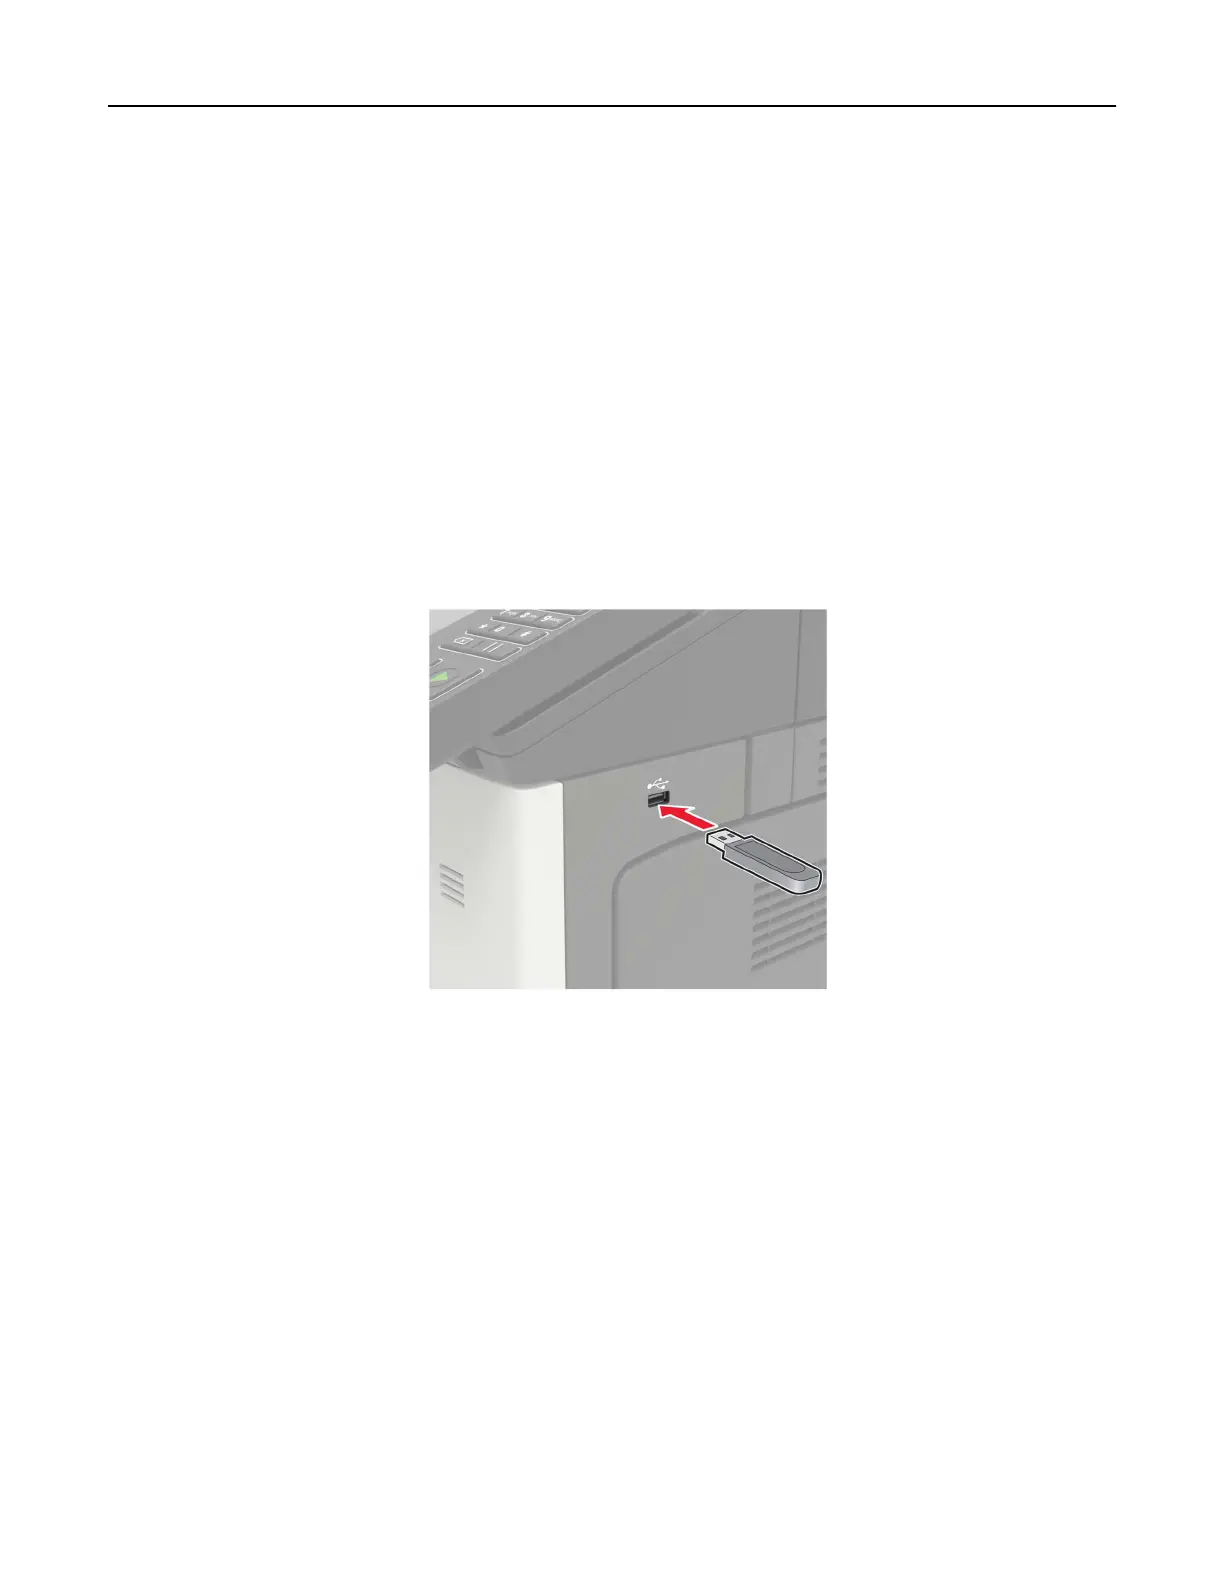
Scanning to a flash drive
1 Load an original document into the ADF tray or on the scanner glass.
2 Insert the
flash
drive.
3 Tou ch Scan to USB and adjust the settings if necessary.
Note: If the USB Drive screen does not appear, then touch USB Drive on the home screen.
4 Scan the document.
Warning—Potential Damage: To avoid loss of data or printer malfunction, do not touch the
flash
drive or
the printer in the area shown while actively printing, reading, or writing from the memory device.
Scanning 73

Table of Contents

Questions and Answers:

Question and Answer IconNeed help?

Do you have a question about the Lexmark CX922 and is the answer not in the manual?

Lexmark CX922 Specifications

General IconGeneral
Print TechnologyColor Laser
Duplex PrintingIntegrated Duplex
FunctionsPrint, Copy, Scan, Fax
Print Resolution1200 x 1200 dpi
Scan TechnologyCIS
Display10-inch color touch screen
Memory4 GB
Hard Disk500 GB
Copy Resolution600 x 600 dpi
Scan Resolution600 x 600 dpi
Fax ResolutionUp to 300 x 300 dpi
Network ConnectivityEthernet, USB
Mobile PrintingYes
Print SpeedSimplex: Black: 65 ppm, Color: 65 ppm; Duplex: Black: 65 ppm, Color: 65 ppm

Related product manuals