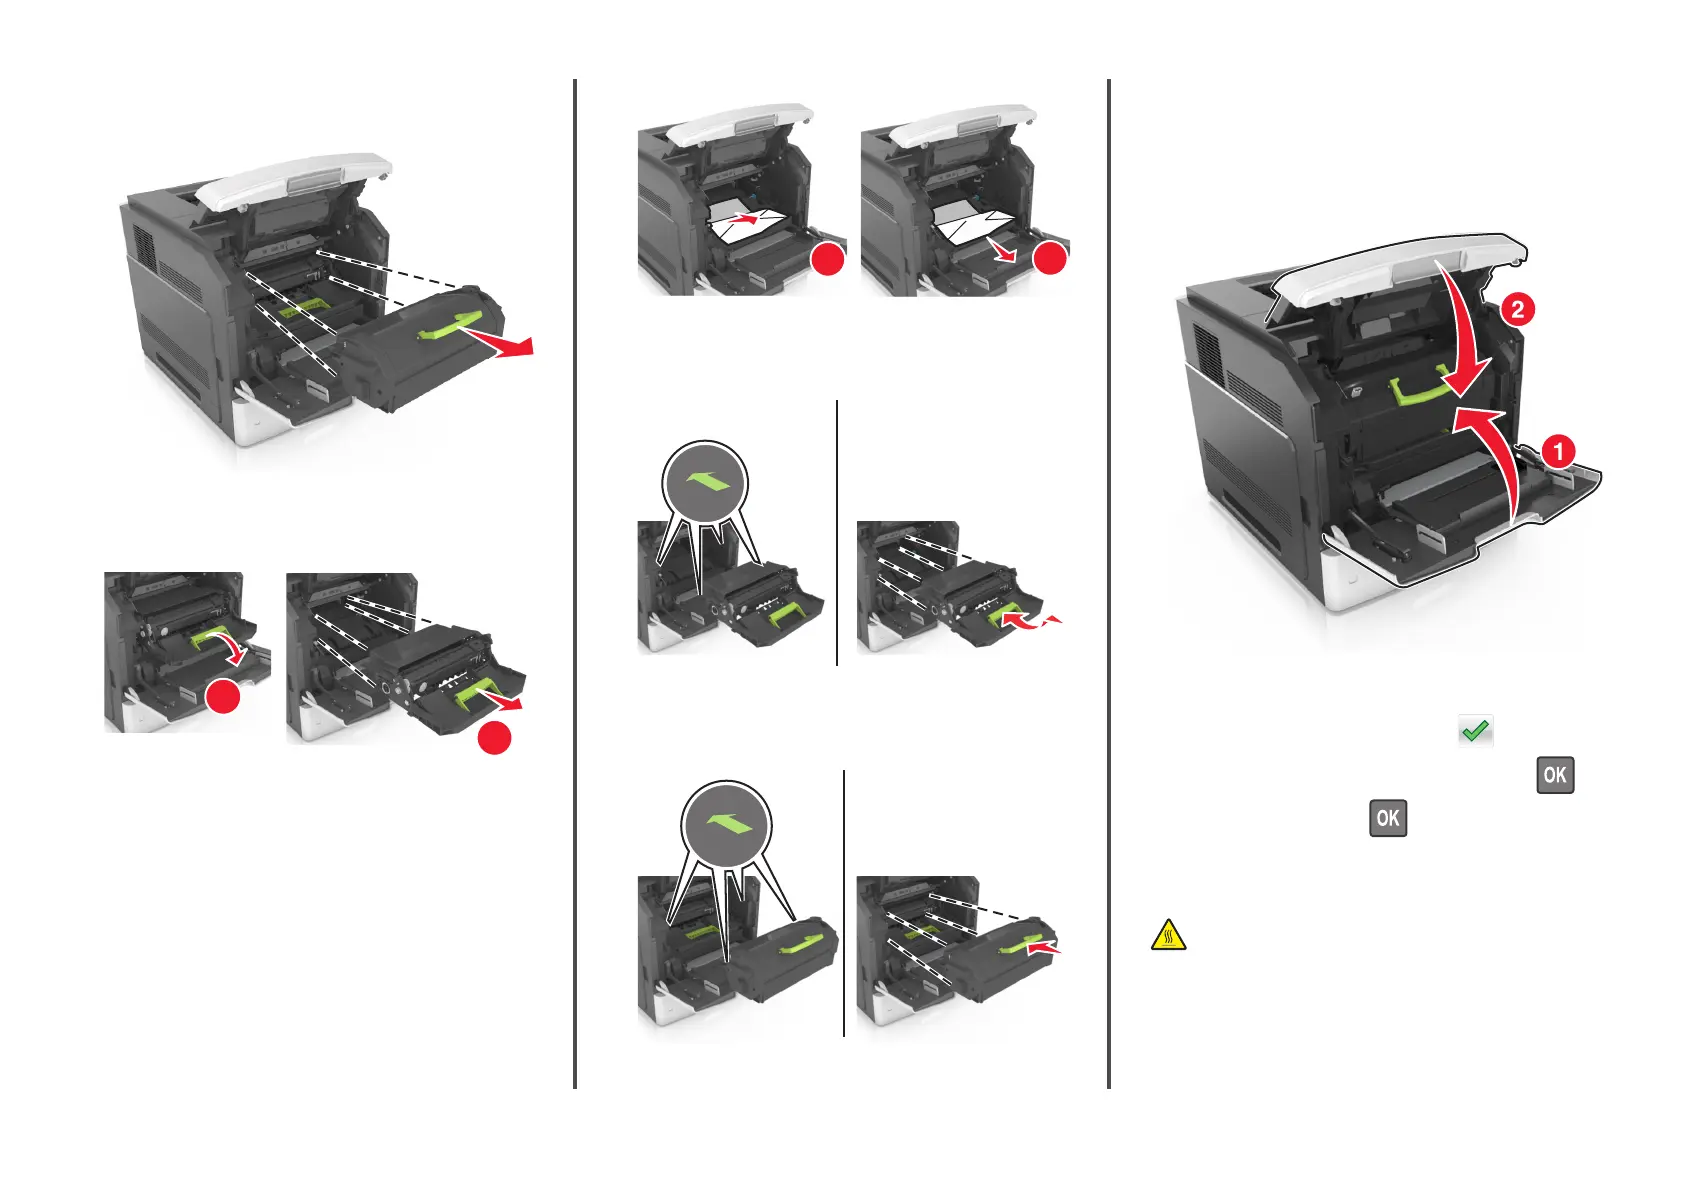
2 Lift the green handle, and then pull the toner cartridge out of the
printer.
3 Place the cartridge aside.
4 Lift the green handle, and then pull the imaging unit out of the
printer.
1
2
5 Place the imaging unit aside on a flat, smooth surface.
Warning—Potential Damage: Do not expose the imaging unit to
direct light for more than 10 minutes. Extended exposure to
light may cause print quality problems.
6 Pull the jammed paper gently to the right, and then remove it from
the printer.
Note: Make sure all paper fragments are removed.
1
2
Warning—Potential Damage: The jammed paper may be
covered with toner, which can stain garments and skin.
7 Install the imaging unit.
Note: Use the arrows on the side of the printer as a guide.
8 Insert the cartridge into the printer, and then push the green handle
back into place.
Notes:
• Align the arrows on the guides of the toner cartridge with
the arrows in the printer.
• Make sure the cartridge is fully pushed in.
9 Close the multipurpose feeder door and the front cover.
10 Do either of the following to clear the message and continue
printing:
• For touch‑screen printer models, touch or Done.
• For non‑touch‑screen printer models, select Next > >
Clear the jam, press OK >
.
[x]‑page jam, open upper rear door. [202]
CAUTION—HOT SURFACE: The inside of the printer might be
hot. To reduce the risk of injury from a hot component, allow
the surface to cool before touching.
21