6 Insert the new pick tires.
7 Insert the tray.
8 Connect the power cord to the printer, and then to the electrical outlet.
CAUTION—POTENTIAL INJURY: To avoid the risk of
fire
or electrical shock, connect the power cord
to an appropriately rated and properly grounded electrical outlet that is near the product and easily
accessible.
9 Turn on the printer.
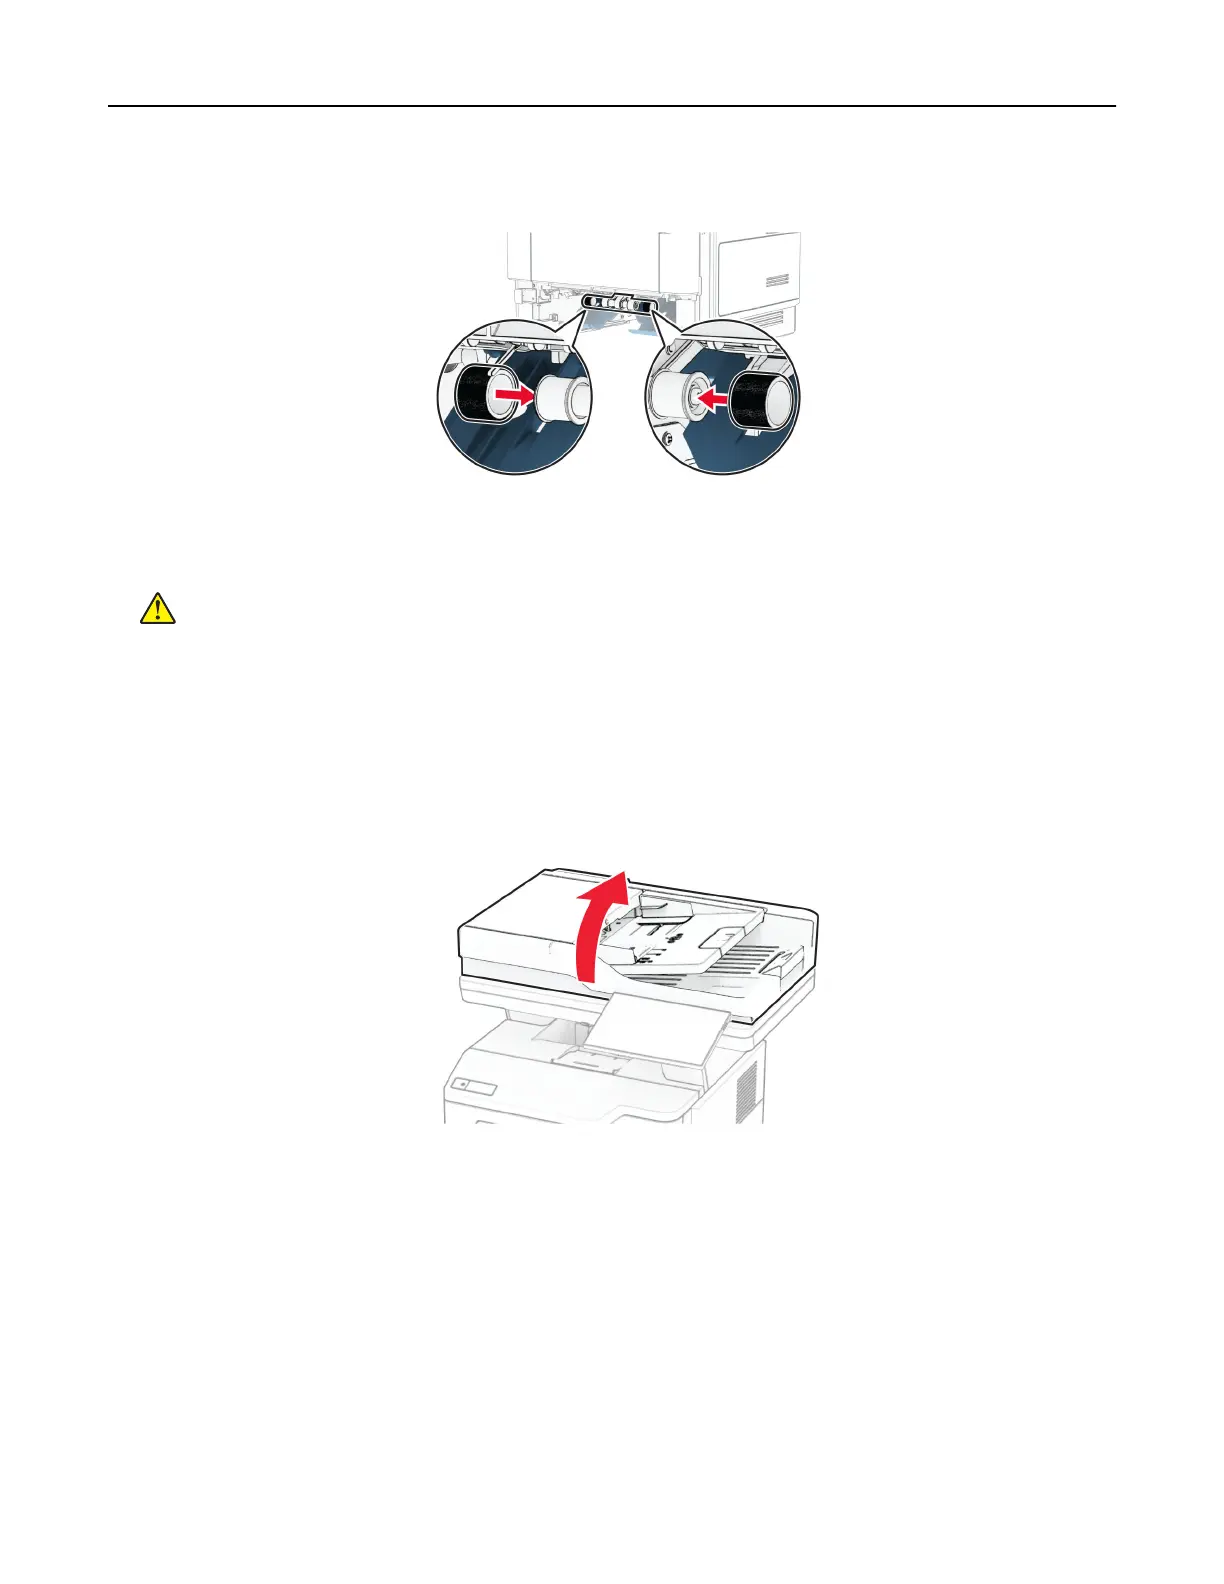
Replacing the scanner glass pad
1 Open the scanner cover.
Maintain the printer 199