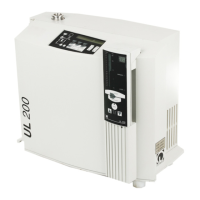
10 s, the helium background of the UL 200 is conti-
nuously monitored. This helium background may be indi-
cated when selecting menu function „21: System BG dis-
play on“. The helium background determination process
takes up to 10 s depending on the sensitivity setting.The
helium background serves as the Zero level for the sub-
sequent measurements.
When the START push-button (5/3) is pressed before
this process has been completed, the Zero determinati-
on process is cancelled and the previous Zero value will
be used once more.
The automatic gas ballast control is also monitored
during the Standby mode. The monitoring facility to con-
trol the gas ballast valve will start 30 s after the UL 200
has returned to the Standby mode (see description for
menu item 3).
ZERO push-button
A constant leak rate reading may be suppressed by
pressing the ZERO push-button (5/1), i.e. a constant
helium background within a test sample. This push-but-
ton is only active in the measurement mode.
The exponent on the hand unit is retained in the case of
„Zero“ when the leak rate display always remains at the
upper decade of the bargraph display. If the leak rate is
indicated in the lower decade, the exponent is decre-
mented by one in the case of „Zero“. Thus the displayed
leak rate can always be suppressed by at least one
decade so as to increase resolution.
Example
A leak rate of 4.1·10
-8
mbar·l·s
-1
can be displayed in two
ways on the hand unit:
a) The exponent indicates -8 and the narrow part of the
bargraph display is fully on and the wider section is
on up to number 4.
b) The exponent indicates -7 and only the lower narrow
section of the bargraph display is on up to number
0.4.
In both cases the exponent -8 and the bargraph display
is dark after pressing of ZERO.
After the ZERO push-button (5/1) has been pressed, the
currently indicated leak rate is stored as the „Zero level“
without changing the internal Zero level which has been
determined by the Zero determination process.
Only values above this Zero level are indicated so that
resolution of the displayed measurement signal is impro-
ved.
Note
It is not possible to reduce the detection limit of the
instrument by pressing the ZERO push-button (5/1).
The ZERO function is cancelled by pressing the ZERO
push-button once more. The Zero function is also can-
celled automatically as soon as the STOP / VENT push-
button (5/2) is pressed.
The ZERO function has an effect on all output devices
such as remote control, LCD display, chart recorder, trig-
gers and RS 232 interface.
Should the helium background which has been suppres-
sed with the aid of the ZERO push-button change in such
way that no measured value is indicated for over
t = 5 s, then the Zero level is readjusted automatically.
Acoustic signal
The acoustic signal is used to indicate the leak rate. An
acoustic signal is also generated in the case of error
messages. For details please refer to the description of
menu item 18 in Chapter 2.5.4 and in Chapter 4.2.
The volume of the acoustic signal can be increased by
operating the push-button (5/13) to the left of the louds-
peaker. With the push-button (5/12) to the right of the
loudspeaker the volume of the acoustic signal may be
reduced.
2.4.5 Displays on the Hand Unit
Measurement range display
Here the leak rate is indicated by way of a bar (5/4). In
case of a range overflow, the upper arrow (5/7) at the
bargraph on the hand unit comes on and in the case of
range underflow, the lower arrow (5/5) at the bargraph on
the hand unit comes on.
The corresponding exponent (5/9) is indicated at the top
to the right of the bargraph display.
Depending on the kind of hand unit which is supplied, the
measured leak rate (bargraph display together with the
exponent display) is indicated in mbar·l·s
-1
or Pa m
3
·s
-1
.
Two leak rate decades can be indicated by the bargraph
display (5/4). The panel for the upper leak rate decade
(1 ... 10) is twice as wide as that for the lower decade
(0.1 ... 1).
LOCK LED
The LOCK LED (5/11) comes on when the hand unit has
been locked. For details on this please refer to the
description for the menu line in Chapter 2.5.4.
MANUAL LED
The MANUAL LED (5/10) comes on when the manual
ranging mode has been selected by pressing the
MANUAL push-button (4/11) on the control panel.
14
TH 10.211/8.02 - 12/97