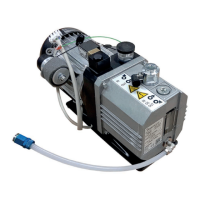
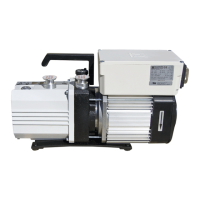
Maintenance
Mounting the front end plate (9/8) and rear end plate
(10/2)
Before sliding the front end plate with radial shaft seal
onto the shaft and mounting the L-ring shaft seal, push
the sleeve tool (special tool 3) onto the shaft.
Place the O-ring (9/5) or (10/11) into the groove of the
end plate and secure it with some vacuum grease, if
necessary. Remove the nuts and washers from the tape-
red dowel pins (9/6) or (10/1) and fit the pins in the end
plate.
Carefully push on the end plate with radial shaft seal
over the sleeve tool. Install the fastening screws of the
end plate without tightening them fully. Carefully drive in
the pins and tighten the fastening screws.
Inserting the L-ring shaft seal (9/27) and spacer
(9/26)
Carefully slide the L-ring shaft seal over the sleeve tool.
The end of the seal with the larger diameter should face
the center of the pump.
When withdrawing the sleeve tool, hold the L-ring shaft
seal tight.
The spacer (9/26) has an oil channel, which must point
upward when installed.
Inserting the reverse lock
Secure the screws of the outer race (9/20) with Loctite
271 and tighten them crosswise.
The shoulder of the reverse lock (9/21) faces outward.
Looking from the motor end, the shaft must only turn
counterclockwise.
If it can be turned in both directions, the reverse lock is
faulty; if it can be turned clockwise only, the reverse lock
is the wrong way round.
Inserting the ring gear (9/18)
The side of the ring gear bearing with the lead weight
faces the center of the pump.
Do not force on the ring gear with a hammer. It can be
carefully warmed to make it easier to mount (150 °C
max.).
The shaft has a hole into which a bolt can be screwed for
forcing on the ring gear. After attaching the retainer ring
(9/17), draw back the ring gear as far as this ring (speci-
al tool 4).
Fitting the valve
Place the gas ballast valve (8/3) on the valve seat with-
out exposing it to mechanical strain. The threaded holes
for attaching the valve holder (8/4) must be free of grea-
se and clean. Fit the valve holder with the valve.The hex.
socket screws used to attach the valve holder must be
degreased and cleaned before they are inserted. Finally
apply Loctite 271 to the threads.
Screw in the hex. socket screws.The amount of torque is
given in the Table on page 16.
Do not mechanically stress the valve holder
on one side.If this is not observed the pump
may be completely damaged.
Before starting up the pump you must fill the
gear space and the pump chamber with oil.
3.7 Leybold Service
If a pump is returned to LEYBOLD, indicate whether the
pump free of substances damaging to health or whether
it is contaminated.
If it is contaminated also indicate the nature of the
hazard. For this you must use the form which has been
included at the end of these Operating Instructions.
A copy of this form is reproduced at the end of these
Operating Instructions: “Declaration of Contamination of
Vacuum Instruments and Components“.
Please attach this form to the pump or enclose it with the
pump.
This declaration of contamination is required to meet
German law and to protect our personnel.
LEYBOLD must return any pumps without a “Declaration
of Contamination“ to the sender’s address.
The pump must be packed in such a way,
that it will not be damaged during shipping
and so that any contaminants are not relea-
sed from the package.
23
GA 02.200/8.02 - 10/02
Warning
Caution