exponent may be modified separately by operating the
VALUE push-button (4/6).
As soon as the leak rate drops below one of these thres-
holds, the corresponding LED (4/1), (4/2) or (4/3) will
come on. At the same time, the corresponding relay
contacts at the „CONTROL connection“ (3/12) are swit-
ched.
Changeover relay contacts at CONTROL (3/12):
Leak rate exceeds the Leak rate drops below
trigger threshold level, the threshold level,
relay inactive relay active
————————————————————————
Trigger 1
Pins 5 and 6 Pins 5 and 6
are not linked. are linked.
Pin 5 is linked Pin 5 is not linked
to pin 7. to pin 7.
Trigger 2
Pins 8 and 9 Pins 8 and 9
are not linked. are linked.
Pin 8 is linked Pin 8 is not linked
to pin 10. to pin 10.
Trigger 3
Pins 11 and 12 Pins 11 and 12
are not linked. are linked.
Pin 11 is linked Pin 12 is not linked
to pin 13. to pin 13.
When the measurement mode is not active, the three
triggers are set to the inactive state.
The three trigger also influence the automatic control of
the gas ballast (see explanations for menu item 3).
Trigger 1 causes sounding of the acoustic warning signal
provided „Alarm trigger ON“ has been selected in menu
item 18 (see explanations for menu item 18).
If the relay mode 3 is selected in menu item 16, only the
treshold values 1 and 2 are availabe.
Note
In the case of manual ranging (MANUAL push-button
(4/11)) only trigger values which fall within the bargraph
display range can be detected.
The trigger threshold level for Trigger 1 is adjusted
as follows:
Press MENU push-button (4/7).
Pressing the upper (∧ ) or the lower ( ∨) symbol on the
SCROLL push-button (4/5) selects the desired menu
item 01. The display will indicate the following, for exam-
ple:
01: Trigger 1 2.5E-10
Note
The flashing 1 indicates that trigger threshold 1 has been
selected. The currently stored trigger threshold level is
indicated to the right.
By pressing the VALUE push-button (4/6) one may select
the desired trigger 1, 2 or 3.
If it is required to change the corresponding trigger level
(numerical value), then you must press the ENTER
push-button (4/8).
If the message „Keyboard locked“ is displayed when try-
ing to change a parameter, this means that access to the
keyboard has been restricted. The parameters for this
trigger can not be changed in such a case.The keyboard
may be unlocked by selecting menu item 14. Otherwise
the display will indicate:
01: Trigger 1 2.5E-10
The factor (2.5) flashes and can be changed through the
VALUE push-button as required. Acknowledge the chan-
ge by pressing the ENTER push-button. The display will
indicate the following, for example:
01: Trigger 1 4.3E-10
The exponent (-10) flashes and can be changed in the
same way as described above. Pressing of the ENTER
push-button acknowledges the changed exponent. Then
display will then display the newly entered trigger thres-
hold level.
01: Trigger 1 4.3E-9
The trigger threshold levels for triggers 2 and 3 may be
changed in the same way.
02: Mode Vacuum Select leak detection mode
(vacuum, partial flow or sniffer
leak detection)
Vacuum stands for vacuum leak detection mode. Refer
to Operating Instructions GA 10.211, Chapter „Vacuum
leak detection“ for more information.
Sniff stands for sniffer leak detection. Here two different
sniffing modes may be selected:
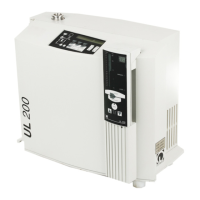
NORMAL: for the standard sniffer mode when using the
sniffer line for the UL 200 (Cat. No. 140 21 or
140 24). These sniffer lines are particularly
well suited for especially sensitive measu-
rements and offer a short response time.
QT for the Quicktest sniffer. Sniffer leak detection
in connection with the Quicktest QT 100
(Cat. No. 155 94) sniffer. This sniffer is parti-
cularly well suited in the case of long sniffer
lines (5; 20; 50 m).
Part.flow for connection of an external LEYBOLD parti-
al flow pump set (see Chapter 1.3.2). Here two partial
flow modes may be selected.
17
TH 10.211/8.02 - 12/97