13
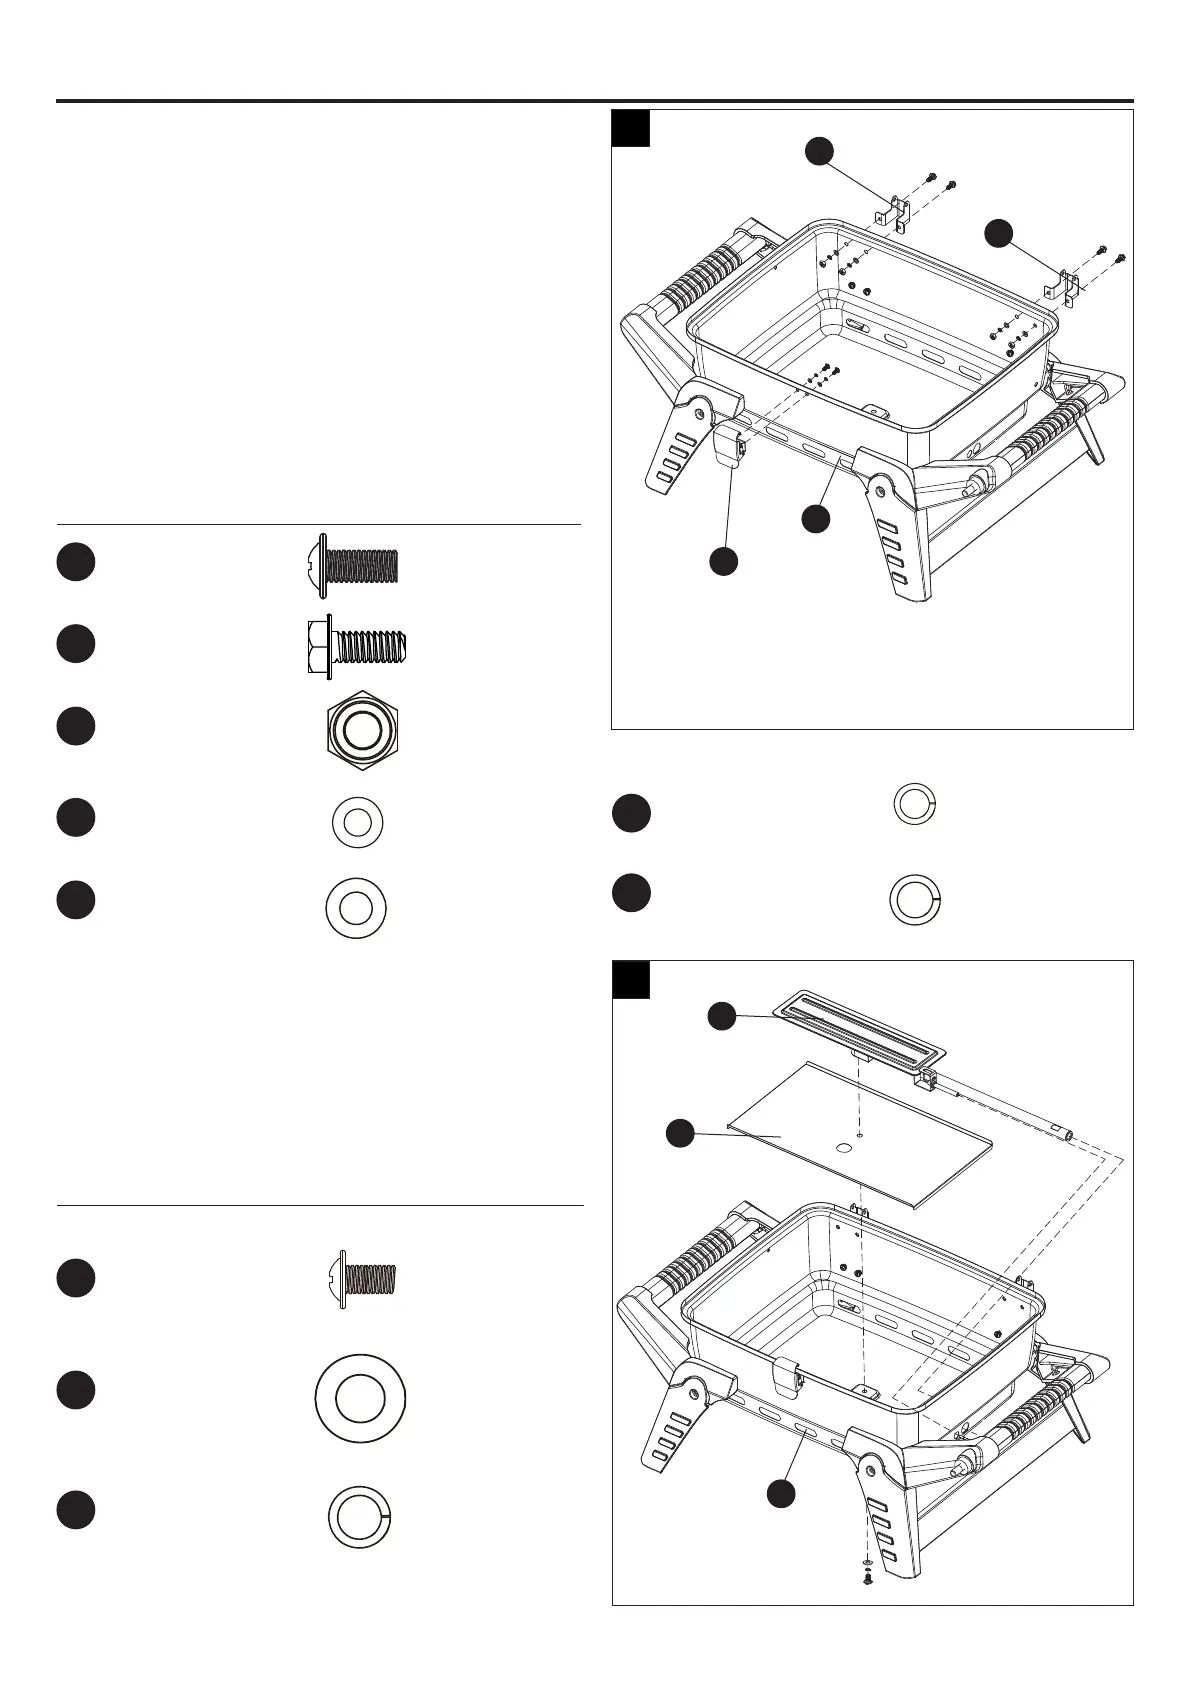
Step 9: Attach The Burner
Align the holes in the burner (O), heat shield (Q)
and bottom bowl (M). Then attach them onto the
bottom bowl (M) with one M6 x 8 screw (CC), one
Ø6 washer (KK) and one Ø6 lock washer (NN).
Tighten the screw completely.
Hardware Used
Step 8: Attach Bottom Hinges and Lock
Align the holes in the bottom hinges (G) and
bottom bowl (M). Then attach them onto the
bottom bowl (M) with four M5 x 12 bolts (BB),
four Ø5 washers (JJ) , four Ø5 lock washers (MM)
and four M5 nuts (GG).
Attach the lock (N) onto the bottom bowl (M) with
two M4 x 12 screws (AA), two Ø4 washers (II)
and two Ø4 lock washers (LL).
Hardware Used
ASSEMBLY INSTRUCTIONS
Ø5
Lock
Washer
x 4
Ø4
Lock
Washer
x 2
M6 x 8
Screw
x 1
M5 x 12
Bolt
x 4
M4 x 12
Screw
x 2
Ø5
Washer
x 4
Ø4
Washer
x 2
M5
Nut
x 4
Ø6
Washer
x 1
Ø6
Lock
Washer
x 1
AA
BB
KK
NN
CC
GG
II
LL
JJ
MM
8
9
G
G
N
M
O
Q
M