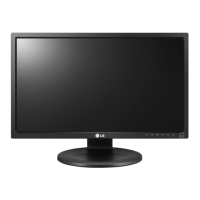
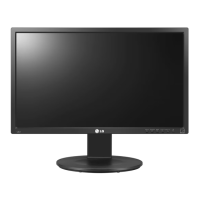
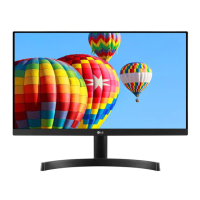
The device is an LG LED LCD Monitor (LED Monitor)*, model 24MB35PY, designed for use with personal computers. It features a TFT (Thin Film Transistor) LCD panel with an anti-glare coating.
Function Description
This monitor serves as a visual display unit for PCs, supporting both analog and digital video signals. It includes various input ports for connectivity and offers a range of customizable settings for optimal viewing. The monitor also incorporates energy-saving features and ergonomic adjustments for user comfort.
Important Technical Specifications
Display:
- Screen Type: TFT (Thin Film Transistor) LCD (Liquid Crystal Display) Panel, Anti-Glare coating
- Pixel Pitch: 0.275 mm x 0.275 mm
- Resolution:
- Max: VESA 1920 x 1080 @ 60 Hz
- Recommend: VESA 1920 x 1080 @ 60 Hz
Sync Input:
- Horizontal Frequency: 30 kHz to 83 kHz (Automatic)
- Vertical Frequency:
- 56Hz to 75Hz (D-SUB, DVI-D)
- 56Hz to 61Hz (Display Port)
- Input Form: Separate Sync. Digital
Video Input:
- Signal Input: 15 pin D-SUB Connector /DVI-D Connector (Digital) / Display Port Connector
- Input Form: RGB Analog (0.7 Vp-p/ 75 ohm), Digital
Audio:
- Speaker Wattage: 1 W + 1 W
- Audio Input: Supports external analog audio jack (Audio-In) and Display Port (DP) audio. Automatic switching between DP and Audio-In is available, with DP having higher priority.
Power:
- Power Input: AC 100-240V ~ 50/60Hz 1.2A
- Power Consumption:
- On Mode: 17.1 W Typ. (ENERGY STAR® standard) / 24.3 W Typ. (Outgoing condition)
- Sleep Mode: ≤ 0.3 W
- Off Mode: ≤ 0.3 W
- Plug & Play: DDC 2B (Analog, Digital, DP) compatible.
Dimensions (Width x Height x Depth):
- With Stand: 56.9 cm x 43.2 cm x 27.1 cm
- Without Stand: 56.9 cm x 34.2 cm x 6.3 cm
Weight: 5.1 kg
Environmental Conditions:
- Operating Temperature: 10°C to 35°C
- Operating Humidity: 10% to 80%
- Storage Temperature: -20°C to 60°C
- Storage Humidity: 5% to 90% non-Condensing
Stand Base: Attached ( ), Detached (O)
Wall Mount:
- VESA (A x B): 100 x 100
- Standard screw: M4
- Number of screws: 4
- Wall Mount Plate (Optional): LSW 149
Usage Features
Connectivity:
- PC Connection: Supports D-SUB, DVI-D, and DisplayPort connections.
- Peripheral Device Connection: Features two USB Downstream ports (for mouse, keyboard, memory stick under 100mA) and one USB Upstream port (to connect to a computer, laptop, or USB monitor with USB ports). The monitor's USB terminal supports USB 2.0 and high-speed cables.
- Audio Input: Separate audio input (PC) for analog audio signals.
Ergonomics and Adjustments:
- Angle Adjustment: The screen can be tilted from -5° (forwards) to 20° (backwards) for comfortable viewing. Users are cautioned not to hold the lower part of the monitor's frame or touch/press the screen when adjusting the angle.
- Height Adjustment: The stand height can be adjusted up to 4.33 inches. A locking pin needs to be removed for adjustment.
- Swivel Stand: The monitor can swivel 355 degrees to adjust the viewing angle.
- Pivot Function: Allows rotating the screen 90 degrees clockwise for landscape or portrait orientation. To use this, the monitor must be lifted to its highest height. Caution is advised to avoid contact between the monitor head and the stand base during rotation to prevent damage.
On-Screen Display (OSD) Menu:
- Access: Accessed via buttons on the bottom of the monitor.
- Navigation: Uses arrow buttons for navigation and selection.
- Main Menus:
- Volume: Adjusts audio output.
- Brightness: Adjusts screen brightness.
- Response Time: Sets response time for displayed pictures (Off, Low, Middle, High).
- Wide/Original: Switches between full screen (Wide) and original image signal ratio (Original).
- Reset: Restores all factory default settings.
- Next Menu (Advanced Settings):
- Picture:
- Contrast: Adjusts screen contrast.
- Sharpness: Adjusts screen clearness.
- Color:
- Gamma: Sets gamma value (Gamma 0, 1, 2).
- Color Temp: Selects screen color temperature (Custom, Warm, Medium, Cool). Custom allows setting individual Red, Green, Blue levels.
- Six Color: Adjusts hue and saturation for six colors (Red/Green/Blue/Cyan/Magenta/Yellow).
- Color Reset: Resets color settings to factory defaults.
- Display:
- Horizontal: Moves image left and right.
- Vertical: Moves image up and down.
- Clock: Minimizes vertical bars or stripes.
- Phase: Adjusts display focus, removes horizontal noise, and sharpens characters.
- Audio: Selects audio input source (Audio-In, DP, Auto).
- Others:
- Language: Chooses OSD language.
- Power Indicator: Turns the power indicator LED on or off.
- Off Time Setting: Sets a timer (1-24 hours) after which the monitor will switch to power off mode.
Special Functions:
- Self Image Setting Function: Automatically adjusts display settings for optimal display when the monitor is first connected or powered on (Analog Mode only).
- AUTO Function: Improves resolution for blurry, flickering, or tilted screens, or after changing screen resolution (Analog Mode only).
- OSD Locked/Unlocked: Allows locking current control settings to prevent accidental changes. Press and hold the MENU button for several seconds to toggle.
- Reader Mode: Adjusts the screen for paper-like viewing (Reader 1 for newspaper, Reader 2 for cartoon) for eye comfort. Brightness can still be controlled via the OSD menu. When Reader Mode is active, Picture Mode automatically sets to Custom, and SMART ENERGY SAVING is turned Off.
- SMART ENERGY SAVING: Conserves energy using a luminance compensation algorithm. Offers High, Low, and Off settings. When High or Low is selected, monitor luminance adjusts, Picture Mode sets to Custom, and Reader Mode turns Off.
Maintenance Features
Troubleshooting:
- No image/Power Indicator issues: Checks power cord connection, power button, brightness/contrast, mouse movement/keyboard input (for power saving mode), and PC power.
- "OUT OF RANGE" / "NO SIGNAL" messages: Advises checking PC video card signal range and configuring display settings according to specifications. Monitor enters DPM mode after 5 minutes of "No-Signal".
- "OSD LOCKED" message: Provides instructions to unlock OSD controls by holding the MENU button.
- Incorrect Display Image:
- Position incorrect/Vertical bars/Horizontal noise: Recommends using the AUTO button for automatic adjustment.
- Screen color mono/abnormal: Checks signal cable connection, video card insertion, and color settings (24 bits true color).
- Screen blinks: Checks for interlace mode and recommends changing to optimal resolution.
- "Unrecognized monitor, Plug&Play (VESA DDC) monitor found" message: Advises installing the display driver from the provided CD or LG website, and checking if the video card supports Plug&Play.
General Care:
- Screen Protection: Always place the monitor screen face down on a flat, cushioned surface (e.g., soft cloth) when assembling or disassembling the stand to prevent scratches.
- Moving/Installation: Disconnect the power cord before moving or installing to prevent electric shock. Avoid holding the monitor upside-down. Only hold the stand or plastic cover when lifting/moving.
- Fixed Image Prevention: Avoid displaying a fixed image for long periods to prevent image burn; use a screensaver.
- Wall Mounting: Use VESA standard screws and wall mounts. Ensure proper clearance (100mm from wall) for ventilation. Do not overtighten screws.